 Happy Egg Farm
We’ve been through two main iterations of chicken housing. The first houses were portable, sort of, and short. These were very difficult to work in because of the height, and our primary lesson from those was to make the roosting area tall enough for us to stand up in.
Our second design was stationary, around 10 feet square, with around 8×10 of auxiliary “annex” space for storing feed in cans, empty egg cartons, etc. This also gave us an “air lock” to be able to enter the space one door at a time, in case someone got ambitious about escaping in the wrong direction. This system worked out well for many years, but the biggest drawback was not being able to move them. This wasn’t the end of the world, because our property was small enough and had topographic constraints that meant we didn’t really have anywhere else ideal to put them. But the ground around the entryway was pretty well beat down.
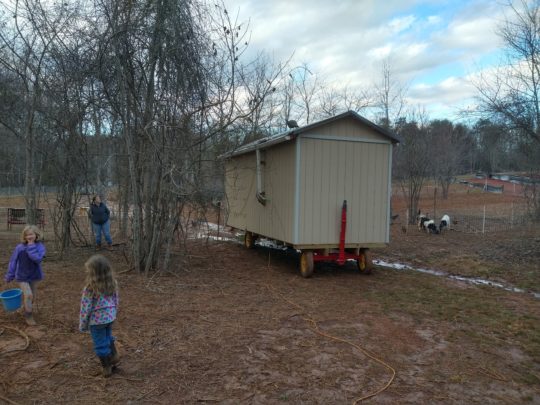
When we moved to our new larger farm, we knew we needed to have a chicken house on wheels. There are some common mission requirements that apply to all of our chicken housing:
-It is a sleeping area, because they will be out of the house during the day. If the birds are going to be confined, then the space requirements increase by an order of magnitude.
-There will be an automatic door that secures them after sunset and lets them out after sunrise, because those are the times that I’m asleep.
-It would need good ventilation capability while not being too drafty
-There will be an automatic water system that collects rainwater and dispenses it to the birds via drinking nipples
-We need space for the feeders that are made from 55-gallon drums
-It needs to be easy to clean out for the couple times per year of litter refresh
-It doesn’t need to justify its cost in the business sense because the housing serves us. Poor housing costs us time and frustration, and our time is very expensive.
-Preferably, we can collect eggs from outside of the structure
-We need storage space for things that aren’t in the chicken area, like feed (we use steel trash cans to store bags), bedding, empty egg cartons, etc.
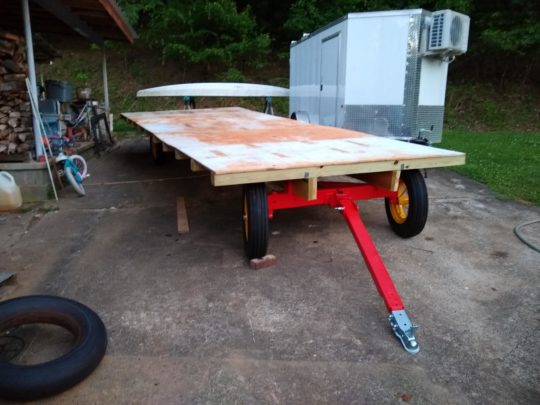
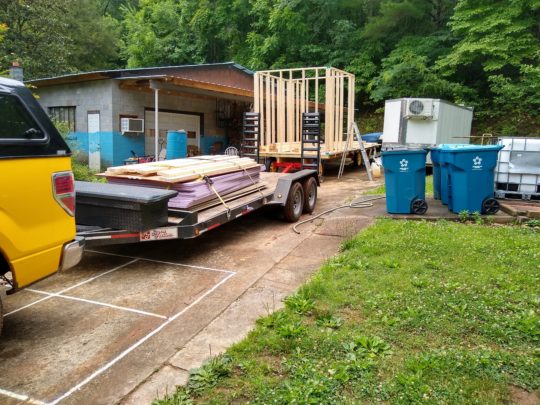
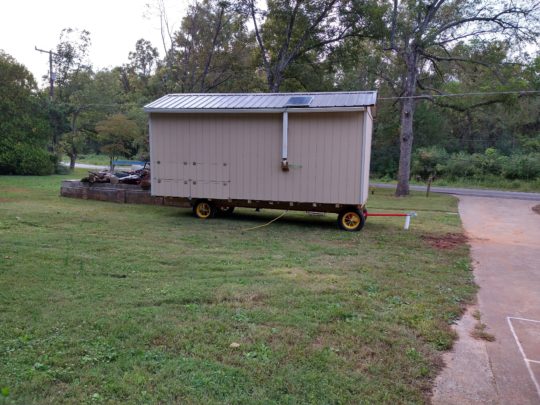
Our starting point for a mobile house was a hay wagon. Hay wagon running gears are built for plenty of weight. They have high ground clearance, and thankfully they are available. We found one on Craigslist, or maybe it was Facebook Marketplace, and went to check it out. The one that we were there for would have worked out, but the seller also had a larger wagon in better shape, which we were able to purchase instead.
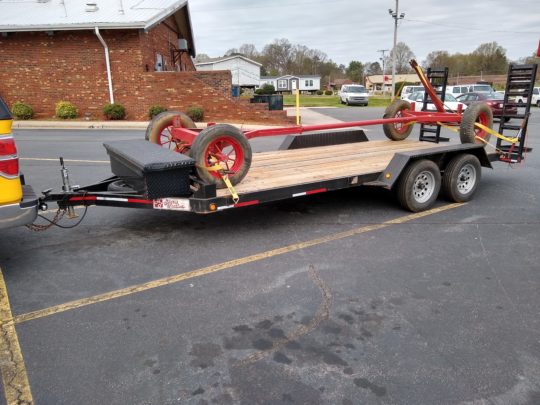
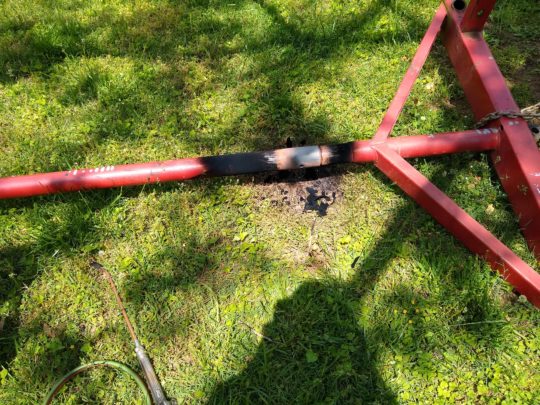
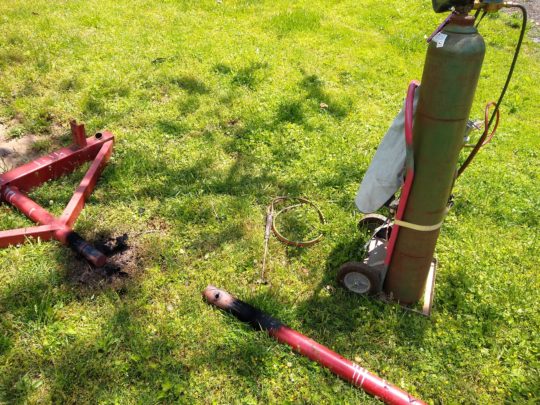
This wagon was in good shape but it still wasn’t perfect. We don’t know how old it is, but I’d guess at least 50-60 years, maybe more. The length is established by the center pipe. The first step was to take everything apart and refinish the steel. The easier way to do this was to haul the parts down to the powder coating place, where they did a nice job for us. It was a little hard to get the center pipe removed. After securing one end to a big tree and the other end to a vehicle didn’t work, I used a rosebud tip on the O/A torch to apply some heat. The heat combined with the first method worked.
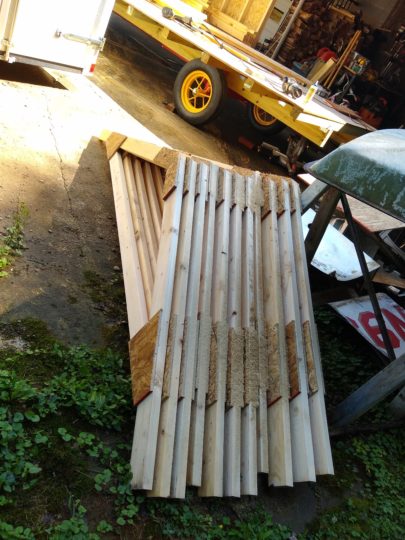
From there we laminated some pressure-treated 2×8 lumber to make the two front-rear beams, staggering the joints to end up with an overall length of 20 feet.
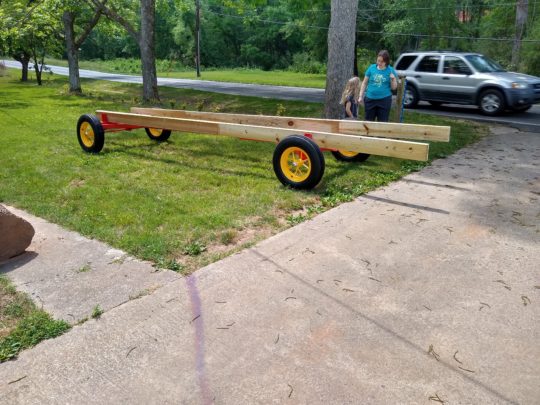
Then we used steel Simpson ties to attach the 8′ pressure-treated 4×4 posts every 24 inches, topping it off with a 3/4 exterior plywood. Some of these material choices were based on what we had laying around, though the 8′ width was useful for the plywood floor and siding.
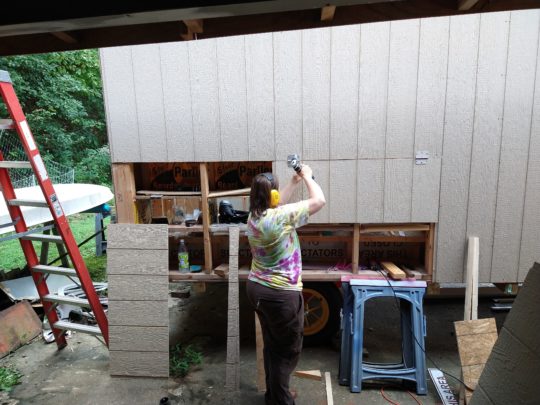
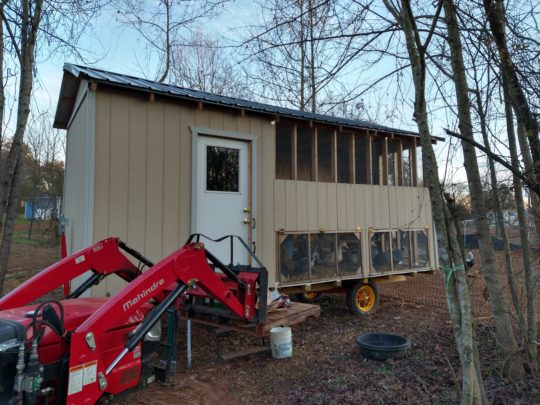
From there it was just like building a shed, or at least sort of like building a shed. We used the new wagon deck as a work surface, making a template to build the roof trusses. These were made from 2×4 lumber gusseted with OSB.
The floor plan included some built-in cabinets in the chicken area. The lower portion of the cabinets were intended to be nest boxes, though we haven’t fully developed those yet. The upper portion is sized to fit a bale of floor shavings. We found the doors at the local Habitat for Humanity store, which sells reclaimed materials.
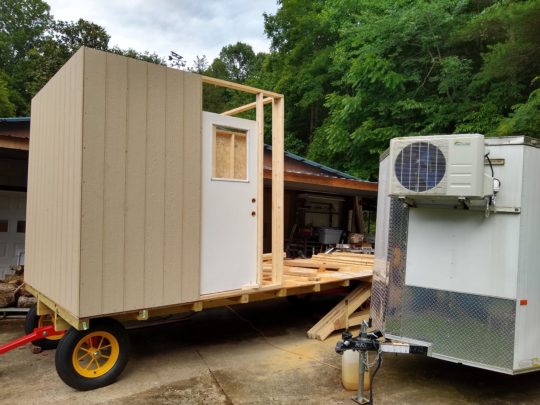
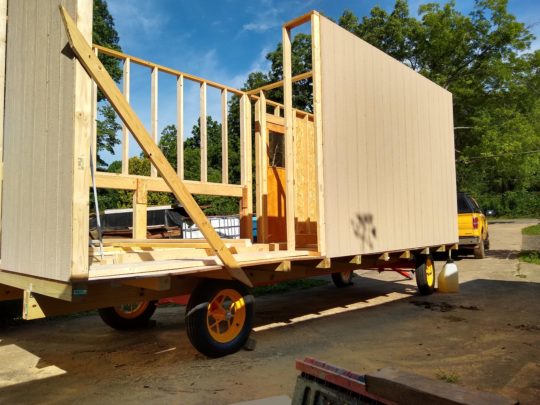
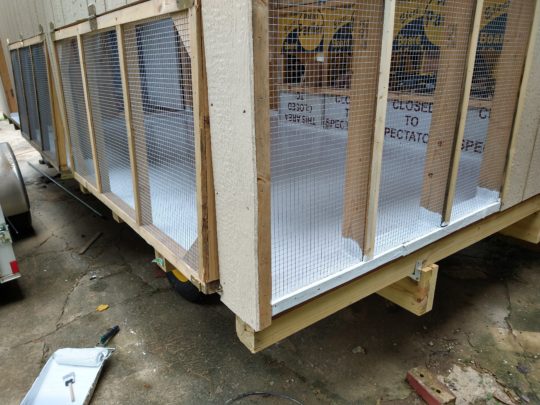
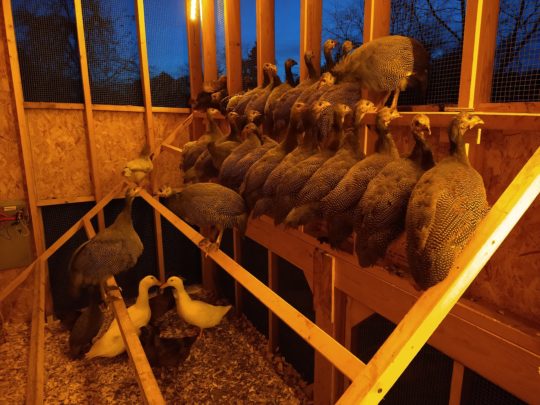
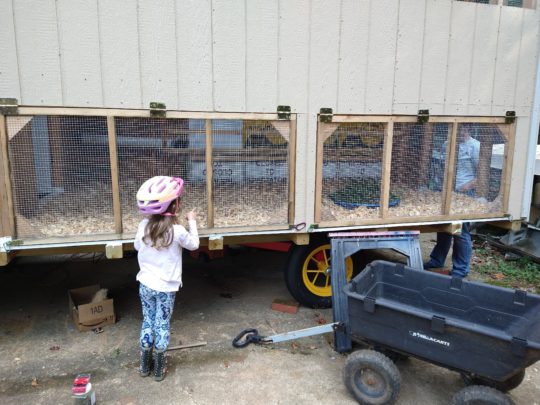
The wall with the cabinets is solid, and the opposite wall and back of the wagon are ventilated with half inch hardware cloth. The lower hardware cloth sections on the side are hatches that can be opened for cleanout. There is a strip of siding in the middle of the wall, to help act as a wind break in the winter.
We coated the floor with a material that is intended to go on RV roofs, though I’m not sure that was a great idea. Time will tell I suppose. We are hoping to delay the inevitable rotting of the floor.

The roost is hinged where it attaches to the side wall, so that we can hoist it up for cleanouts.
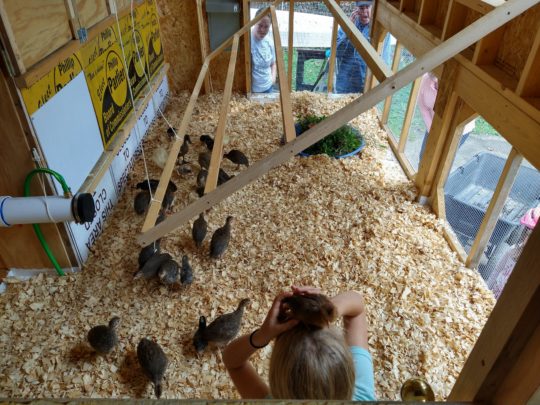
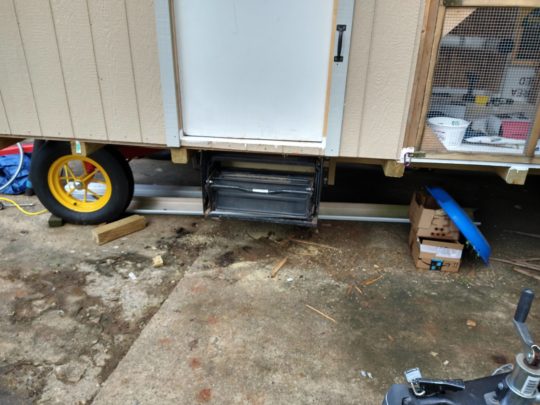
We found a used set of retractable RV steps to add under the side door, and installed a gutter and a rainwater collection system.
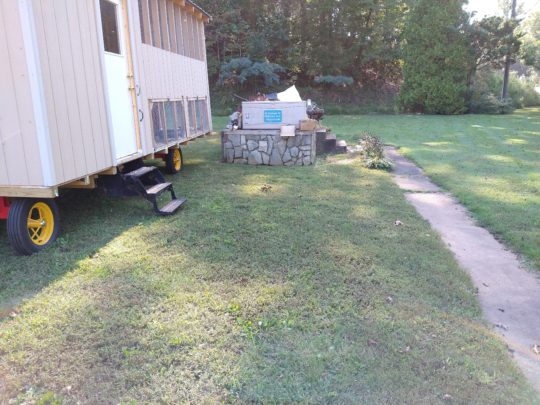
The rainwater system uses pieces and fittings of 4″ drain pipe to catch the gutter downspout, then flow into a 55-gallon barrel inside the annex. The water flows from that barrel into another 4″ drain pipe with the orange drinking nipples, and there is also an overflow tube that vents overboard once the barrel gets full. All of those systems are heated with an electric pipe heater, though last winter I don’t think we plugged it in. We also installed LED light strips in the roost area and annex, which are powered by a 100ah lead acid battery. This battery is charged by a 100w solar panel and a cheap MPPT controller. This system could also power an electric fence charger, but at the moment we haven’t needed it to.
We added an automatic door from Ador which is also powered by the 12v system. The electric door leads to a 2x6x12 board, which we have to remove when relocating the trailer. Experience has shown that we also need to drive a stake in the ground right next to where the ramp reaches the ground, so that we can anchor the lower end of the ramp. Otherwise the goats play with it and knock it off, because naturally the 12′ of leverage is too much for any attachment options. Occasionally small goats have been motivated to climb the ramp and enter the house. Our goats can’t speak English but I suppose if I asked them why they would want to go in the chicken house, they would probably ask why not?
I didn’t fully appreciate how difficult the hay wagon would be to maneuver, at least in reverse. A typical single or double axle trailer is rigid from the coupler back to the axle, so backing it up is just a matter of turning the wheel the right way. But with the hay wagon, the tongue is attached to steerable wheels, so in addition to all of the usual difficulties with backing up a trailer, we have the added challenge of it always wanting to jackknife. Backing up with the pickup truck is nearly impossible, because I can’t see the tongue well enough to preempt this. It is much easier (though still hard) to use the tractor with a 3-point hitch adapter, because at least in that case we can see the tongue. Moving it in a forward direction is no problem at all, once we remember how tall and wide it is, so we can miss the trees.
Author: Jared Yates
Premier 1 Electric Net Fence Tips
Over the years we have really come to appreciate the temporary electric fences from Premier One. Honestly I’m not sure how we would be able to operate the way we do without this type of fence. In 2020-2021 there have been some difficulties in getting the fence because it isn’t in stock, but it’s worth waiting for. Set up an email alert! They haven’t provided us any compensation for this post, though, they’d certainly be welcome to. As much as we’ve bought, you’d think we’d be eligible for at least a free hat or something!
Selecting the Fence
We have several different varieties that we’ve acquired piecemeal over the years, including the 42″ and 48″ heights, the single and double spike, regular poles vs drive-able poles, and the closer vs the normal pole spacing (Poultry Net is the standard, Poultry Net Plus is the narrower spacing). We even have some of the very widely-spaced fence for larger animals, which allows the chickens to pass through. Our smaller goats can get through it also, so we don’t use it for them. The LGD respects it, but I’ll be very disappointed if any of you tell her that she could easily jump it! So far she hasn’t thought to try. We had one cow for a while and the fence worked fine for him too, but I think he would have been happily contained by a strand of yarn honestly.
For us, the only variety that we want any more of is the 48″ dual spike, either the Poultry Net or the Poultry Net Plus. These two can both be useful depending on the terrain and complexity of the routing. If it’s going to be a fairly straight run over fairly even terrain, we use the standard Poultry Net. Both types have the same number of poles per bundle, so the standard provides a 10-foot pole spacing for a total length of 164′ per roll. The Plus has 6’8″ spacing for a total of 100 feet per bundle. The closer pole spacing really shines if you are needing to introduce curves, maneuver around obstacles, or hug more rolling terrain, but naturally the reduced coverage makes it less economical. It can be nice to have some of each, deploying the most appropriate piece for the task at hand.
The dual spike is the only way to go for us, because it makes it easy to step the post into the ground under normal circumstances, or if the ground is really dry, we can use the flat portion of the double spike to hammer the post into the ground. I don’t think we’ll buy any more of the single spike.
Effectiveness with Poultry
As one would expect, the Poultry Net keeps in the birds just fine, except for the ones that fly out. At that point, we let them assume their own safety from predators. This is part of our selective breeding practice. But in their defense, if they can fly enough to get over the fence, they can probably also fly enough to roost in a tree. We have never lost a single bird to a ground-based predator, as long as the bird was inside the fence. Aerial predators like hawks do occasionally pose a problem. The only tip I can offer for aerial predators is that you have to break the habit- shut down the buffet by putting the birds away for a few days, or the predator will come back for one at a time until they are all gone. This is especially true with chicks, adolescents, and silkies.
Goats
We have tested the poultry net extensively with the Mini Lamancha dairy goats and with a few full-size Alpine dairy goats. Sometimes it is said that we only successfully contain goats when they want to be contained, and I tend to agree. Once during a breeding visit, one of our mini does managed to jump over the 48″ fence to get away from a buck that she didn’t like. She didn’t exactly sail over it, but rather picked the saggyest looking part (around 40 inches actual height), and managed to get over with minimal leg entanglement. The whole situation was sub-optimal, but honestly I think she would have challenged just about any fence from the look of her demeanor.
We have also had small goats manage to shimmy under the fence, especially if the ground is very dry. These type of electric fences depend on the shock to flow from the charger, through the fence, through the animal, and then return back to the charger through the actual earthen/dirt ground. When the dirt is dry, that final link in the chain becomes weak and the shock is less effective. Our only way to break this habit, other than a nice steady rain every week or two, was to install a “cone of shame” on the offending kid. As with the birds of prey, sometimes it’s sufficient just to break the habit.
Chargers
Speaking of chargers, naturally we can’t depend on the “acres” or “miles of fence” ratings that chargers are marketed with. Those numbers are for a single strand of wire, and these electric net fences are energized on every horizontal strand, which is 12 strands for a 48″ Poultry Net. A stand-alone solar charger is almost certainly going to be worthless. They are typically a quarter or half a Joule, and aren’t going to successfully power much more than one length of fence, if that. We have better results with using a ratio of one joule per length of fence, more or less. Sometimes we violate that, and it may work fairly well for a while, but then that’s when the more curious of our goats start to challenge it. If the fence isn’t always hot, the goats will figure it out really fast. You’ll likely not be able to find a charger larger than 3 joules at places like TSC or Rural King, but we were able to order a 12-Joule from Cyclops with no trouble. Here’s more info on our solar setup.
Pigs
We do also have one length of the knee-high pig fence. That worked great when we had our pig. It ships in a positive and ground configuration, but we converted ours to positive only just to simply things. Like most non-goat animals, once he experienced a single shock, he didn’t really challenge it again, except for one time that his feeder got plugged up and he got hungry. After that we learned to check not only the level of feed in his hopper, but also to clean out his lower portion of it every week or two. It’s funny how the farm has a way of teaching us these small lessons. We did try to use this fence with adolescent poultry, intending that they could come and go through the fence but still retreat to safety. This didn’t work very well.
Drawbacks
The one hazard that threatens these fences more than any other, at least for us, is moving water. At our first farm we routinely had major floods, and came to expect them. The fences would often get swept away and buried in sand and debris. Thankfully our current farm isn’t subject to such torrents, but we do get occasional heavy rains, and the fence does a great job of keeping in anything that would have normally floated by. We’ve found that a short scrap of fence (left over from a fence that was damaged beyond reasonable repair in a previous flood) can make a nice sacrificial barrier for debris, keeping the primary fence functional. This can make the difference between keeping the animals in or not, especially if we aren’t on site right away to deal with problems as they arise. The same philosophy could be applied with a second length of fence, if you don’t have the good fortune of already having ruined one.
Also, though we went many years before we started using gates, now we use them often and have come to appreciate their simple and effective design. That is, once you fix them by gluing on the ends!
Finally, we have found it easy to integrate the short pig fence with the 48″ chicken fence. In this video, you can see more details about the moving water, the gates, and the pig fence integration:
Moving Water to Remote Parts of the Farm
Whenever possible, we try to establish rainwater collection systems that directly dispense water to the animals. This is the case especially with poultry. But when we move the goats around by rotating their pastures, sometimes we need to transport water to their troughs. Our friend the IBC tote is great for this. A small tractor like our Mahindra 1526 can only lift 1200 pounds, which means a tote that is about 1/3 full. But that’s plenty of water to make it worth the trip. And the front-end loader makes it easy to lift the tote high enough to gravity feed. Here’s a video of what happened when we tried to fill the calf’s bucket. He was part of the 2020-2021 Catawba County 4-H Dairy Steer project, in which our older daughter bottle fed him from when it was tiny enough to pick up and carry around, until he was old enough to graze. By the time he left our farm, he was almost 600 pounds, and still only half of what would likely become his final weight. He was a big one!
Kidding Season – Proud Mom
Say hello to Rosemary just minutes after her second freshening, spring 2020:
Baby Goats Love to Play
In this video from spring 2019, our first round of kids are having a great time playing in the yard. The kids in this photo are some of the 9 does we have bred for the 2022 season, and we can’t wait to see what comes next! And of course, there is also our invisible cat, who is “of the goats” in this video just like she is on the farm today. She is living her best kitty life as an important part of the herd.
Portable Solar-Powered Fence Charger
We like to rotate to fresh pasture for the animals, which means it’s hard to build a permanent infrastructure for fence chargers. This is our favorite way to power a big fence with a big charger:
Building Goat Houses from IBC Totes
We’ve tried several different methods for goat housing. The goats don’t often use houses, unless it is raining, but our favorite method so far has been to repurpose IBC totes. These are the essentially a pallet for shipping liquid. We also use them for rainwater collection. It’s easy to move them around the homestead with the fork attachment on the front-end-loader for the tractor. Having made a dozen or so, here is the fastest way we’ve found to do it:
Caring for Eggs, and Why We Don’t Wash Them
Folks often ask us how long eggs can last, or how they should care for eggs. The simple answer is that refrigerated eggs will stay food safe for a long time. The long answer turns out to be a bit of a rabbit hole.
It makes sense that egg longevity varies with handling. Temperature is the most important variable, but another is washing. Did you know that eggs are naturally covered in a water-soluble protective coating? This is called the cuticle, or bloom, depending on who you ask. The egg shell seems hard and solid, but it’s actually more like a mesh at the microscopic level. This mesh allows moisture and gasses to pass through the shell, along with things like microbes and contaminants that may be around. The natural bloom coating helps seal that mesh and limit contaminant passage through the shell.
When industrial eggs are collected, they are washed. That washing process removes the natural protective layer. Some industrial producers apply a replacement layer, and some don’t do anything. Isn’t it just like our high-intervention food supply chain to remove a natural barrier only to add a synthetic barrier back? We don’t think this is natural, so we don’t wash our eggs.
But what if they have dirt, or mud, or poop on them? Well, we don’t sell those to the general public. Often we eat them ourselves, or share them with folks who understand why they are dirty. But doesn’t that impact profits? Yes, which is why industrial producers do wash their eggs. We strive to provide management practices that help minimize egg contamination, such as giving the hens a path to the nest boxes that will help clean off their feet. We keep absorbent materials in the laying boxes.
In our own kitchen, sometimes we wash the eggs right before we use them, so that exterior dirt doesn’t fall into the bowl that we are cracking the eggs into. We almost always crack our eggs into a separate bowl before adding them to a recipe, just to be sure that the eggs are good.
If you’d like more reading about how egg handling impacts longevity, see this article:
http://www.motherearthnews.com/real-food/how-to-store-fresh-eggs-zmaz77ndzgoe.aspx
How Big are Our Eggs, and Are They Going to Get Bigger?
One of our customers asked about egg size, expressing concern that they are smaller than others. With eggs being a natural product, there are going to be variations from one to the next. A recipe might call for eggs by count, but what really matters in making a consistent product is the weight of the egg.
In the past, we have not bothered sorting our eggs by size, being that we just don’t have very many to deal with. But since one of our favorite (and largest-volume) customers brought it up, it inspired us to reconsider. Perhaps we should sell to them by weight instead of by count.
The first step was to collect some data. What do our eggs weigh? Being that we don’t have one of these, the next best option was to weigh them on the scale we use for shipping. But what should eggs weigh anyway?
Fortunately, the USDA gives us some guidance on what eggs should weigh, or at least what we should call them based on their weight:
| Size or Weight Class | Minimum net weight per dozen |
|---|---|
| Jumbo | 30 ounces |
| Extra Large | 27 ounces |
| Large | 24 ounces |
| Medium | 21 ounces |
| Small | 18 ounces |
| Peewee | 15 ounces |
Armed with the standards, we set out to weigh ours and get some averages.
We used a postage scale to weigh 40 eggs at a time. The eggs alone weighed 5 pounds and 3 ounces, which works out to an average of 25 ounces per dozen, not counting the cartons. In case you were wondering, our paper fiber carton weighs 2 ounces. The USDA numbers say “large” is more than 24 and less than 27 ounces, so we are comfortably in that size range.
Egg sizes do change throughout the laying cycle of the hen. The newest layers usually start with smaller eggs, as I would certainly prefer to do if I were going to take up laying eggs. The egg size increases as the hen gets older, but to a degree, the total number of eggs begins to diminish. My guess, which I can’t yet cite to be backed up by science, is that a hen only has the physiology to produce a relatively constant amount of egg mass. This is often the case with fruit trees, which have the roots and leaves to only yield a finite amount of fruit mass. It’s up to circumstances and management to determine whether that mass will be delivered in many small pieces, or fewer large pieces.
Are we required to collect North Carolina sales tax for backyard eggs?
I spent far too long researching this topic, so my hope in writing this post is that other North Carolina egg producers will be able to skip some of that research and answer their tax questions.
The most important point to take from this article is that it should not be considered tax advice! Ask your accountant. If your accountant doesn’t know, point your accountant to the resources below. Or, do like I did and call the NCDOR.
The answer comes from North Carolina General Statute 105-164.13, Retail sales and use tax. It says: The sale at retail and the use, storage, or consumption in this State of the following tangible personal property, digital property, and services are specifically exempted from the tax imposed by this Article:
Section 4b says: “Products of a farm sold in their original state by the producer of the products if the producer is not primarily a retail merchant…” and then carries on about ice used to transport those products. This seemed to indicate to me that we were not required to collect sales and use tax on eggs from our chickens.
One thing that seems strange to me is that North Carolina refers to us as “producers” when it comes to eggs. When I called the NCDOR to ask if my understanding of the statute was correct, the fellow on the phone said “Are you the producer of those eggs?” I said “Well, I didn’t lay them…” Once we determined that we were considered the producers, he agreed that our egg sales would be exempt from NC sales and use tax.
It is important to note that just because the egg sales are exempt from tax collection doesn’t mean that we can disregard sales tax. The correct way to account for the sales is to include them in line 1 of the E500, and then “back them out” on line 3. So if we have $100 in egg sales for the quarter, they don’t want to see a zero on line one, but rather 100 on line 1 and 100 on line 3, which will equal zero in the end.
Another important note is that the exemption does not apply if the producer is primarily a retail merchant. So the way I understand that, if we had a country store and happened to keep chickens in the yard behind the store, we would need to collect sales tax on the eggs that we sell, even though we would still be the producer.
And while we’re on the topic of compliance with NC laws concerning poultry, don’t forget to apply for your free poultry dealer license if you are going to sell any live birds in the state. Even though we don’t regularly sell birds, we keep ours current for the occasional flock thinning sale.
Proudly powered by WordPress.
Theme: Flat by YoArts.