
Chicken Ramp
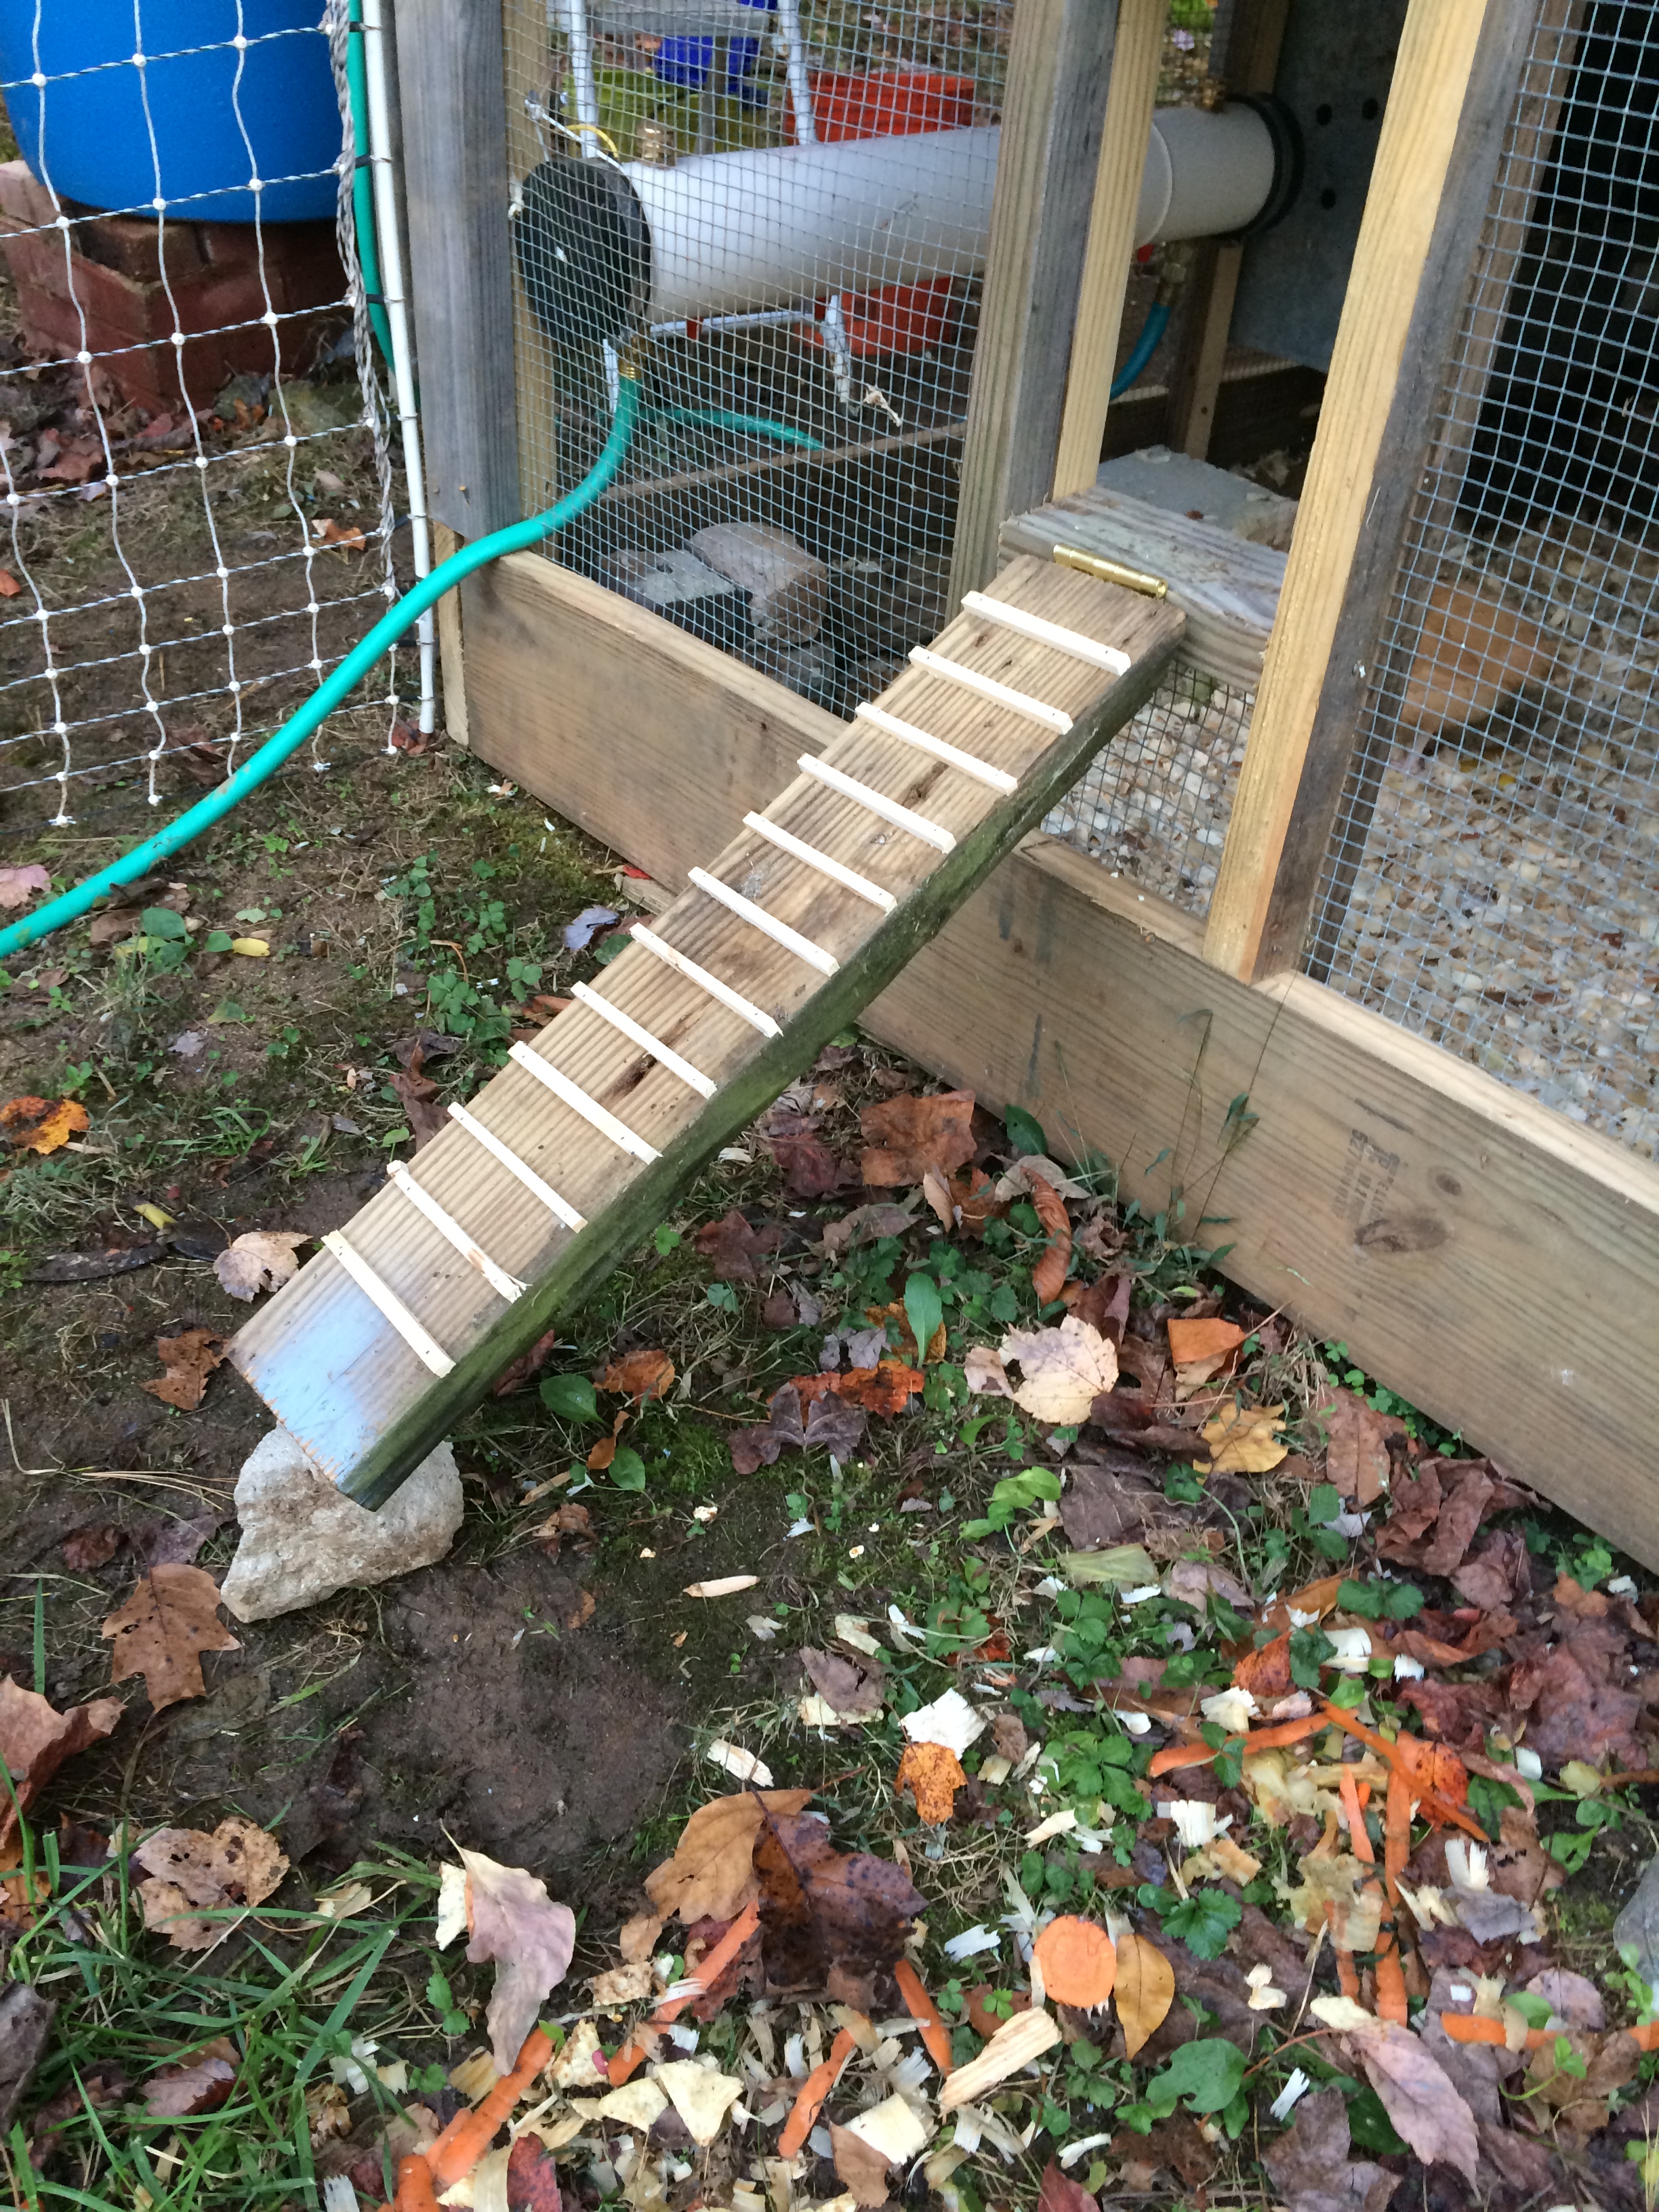
Ramp in Place
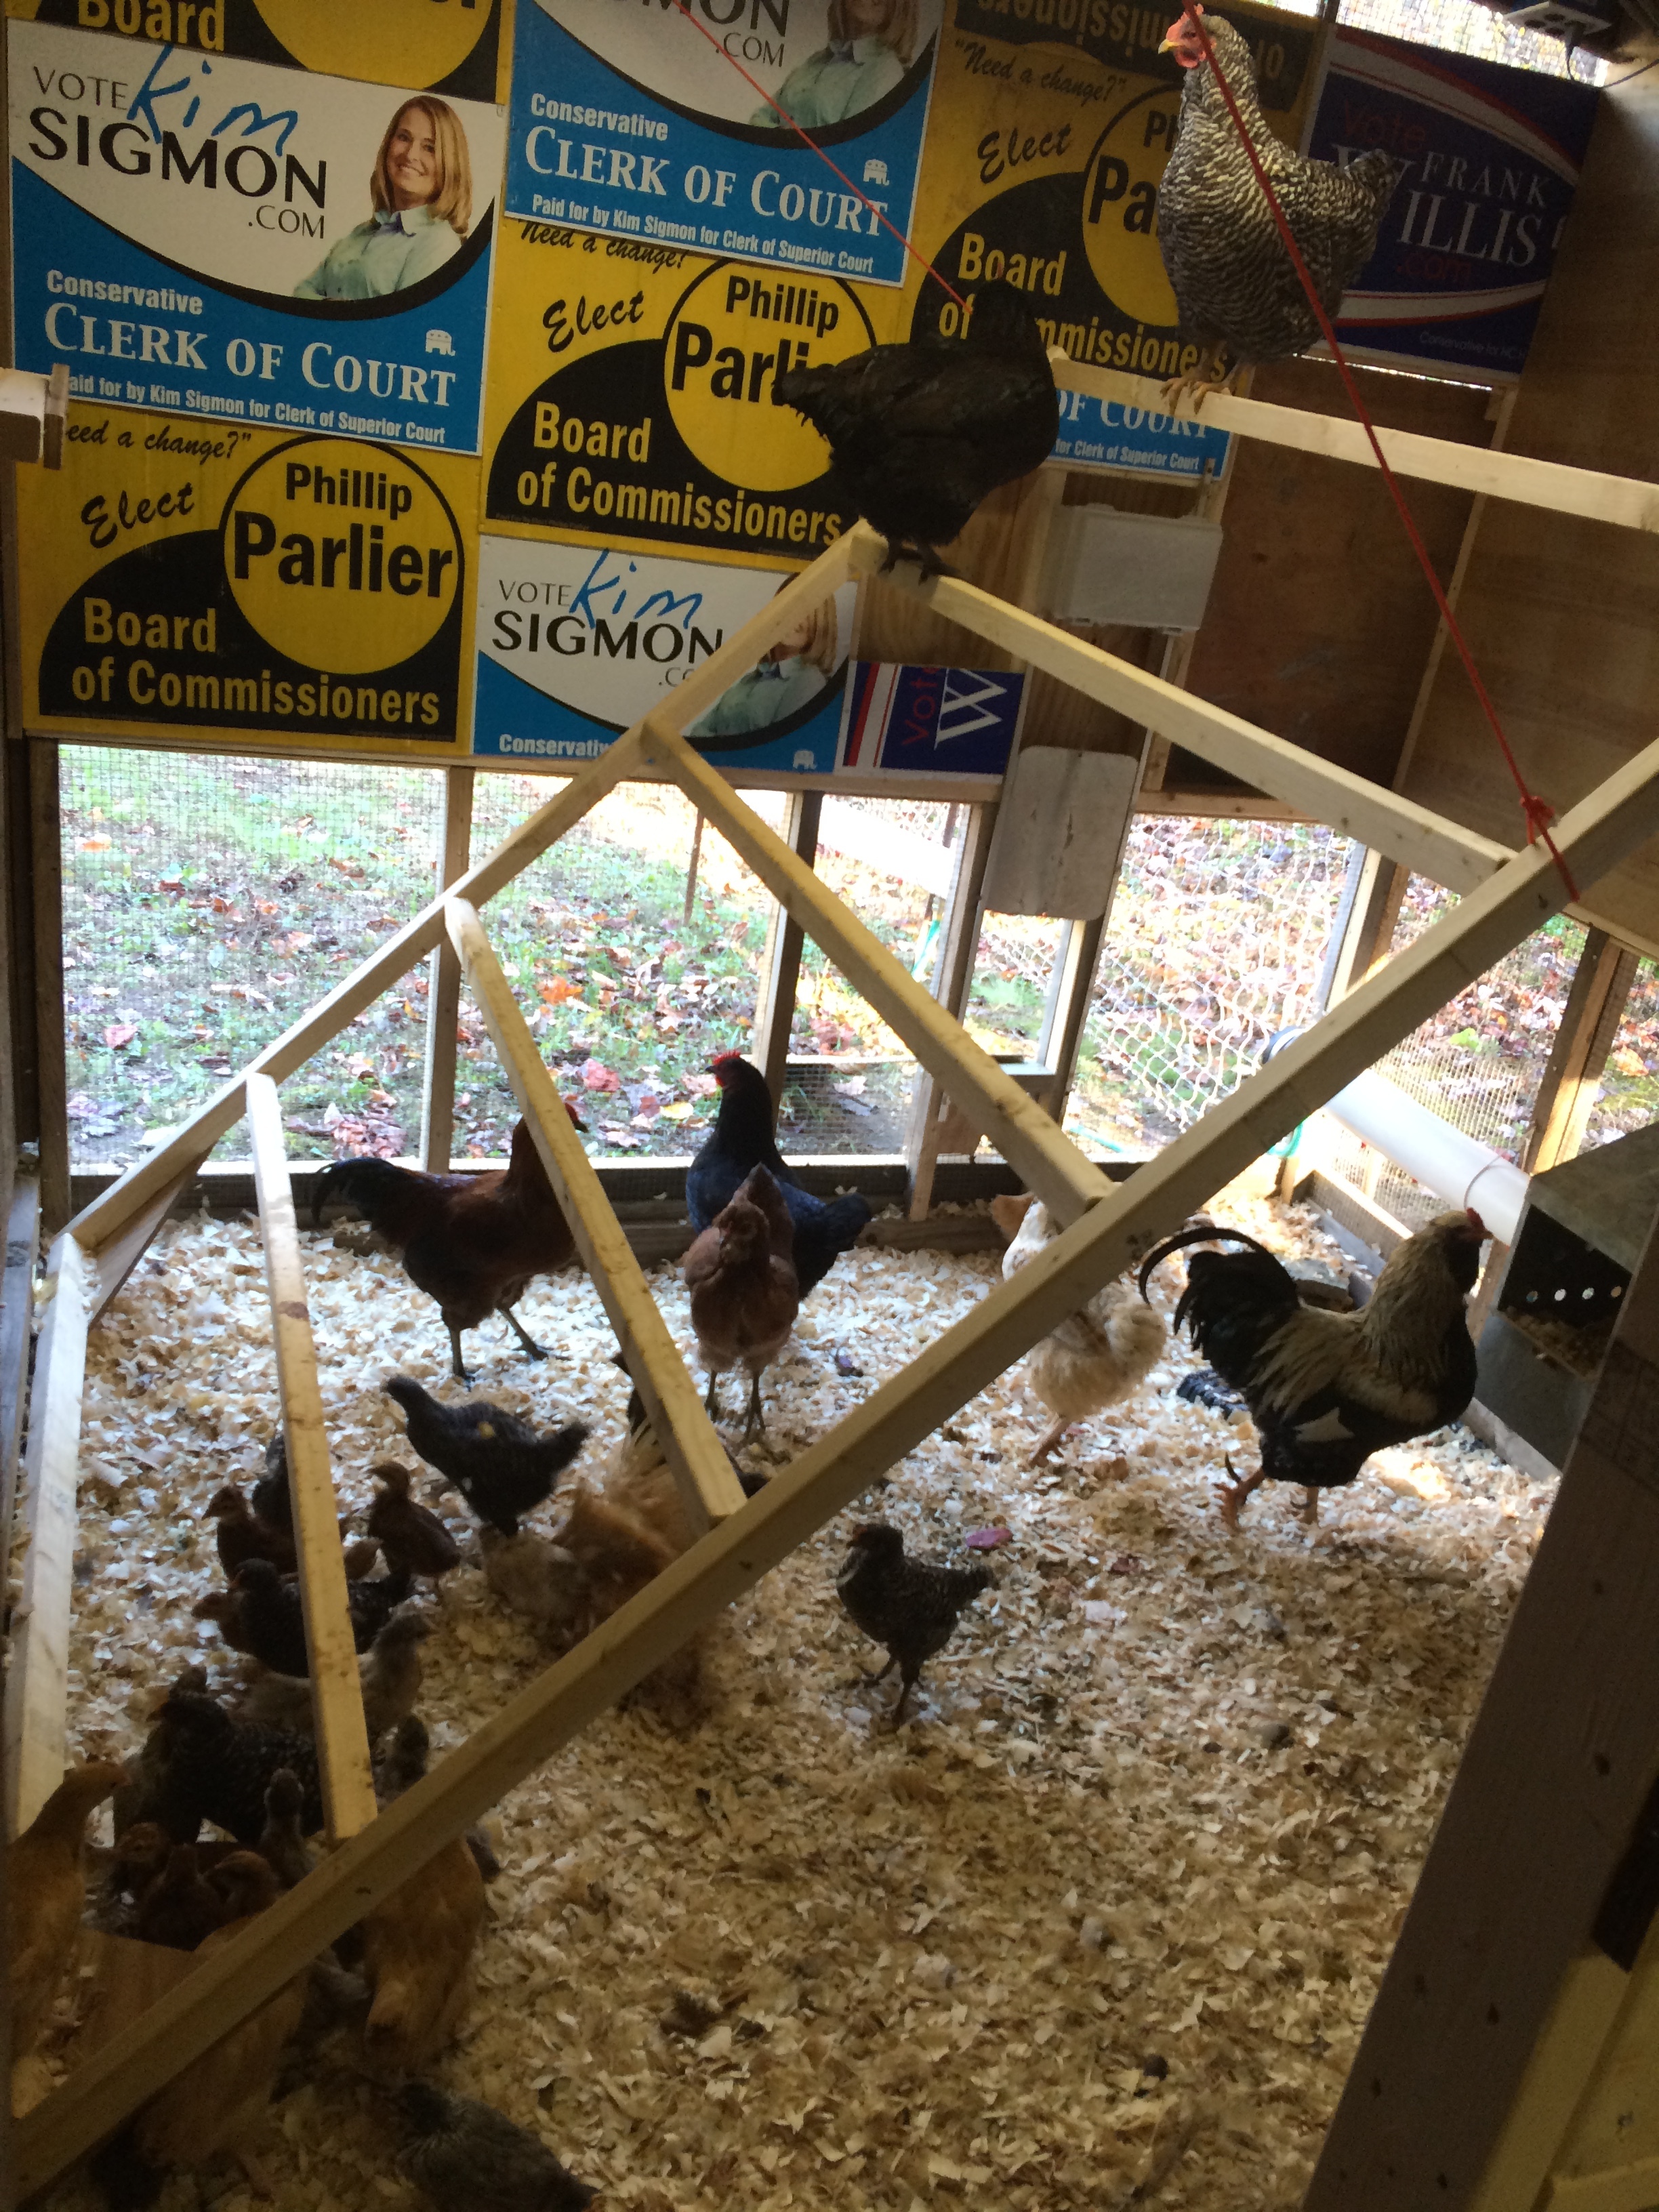
 Happy Egg Farm
Chickens
Chicken Ramp
Ramp in Place

This angle was too steep, making the poles too close together.
Roost Angle
When our neighbors moved away, they gave us a nice metal nest box with plastic bottom liners. We built this box into the new house, with access doors on the back.

Metal Chicken Nest Box
View from the outside
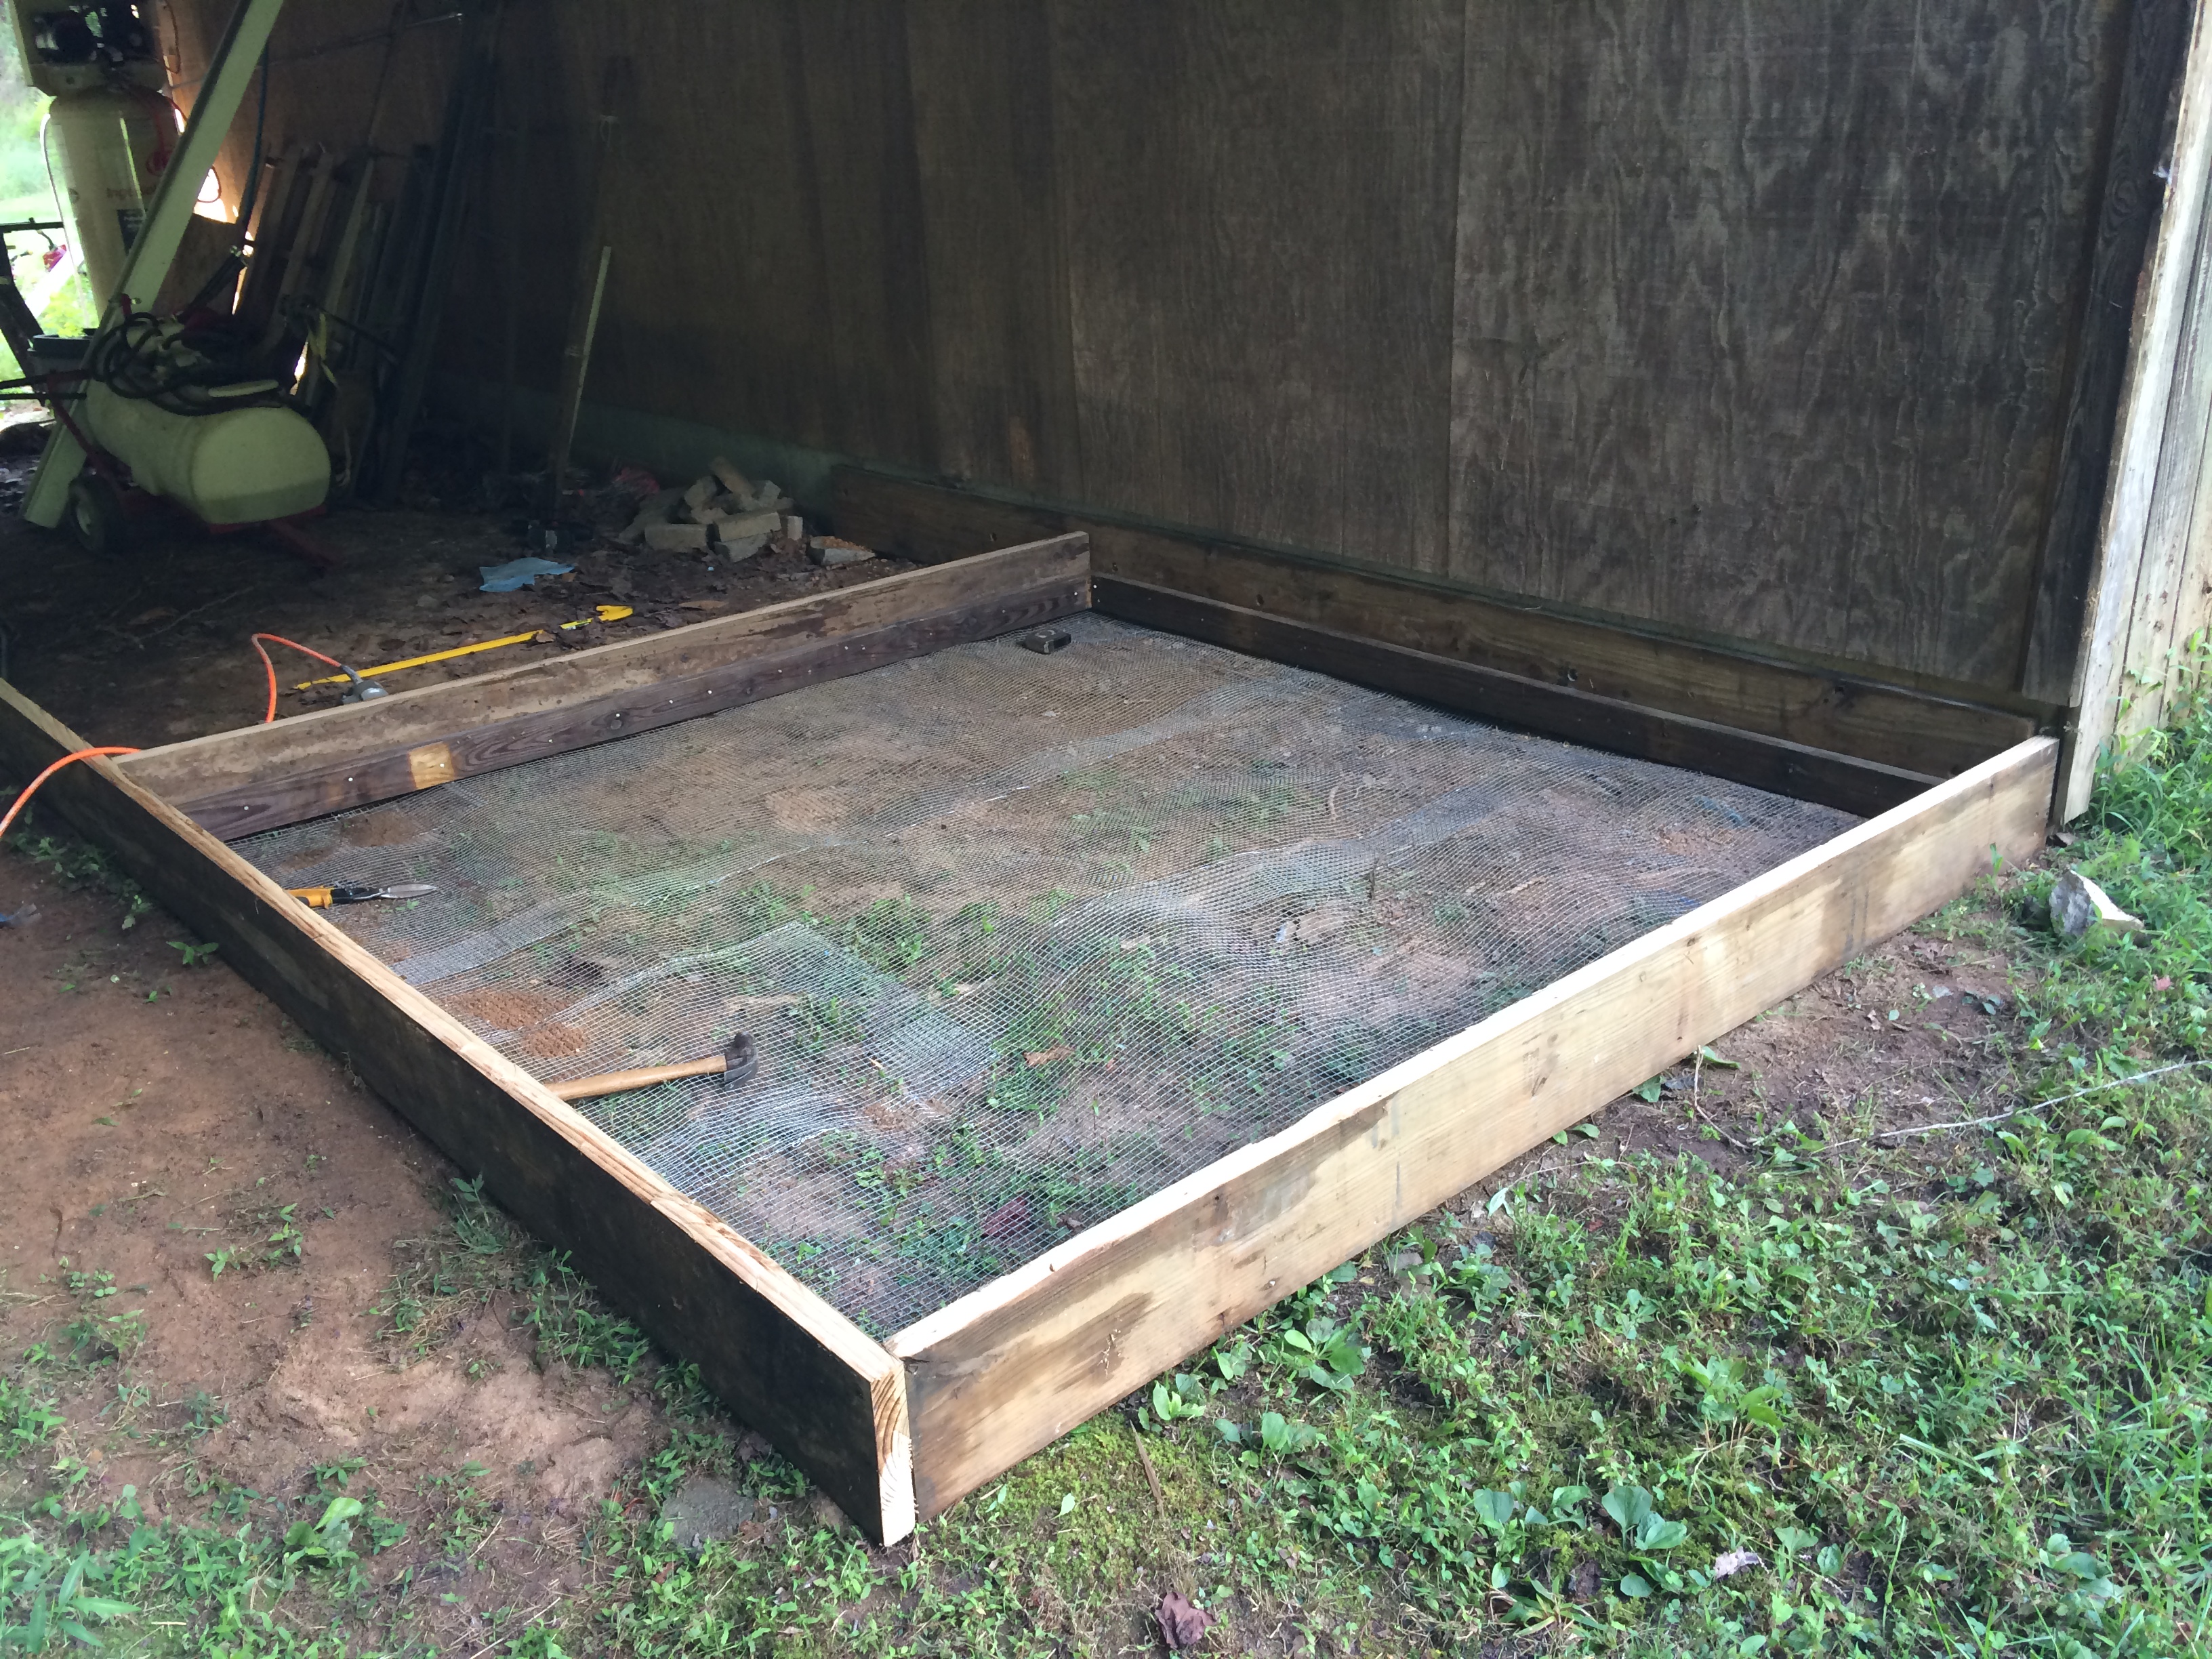
We learned several lessons from our first chicken coops, and we designed our new house to be more safe and comfortable for the girls, and less demanding for us to service and maintain. Our recent property expansion included a storage building, and rather than make the coop a stand-alone structure, we decided to build it as a temporary enclosure on the porch of that building.
This strategy spared us from having to build one wall and a roof.
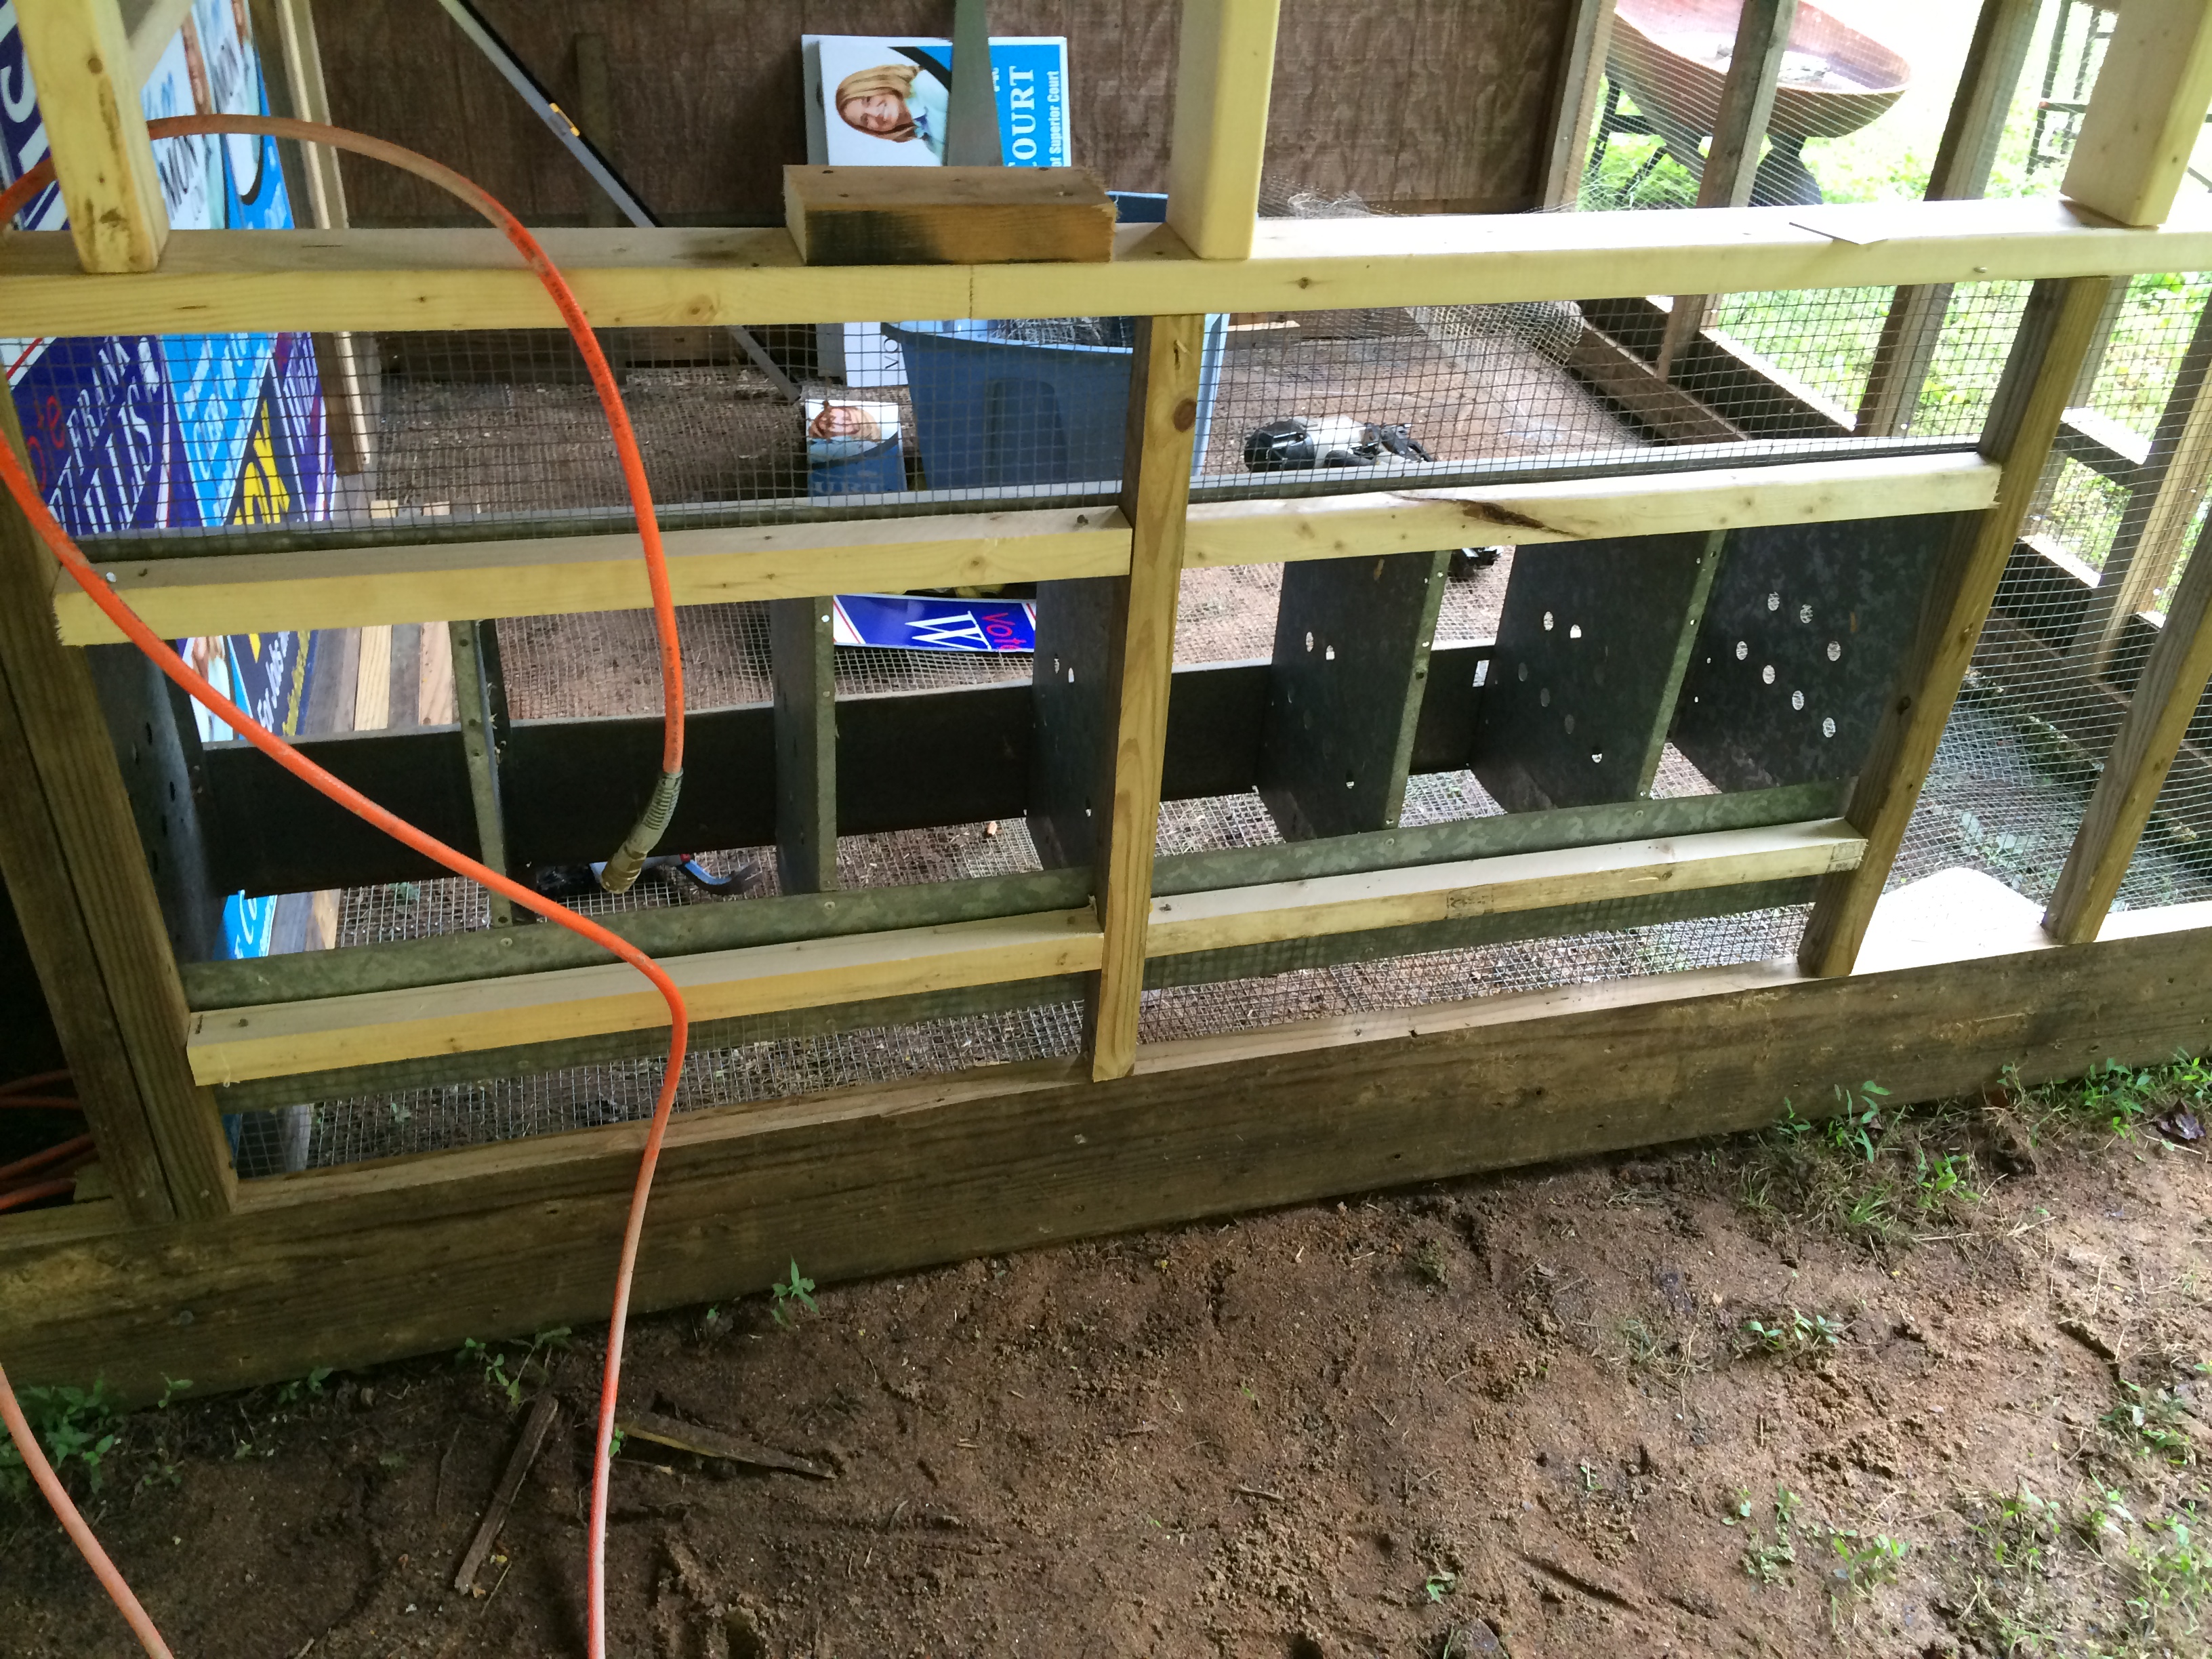
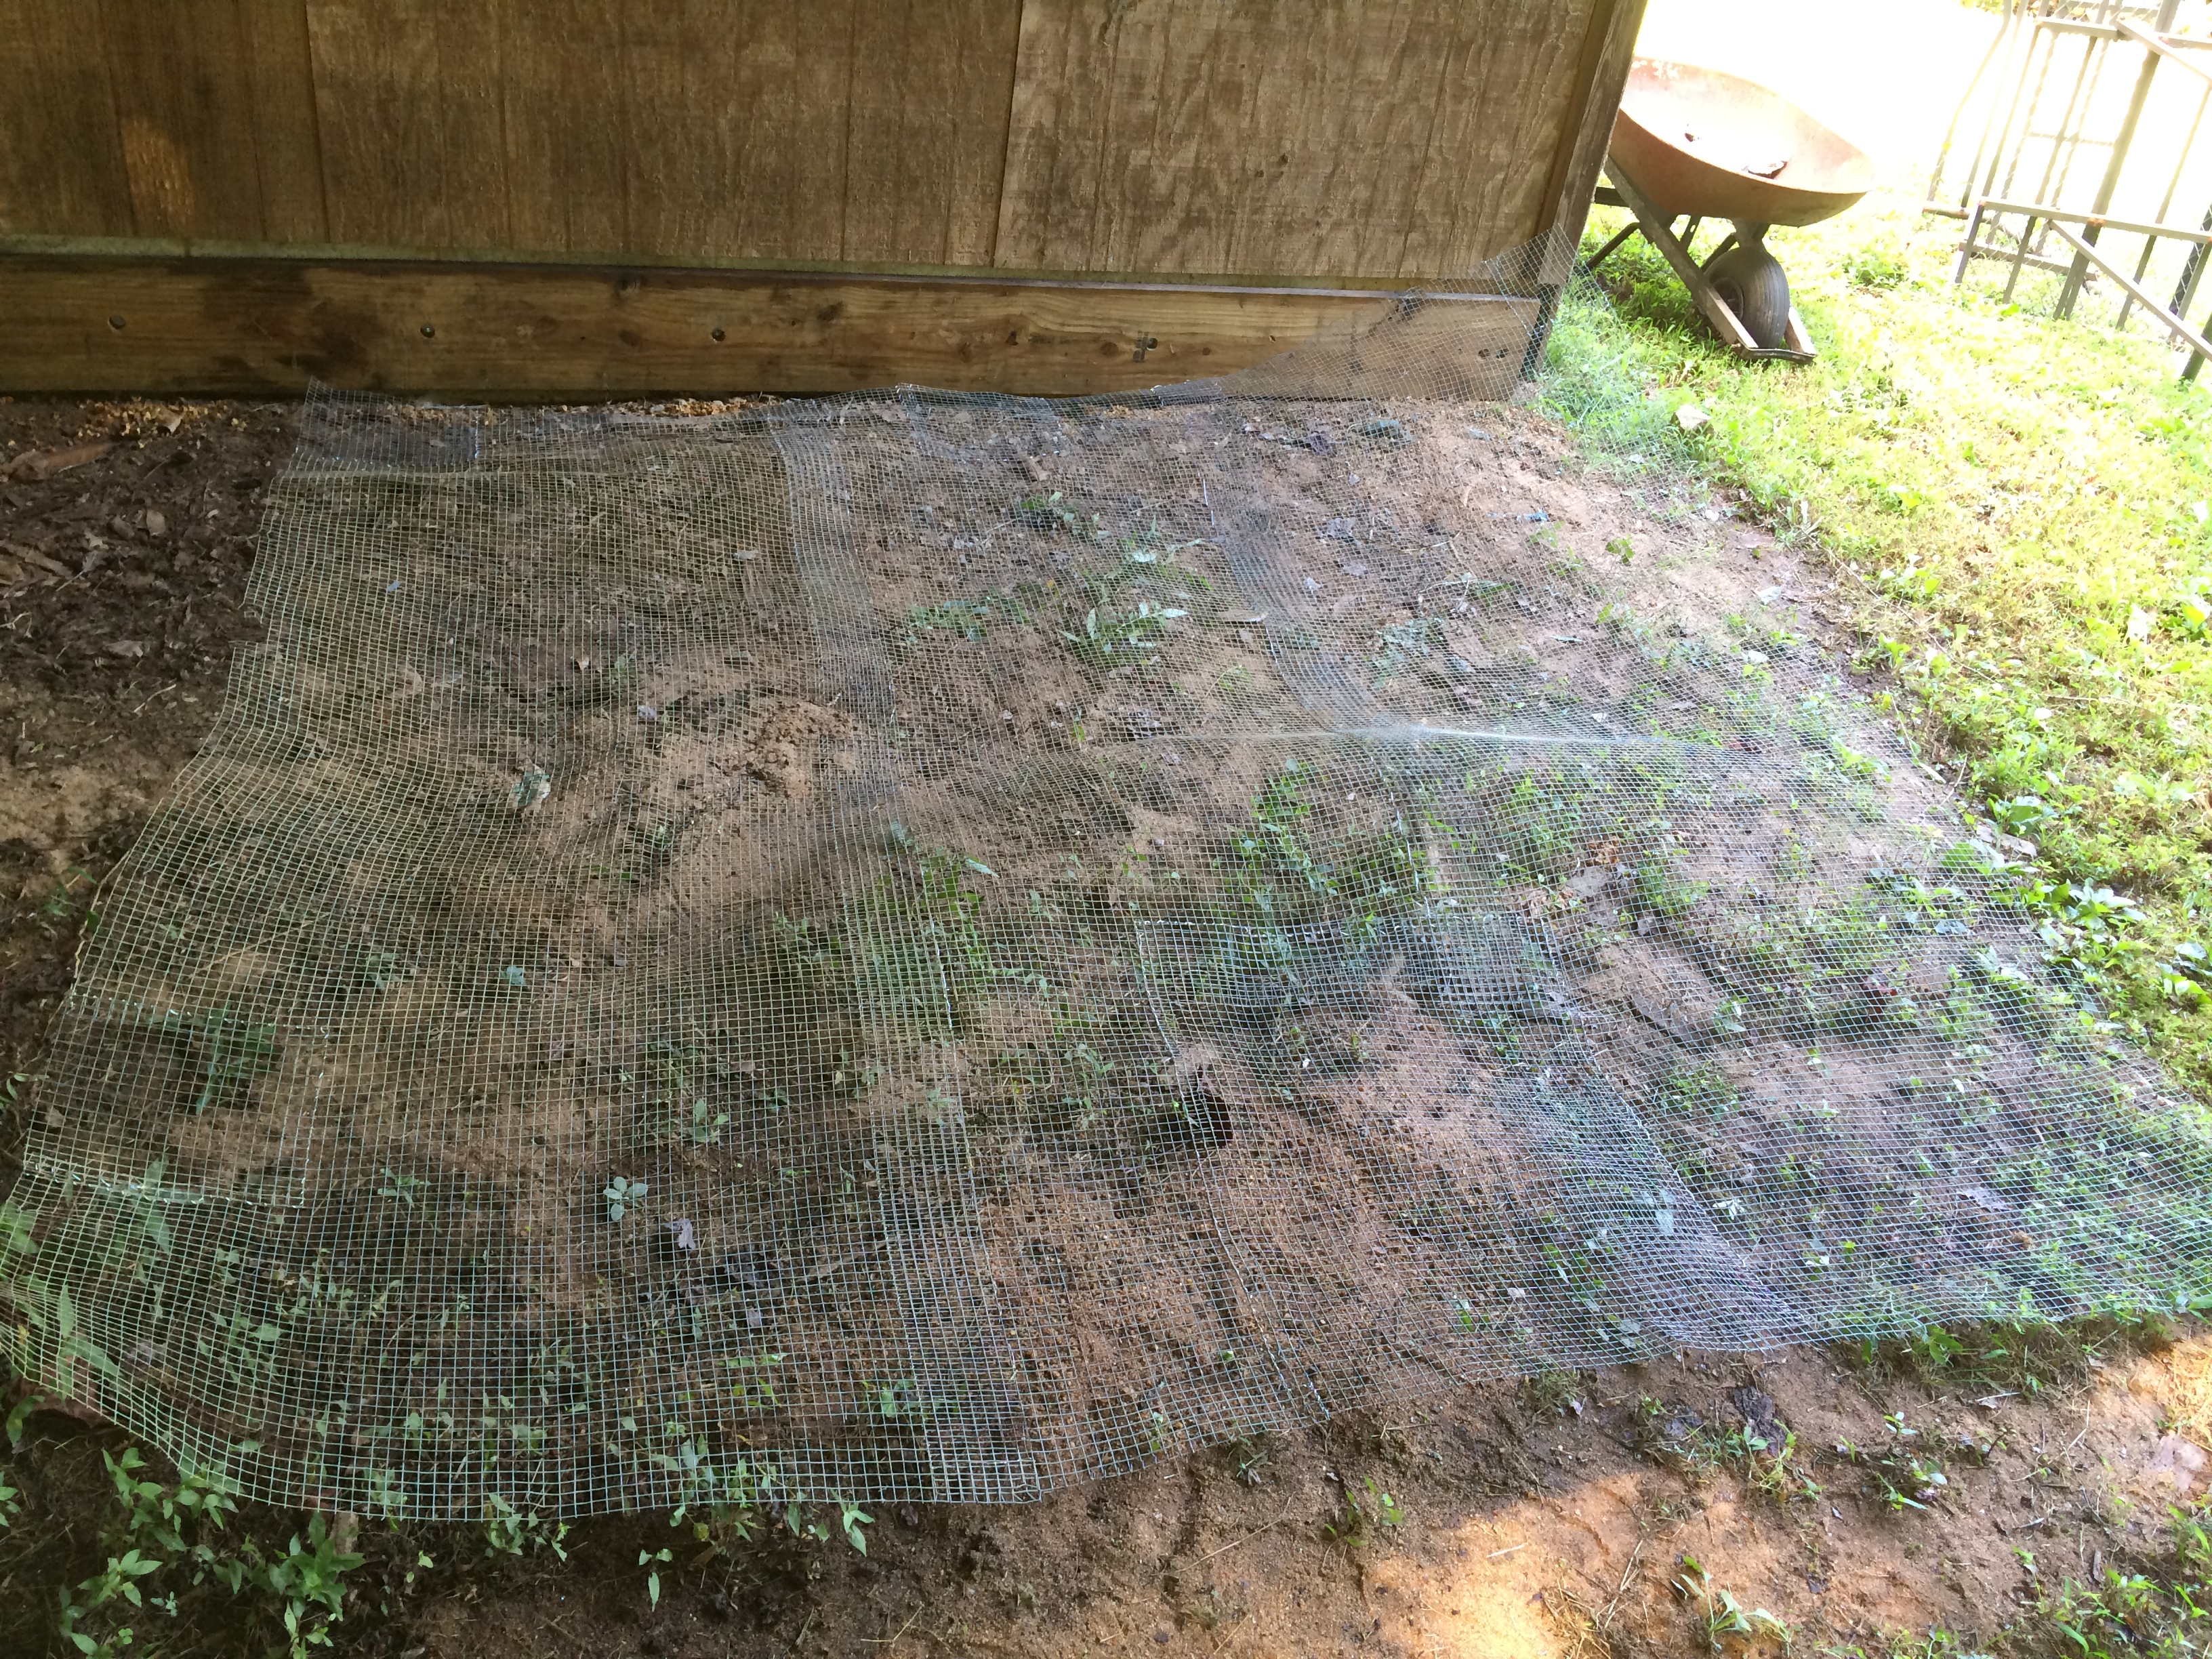
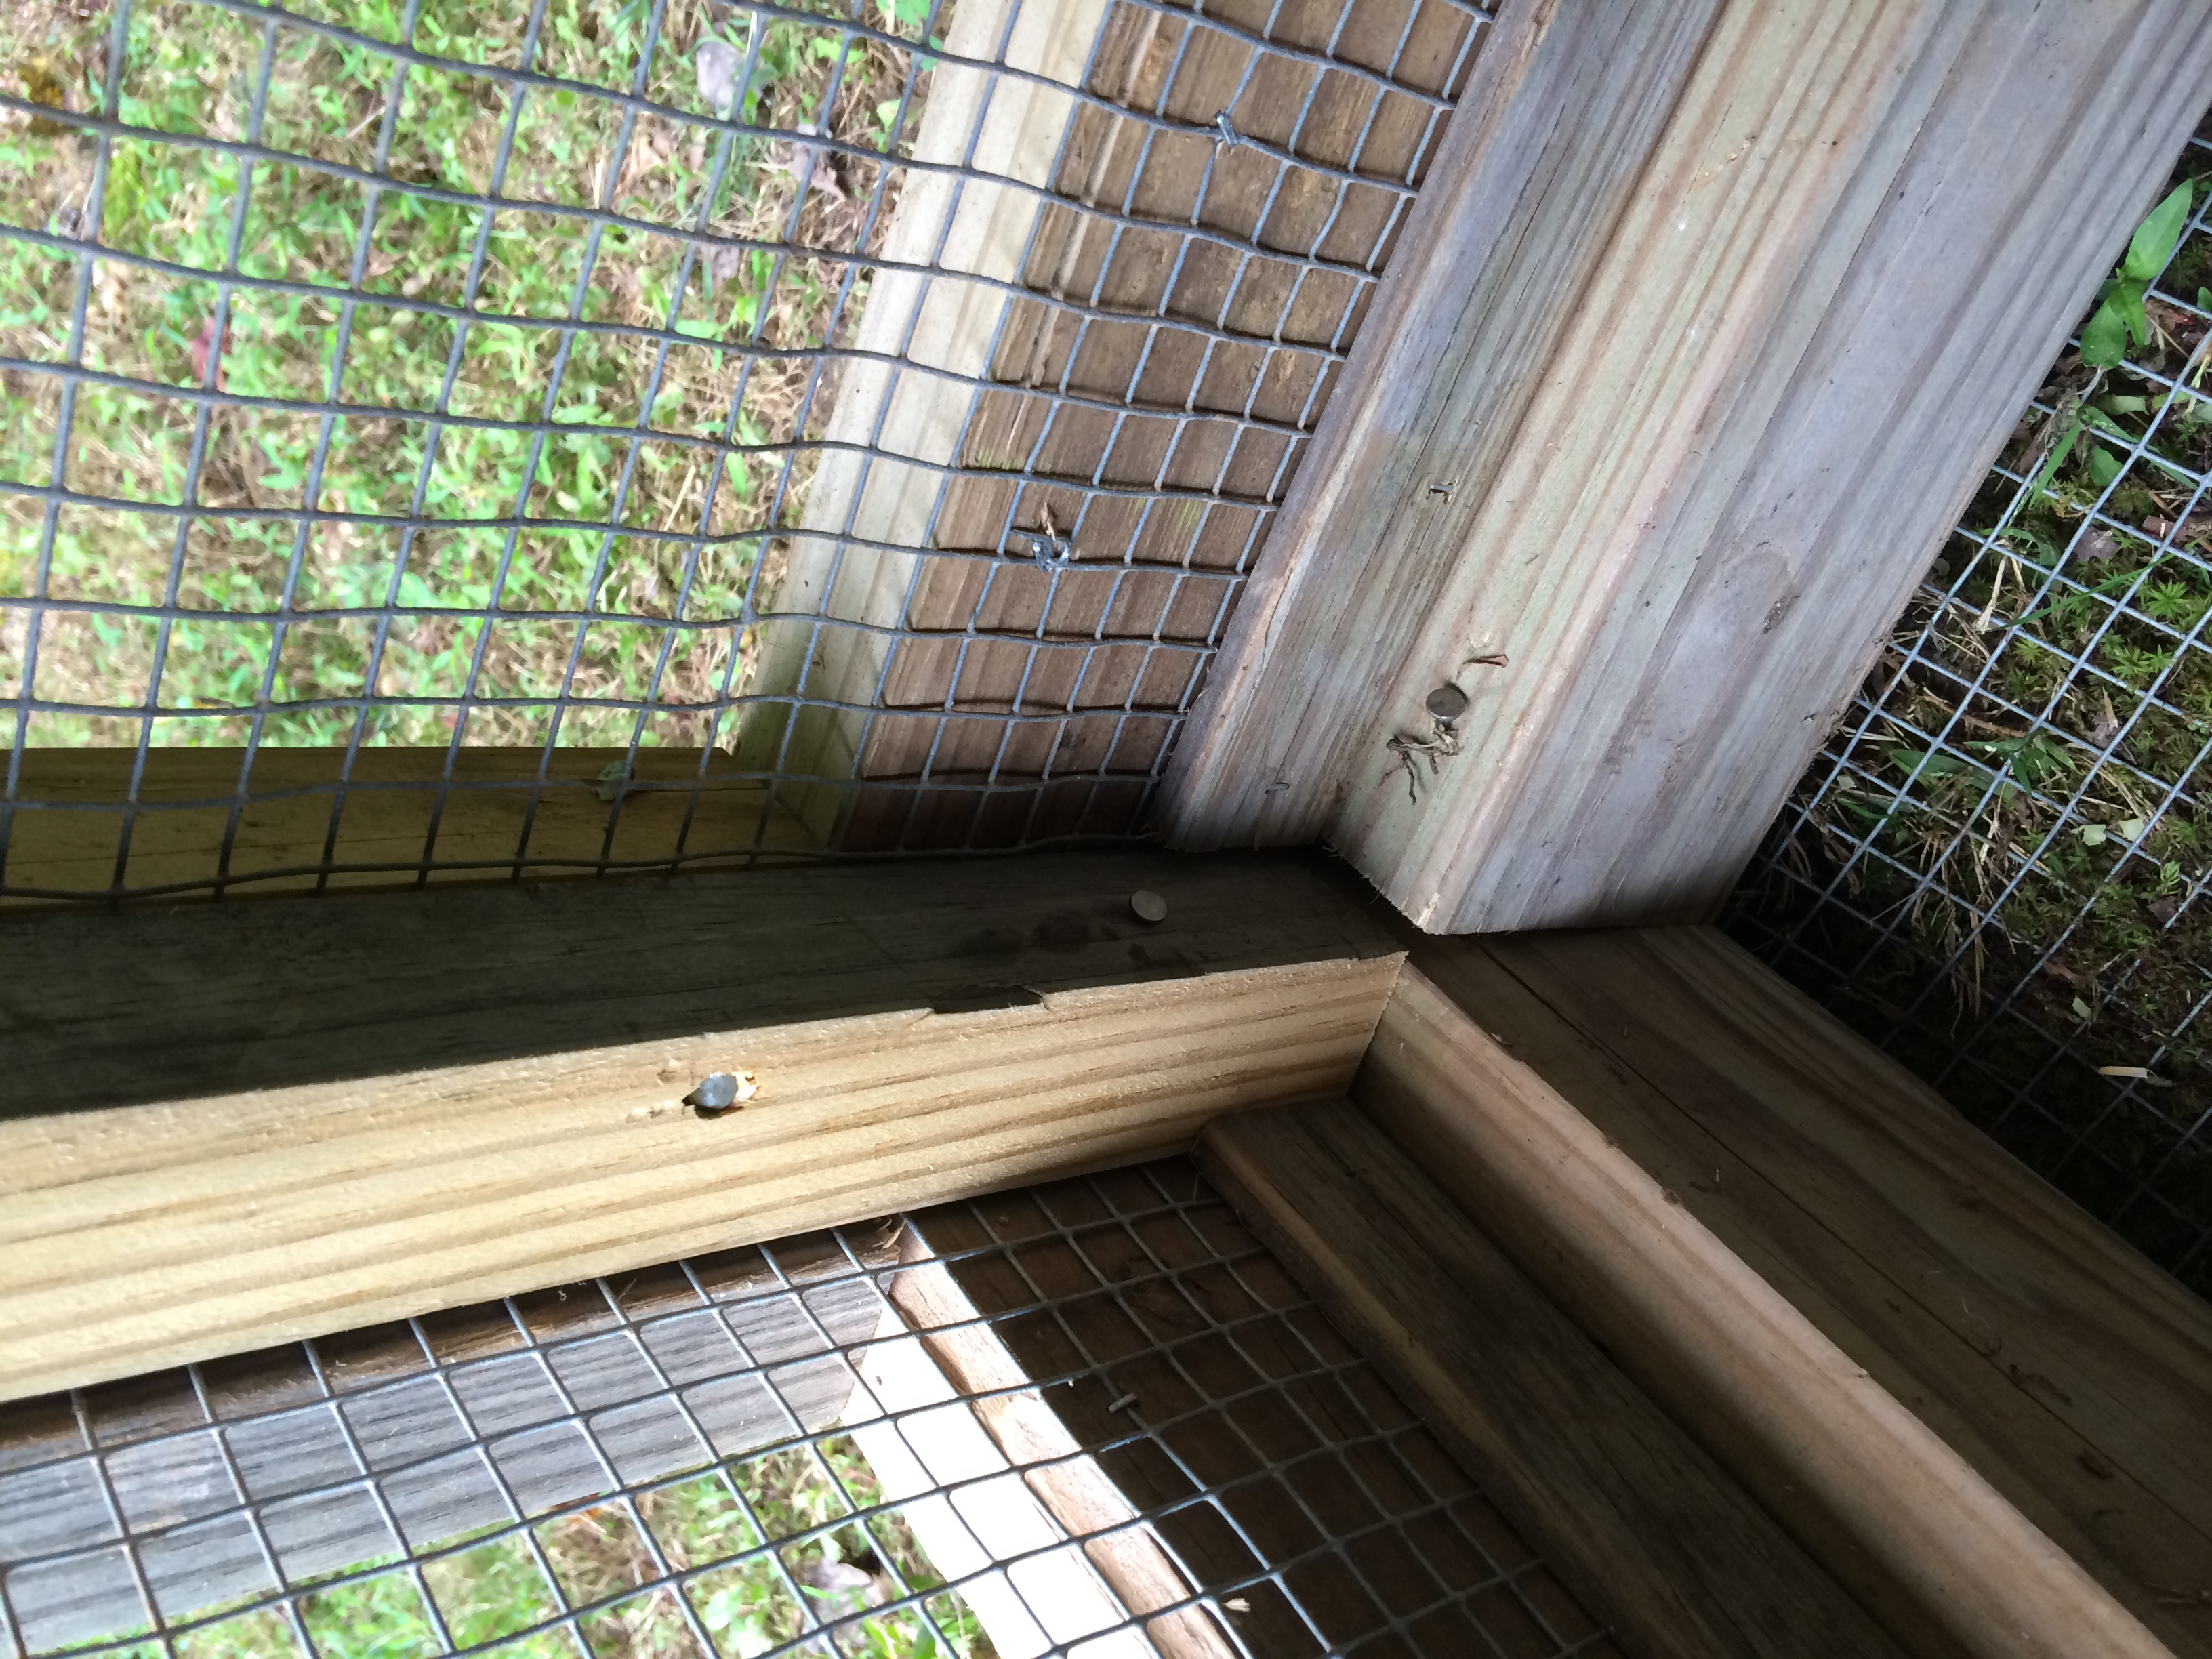
Even with our first chicken houses we knew that rodent and pest protection were as important as predator protection. We used 1/2″ hardware cloth in those houses, which was effective against mice. A larger-than-usual flood destroyed one of our old houses, but I was able to salvage enough hardware cloth from it to make a floor for the new coop. There were a few damaged areas in the large pieces, so I cut those areas out to make clean rectangles, then attached slightly oversized patches with stitches of stainless wire. It took me about half a day to make the single large floor piece this way, though it would have gone a little faster if I had been using new hardware cloth instead.
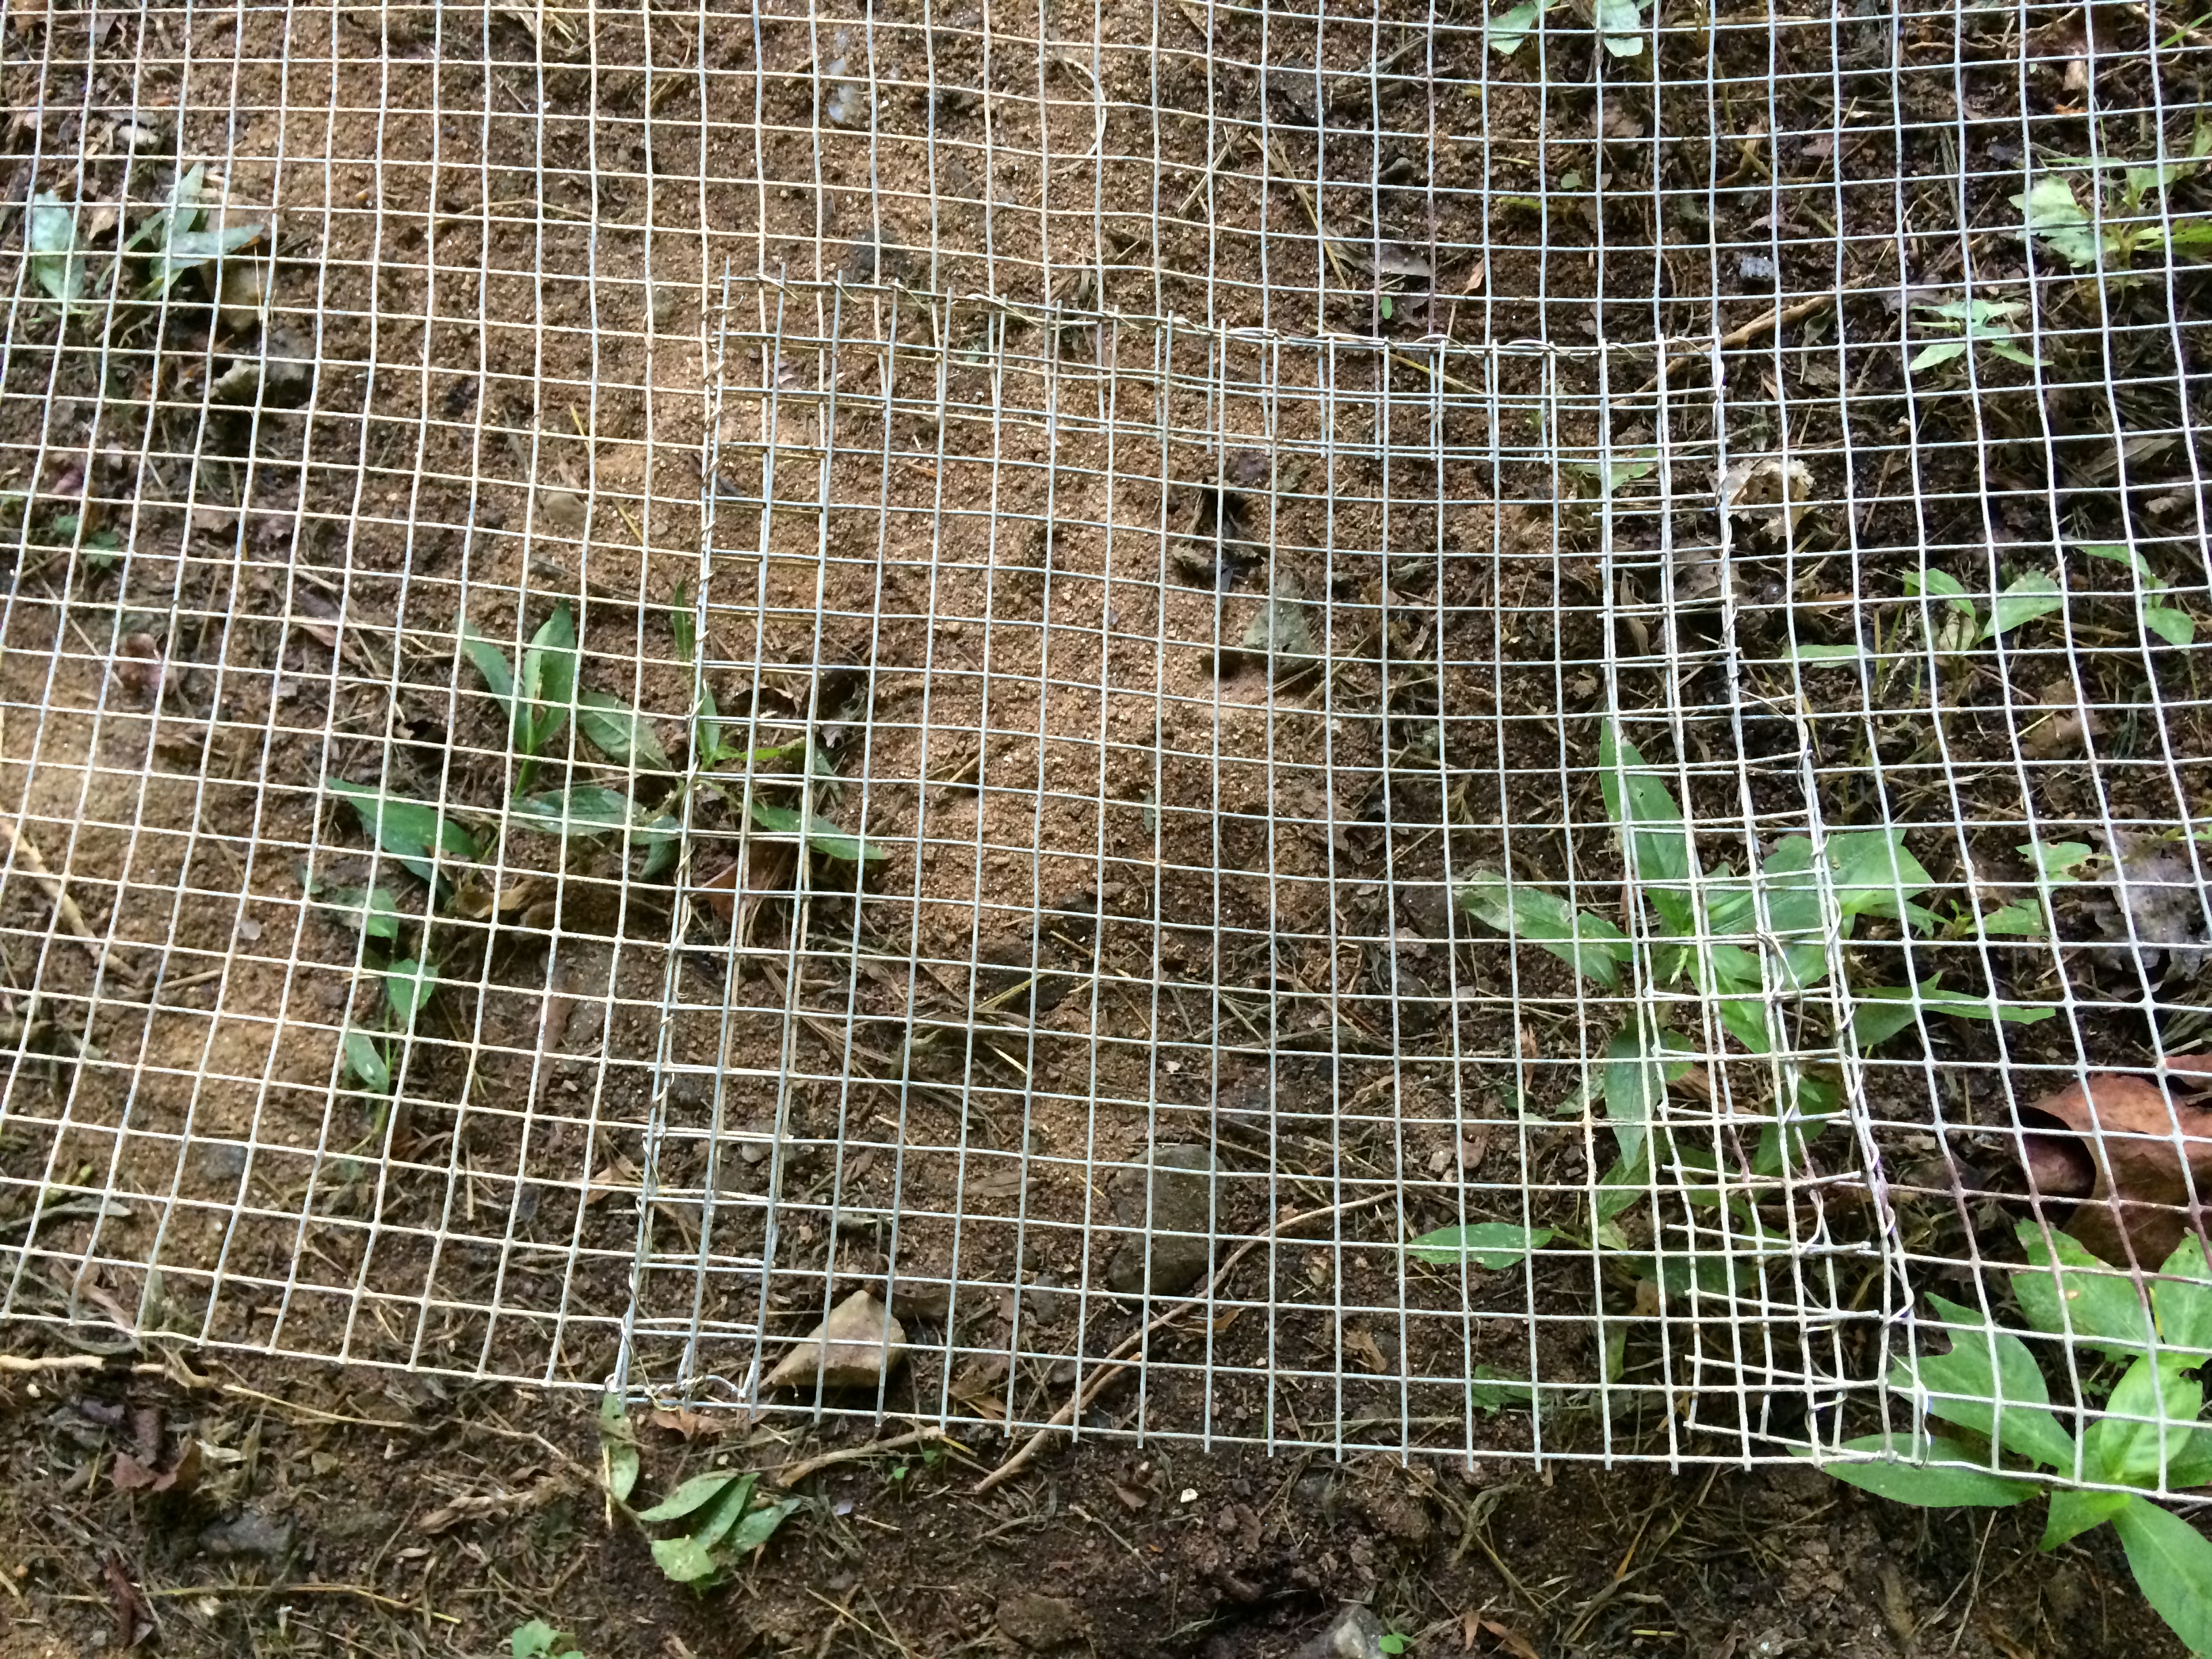
Hardware Cloth Patch
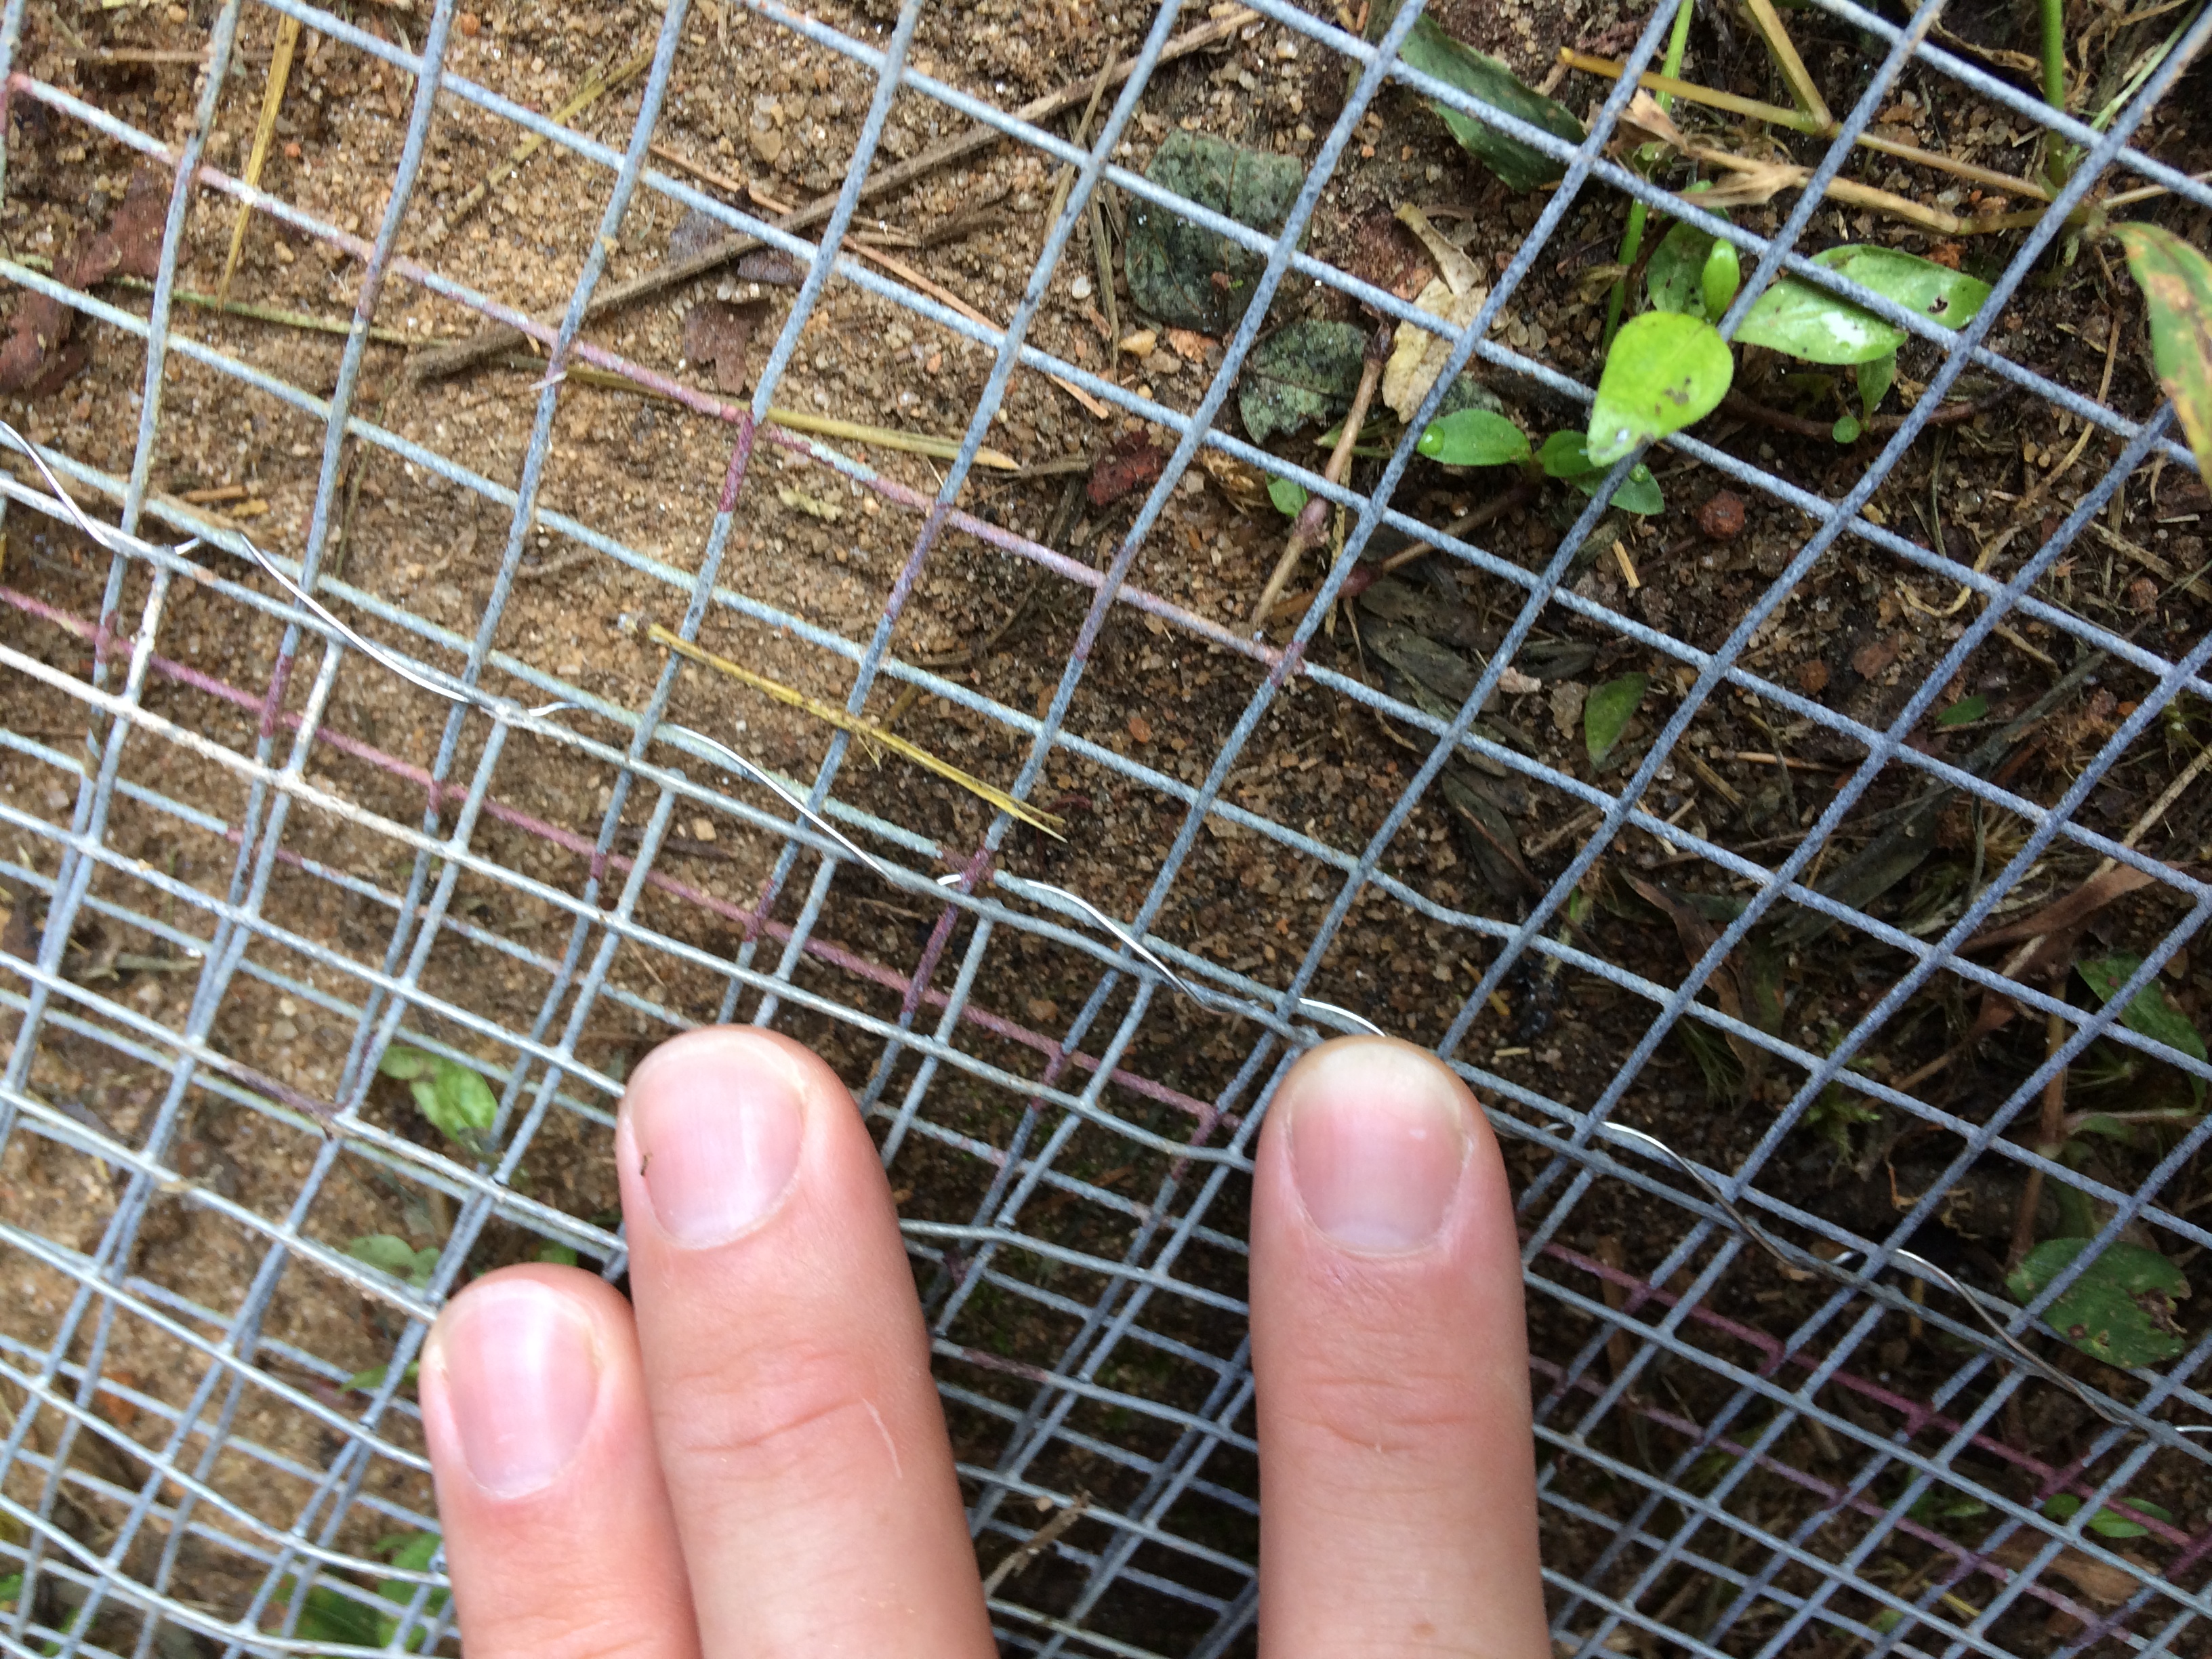
Here’s more detail of how the stainless wire threads through the weave of the hardware cloth
Chicken Coop Floor Protection
In this picture the hardware cloth is just resting under the lumber, not permanently attached yet.
Mighty Chicken Fortress
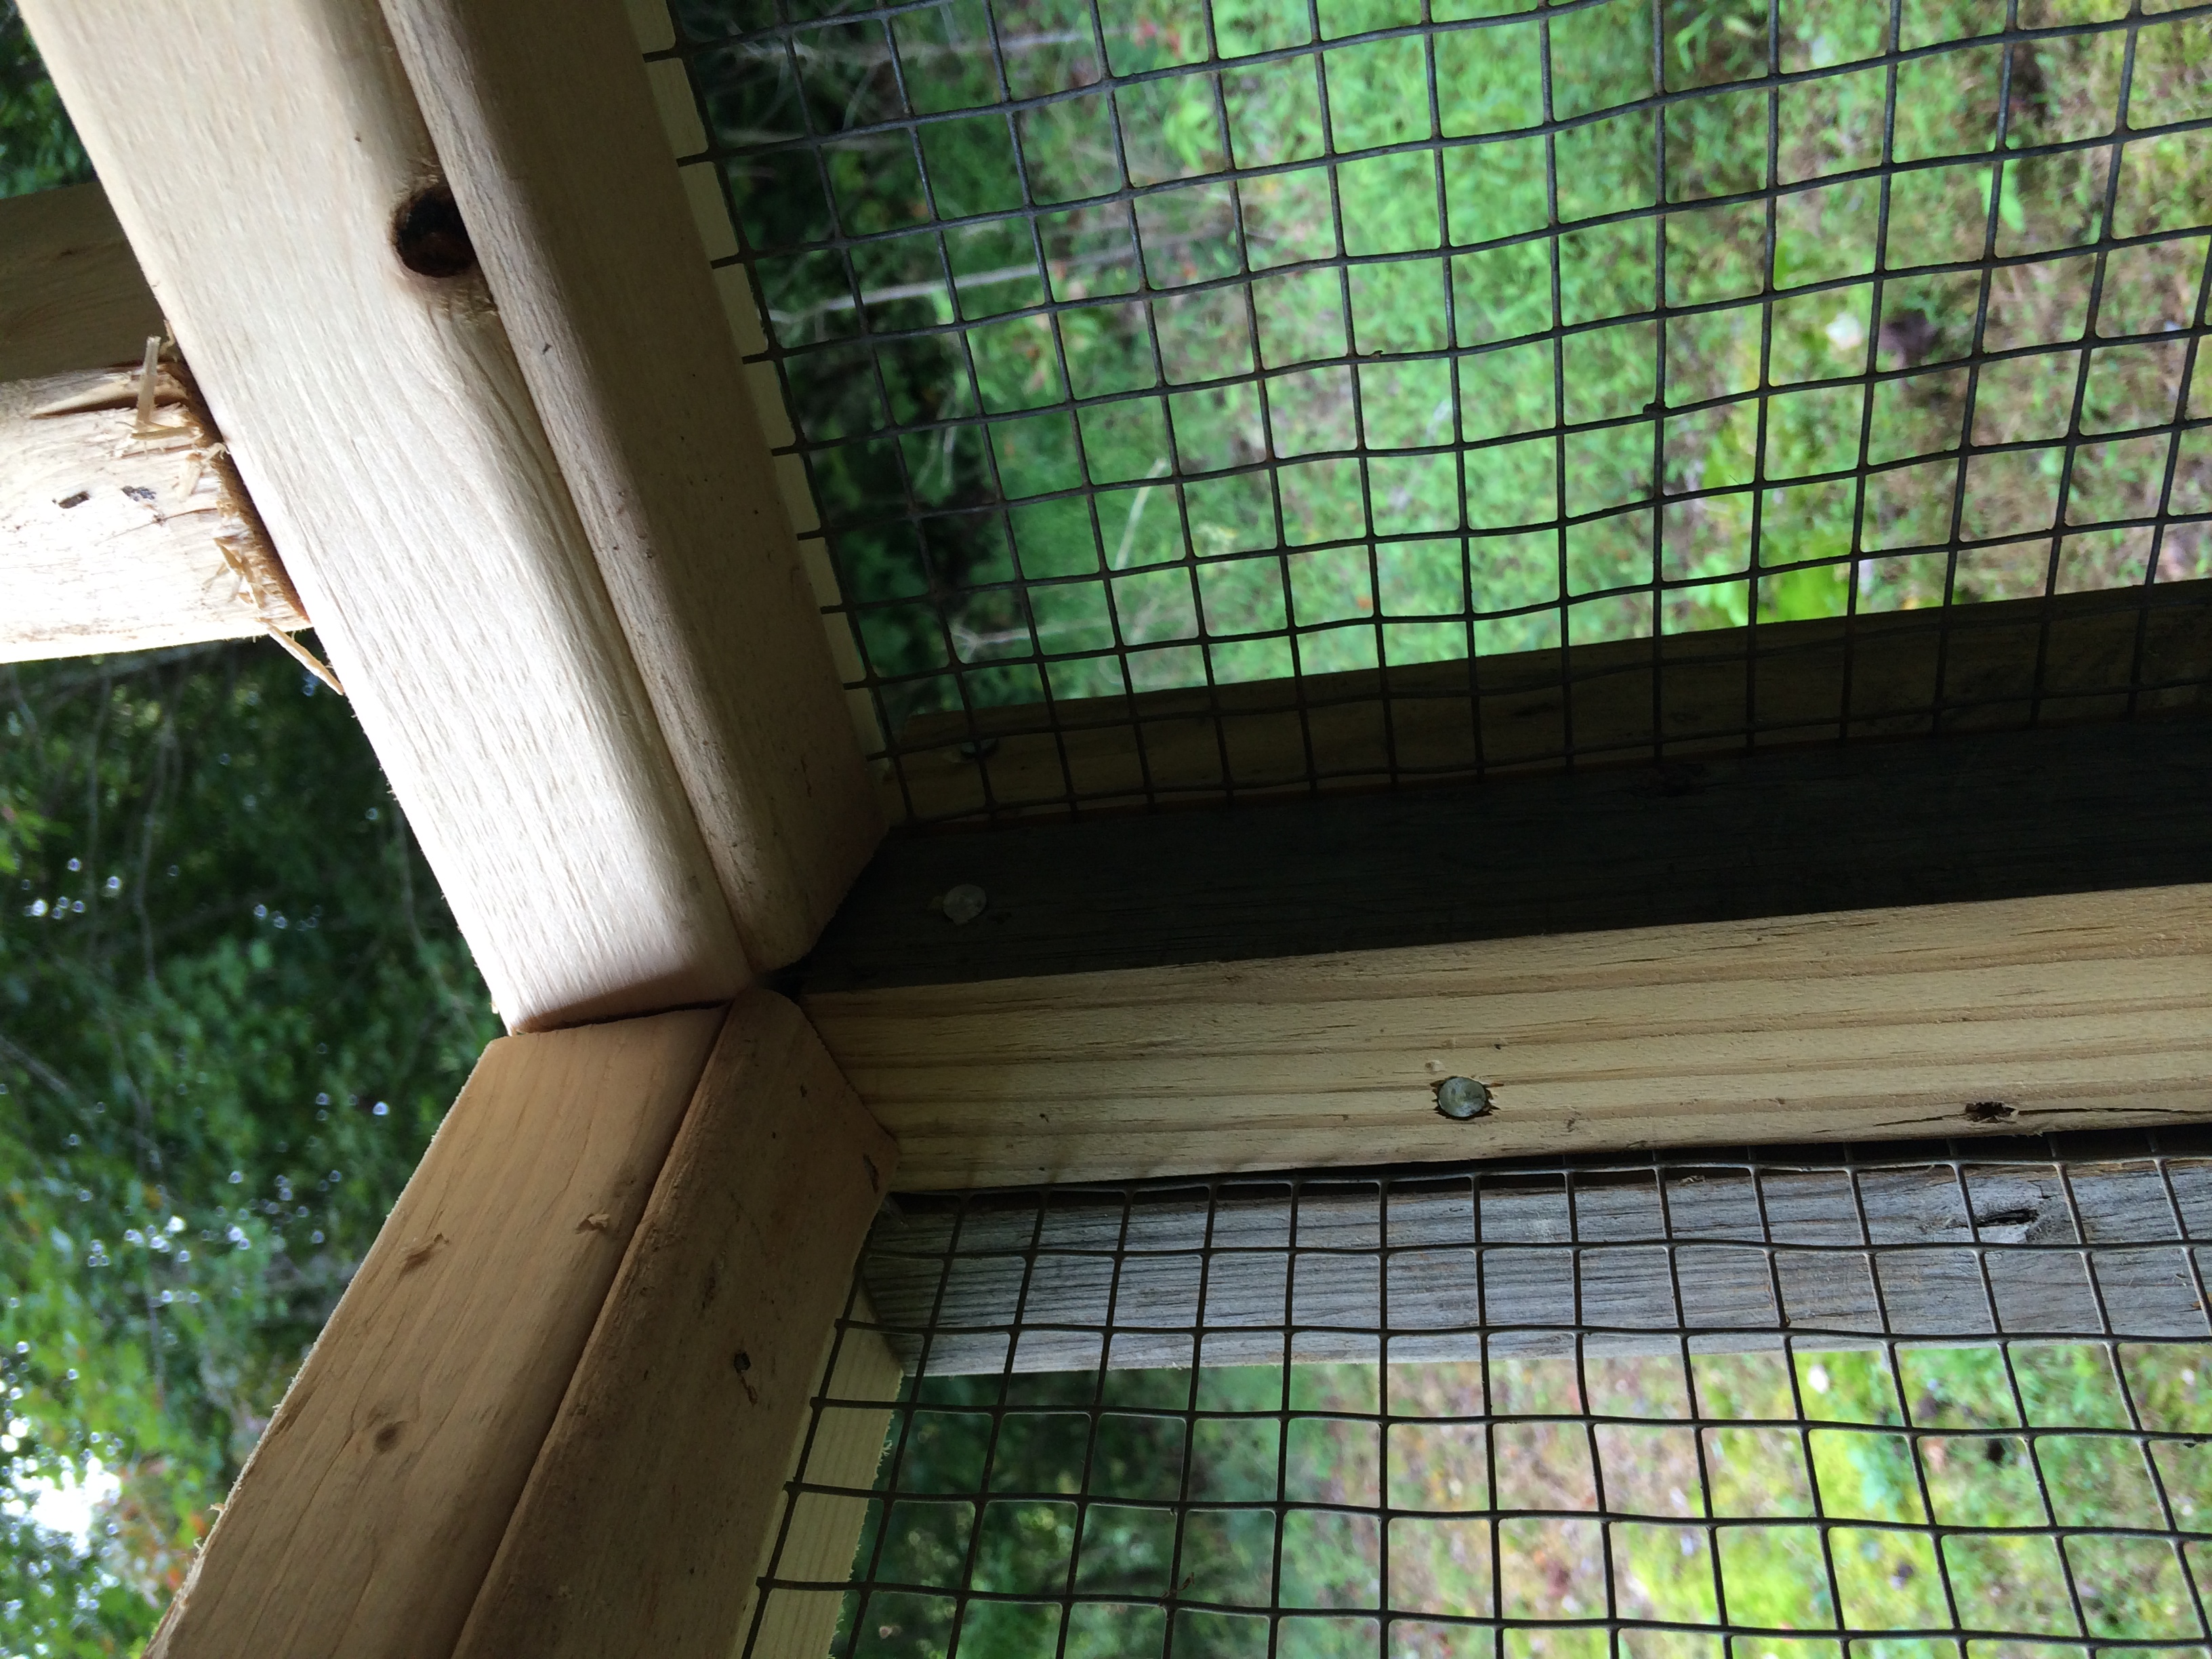
Hardware Cloth Top Detail
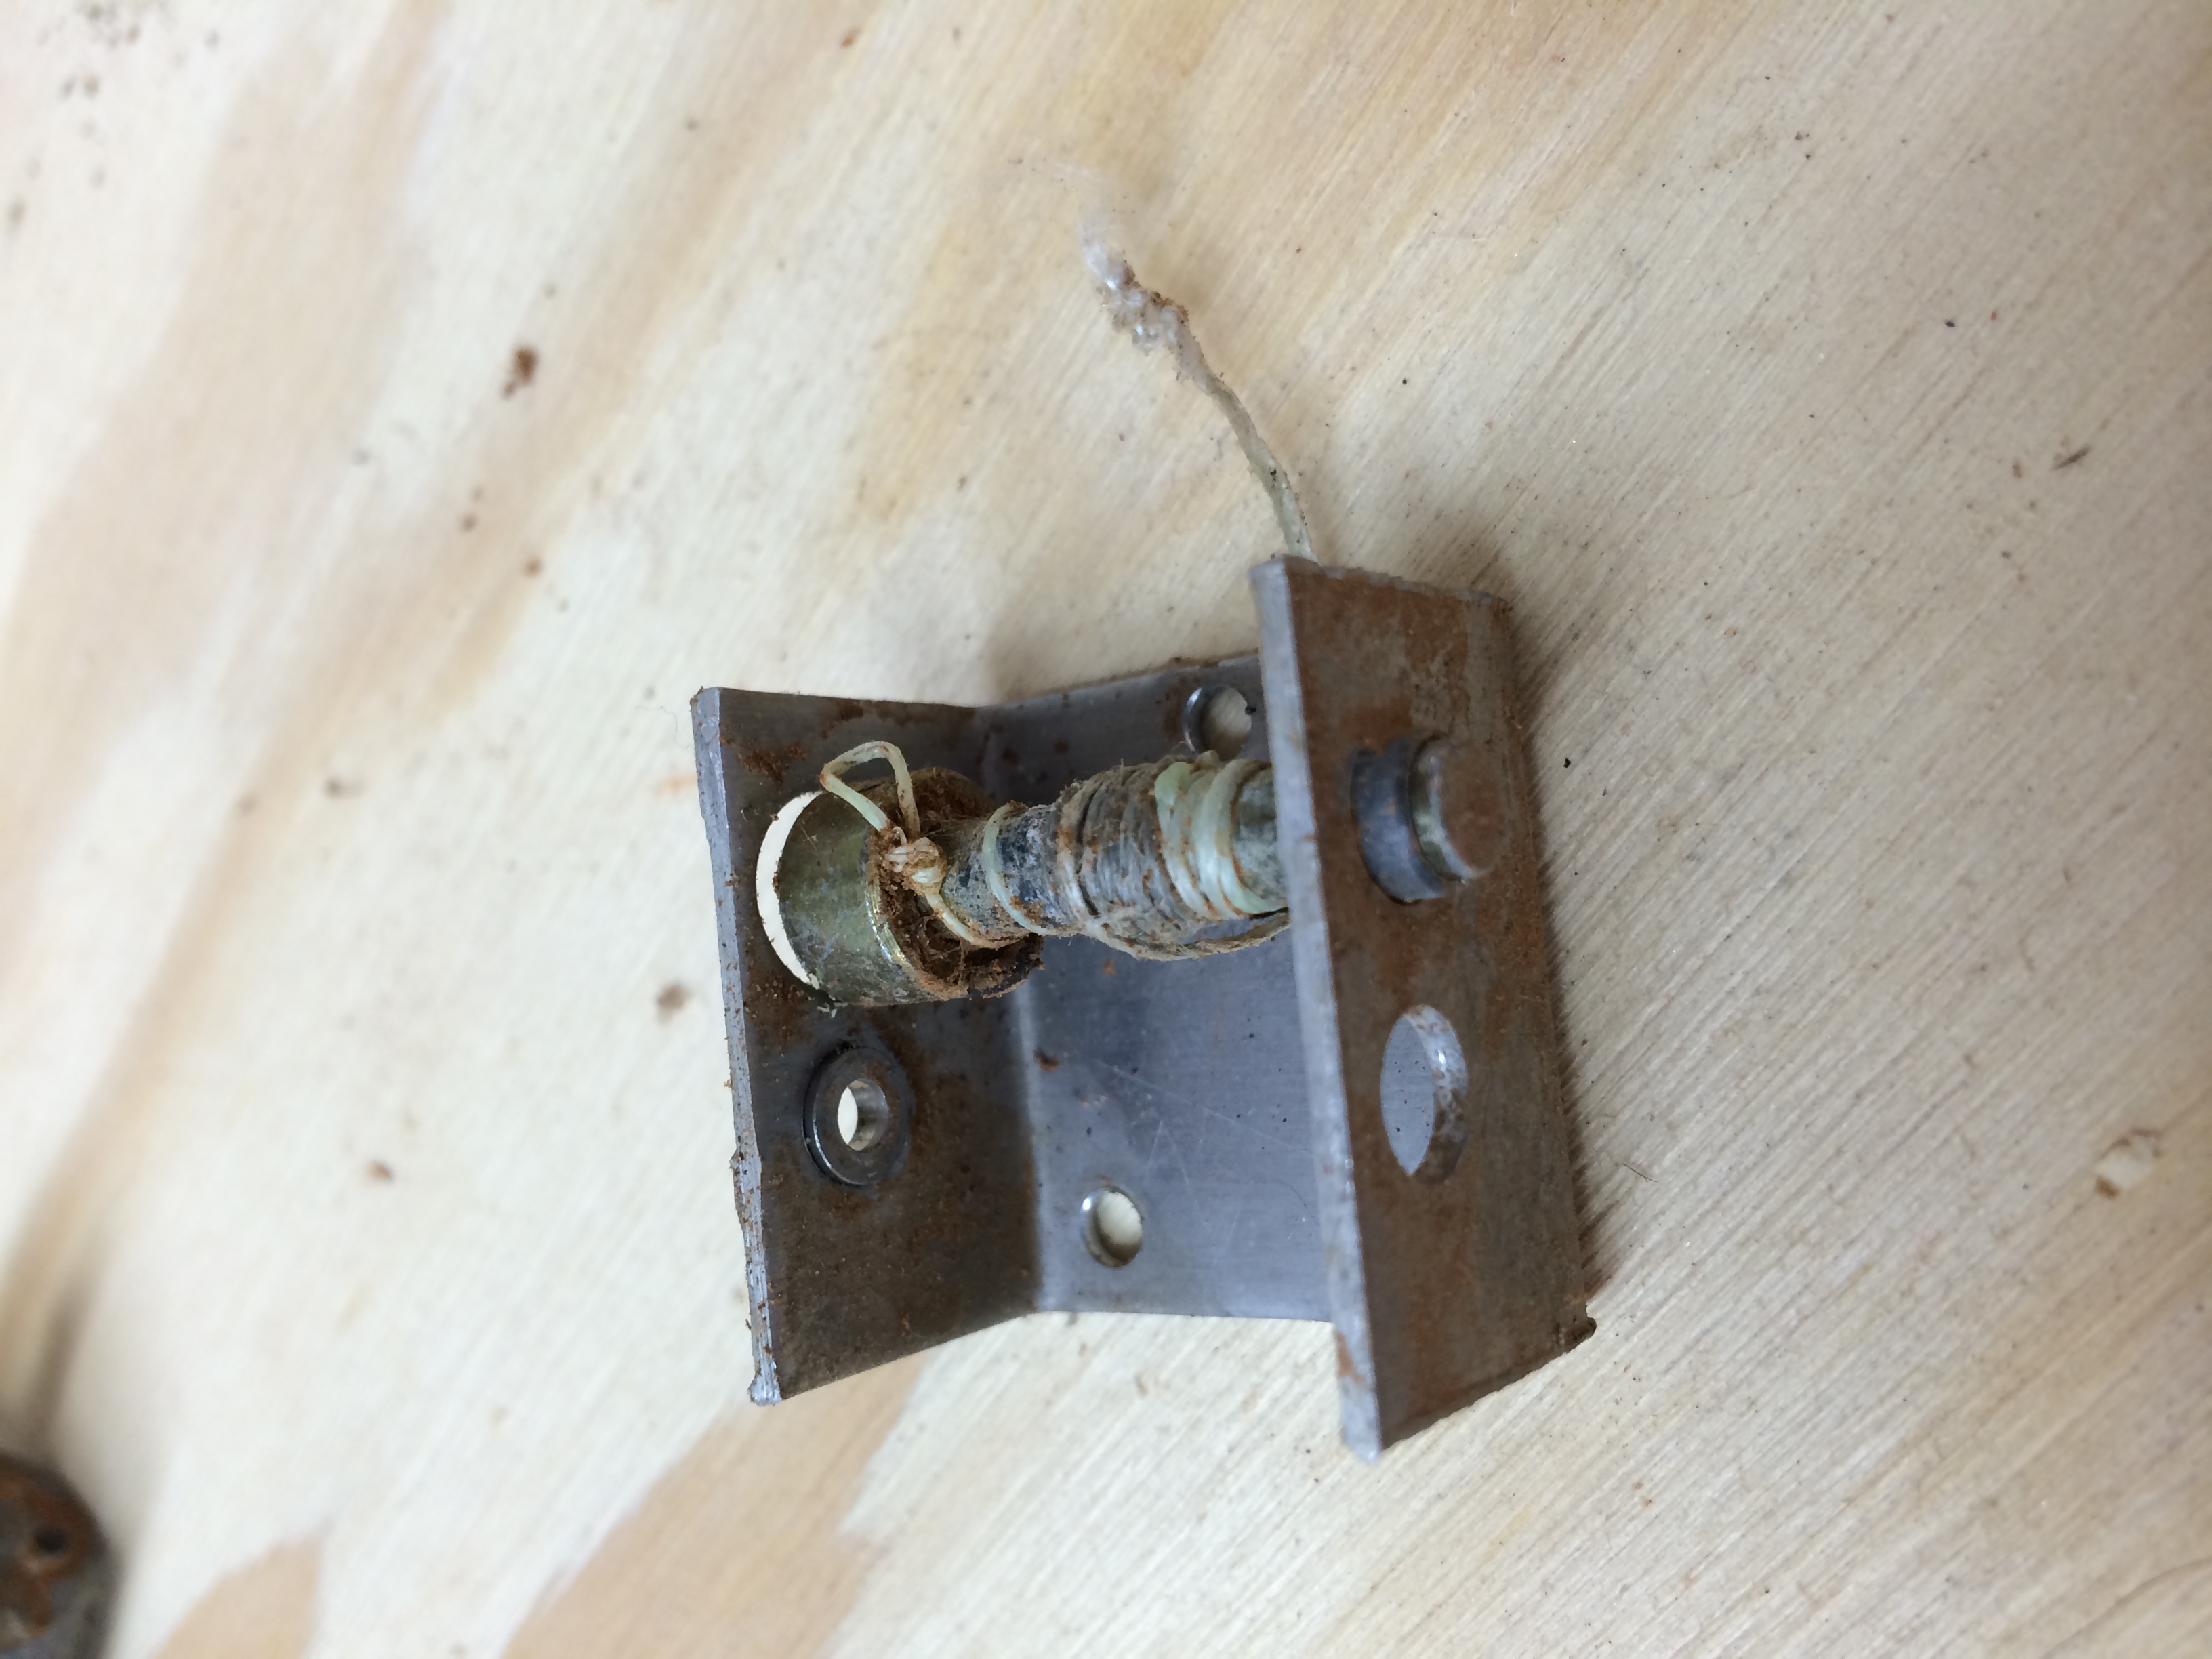
After years of success with the automatic chicken coop door opener from Europe, it was time to build are new expanded chicken house. This was a great opportunity to refine the system a little. The two goals were to consolidate the timer and actuator into a single box, and convert the two to a single, lithium battery power source. Update: experience showed that the batteries did not last long enough. I speculate that this was because of the litte power supply circuits. I removed the batteries and connected a wall-wart type of AC adapter instead, which has been working fine.
Here is the result:
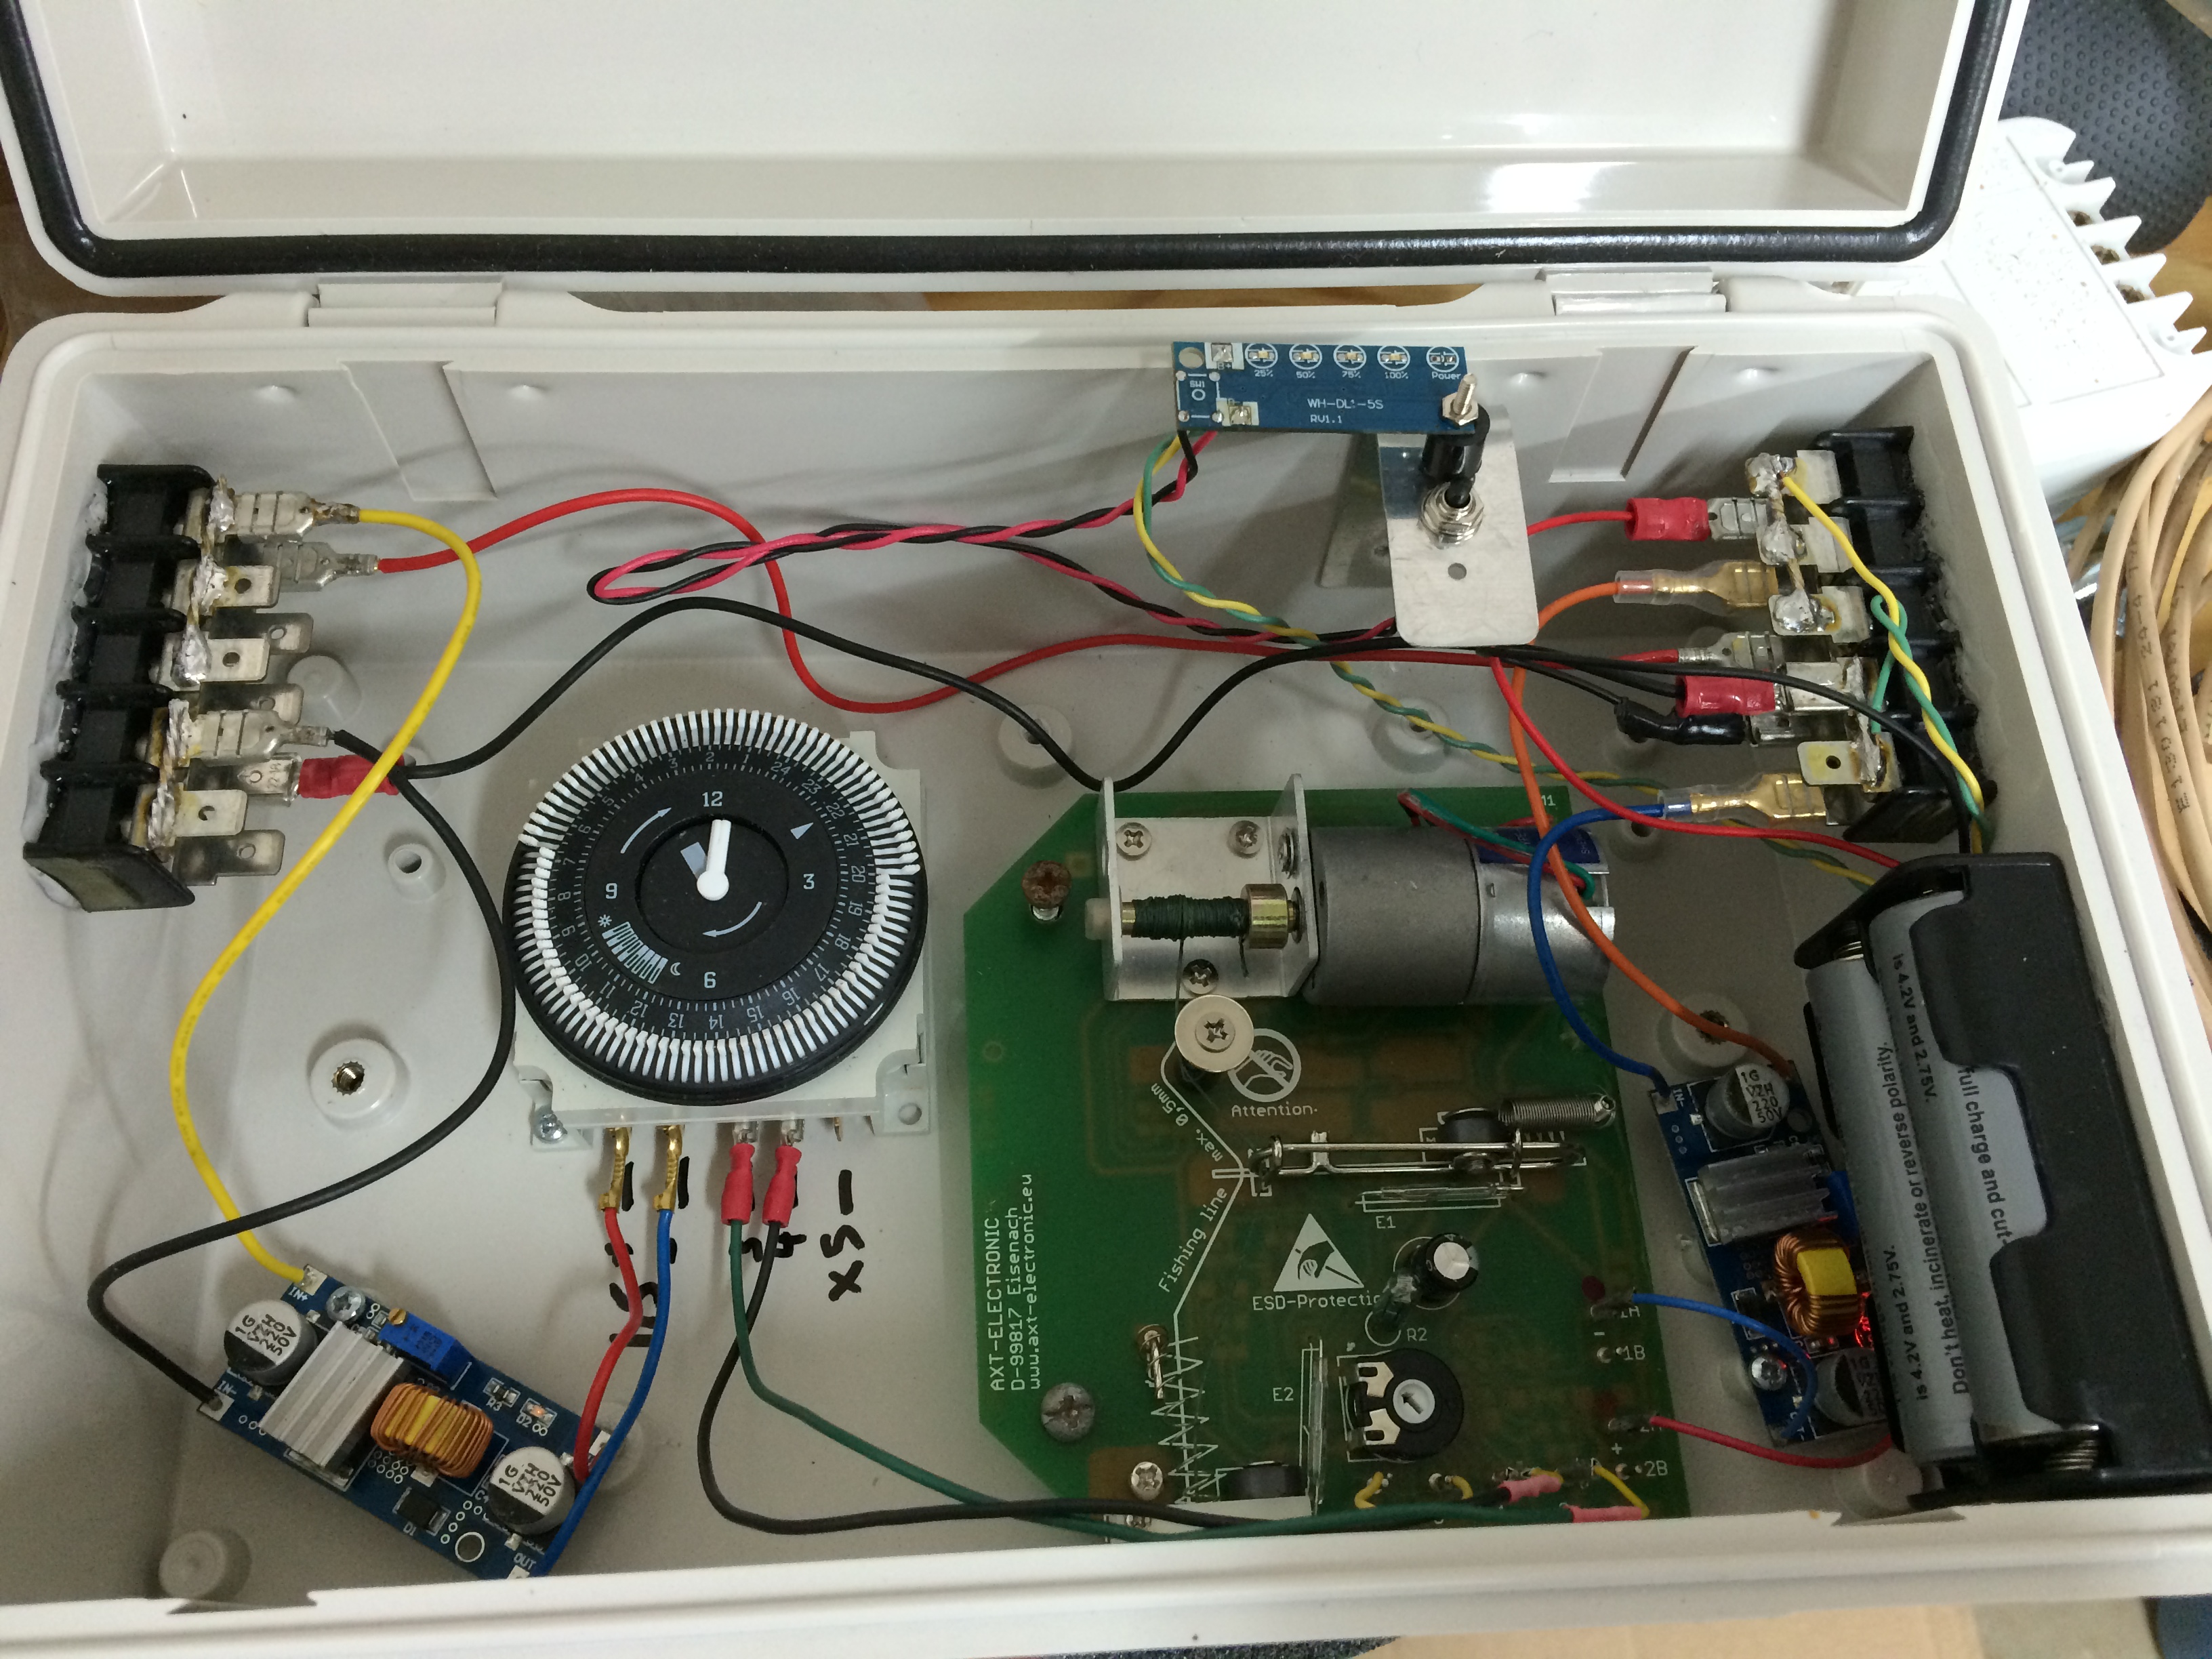
Here’s a tour of the components. You probably recognize the VSB circuit board and mechanical timer. These days they ship a solid-state timer, but I think it is a drop-in replacement. There are three other circuit boards. The one in the top, middle, near the black push-button switch, is a battery status indicator. When the switch is closed, there are LEDs that light up to indicate the battery charge level. The other two circuit boards are little adjustable power supplies from China via eBay. They are very simple to use- volts in on one side, volts out on the other side. The tiny brass screw on top of the little blue component is the adjustment. As shipped, the screw is set for a high output voltage, so it took around 15 counter-clockwise turns to get it into the adjusting range. I adjusted the one on the left to 1.5 volts and connected it to the timer, then adjusted the one on the right to 6 volts and connected it to pins 1 and 2 on the VSB. I shorted pins 5 and 6 as before with a jumper (to bypass the on-board optical sensor), and connected pins 3 and 4 of the timer to pins 3 and 4 of the VSB. There are a few extra slots on the terminal strips because I’m planning to use the same supply voltage to power our water level monitoring system on the rain barrel. These slots will also make it easy to add another two or three lithium cells in parallel, should it turn out that the battery duration is not sufficient.
Pastured-chicken keepers know that chickens will normally return to a coop to sleep, and since many of their predators are nocturnal, we can keep them safe by simply closing the door to their coop. Manually closing a door each night and opening that door the next morning may sound fine to someone who is used to keeping dogs, but we are cat people, and not really interested in that sort of commitment.
The alternative is some sort of motorized coop door on a timer or daylight sensor. These days there are several to choose from, but a few years ago when we first started looking for a system, there was really only one viable option, the VSB system from Europe. We used that system as-delivered with a mechanical timer for a few years, and it worked out well.
The actuator system is contained in a single rain-proof plastic enclosure with a transparent cover. The components in that box operate on four AA alkaline batteries. The door motion comes from a small geared motor that winds a very durable thread/string around an axle. The motor/gearbox is mounted to a circuit board that features a light sensor, a potentiometer for adjusting the light sensor, input pins for an external light sensor or timer, and limit switches.
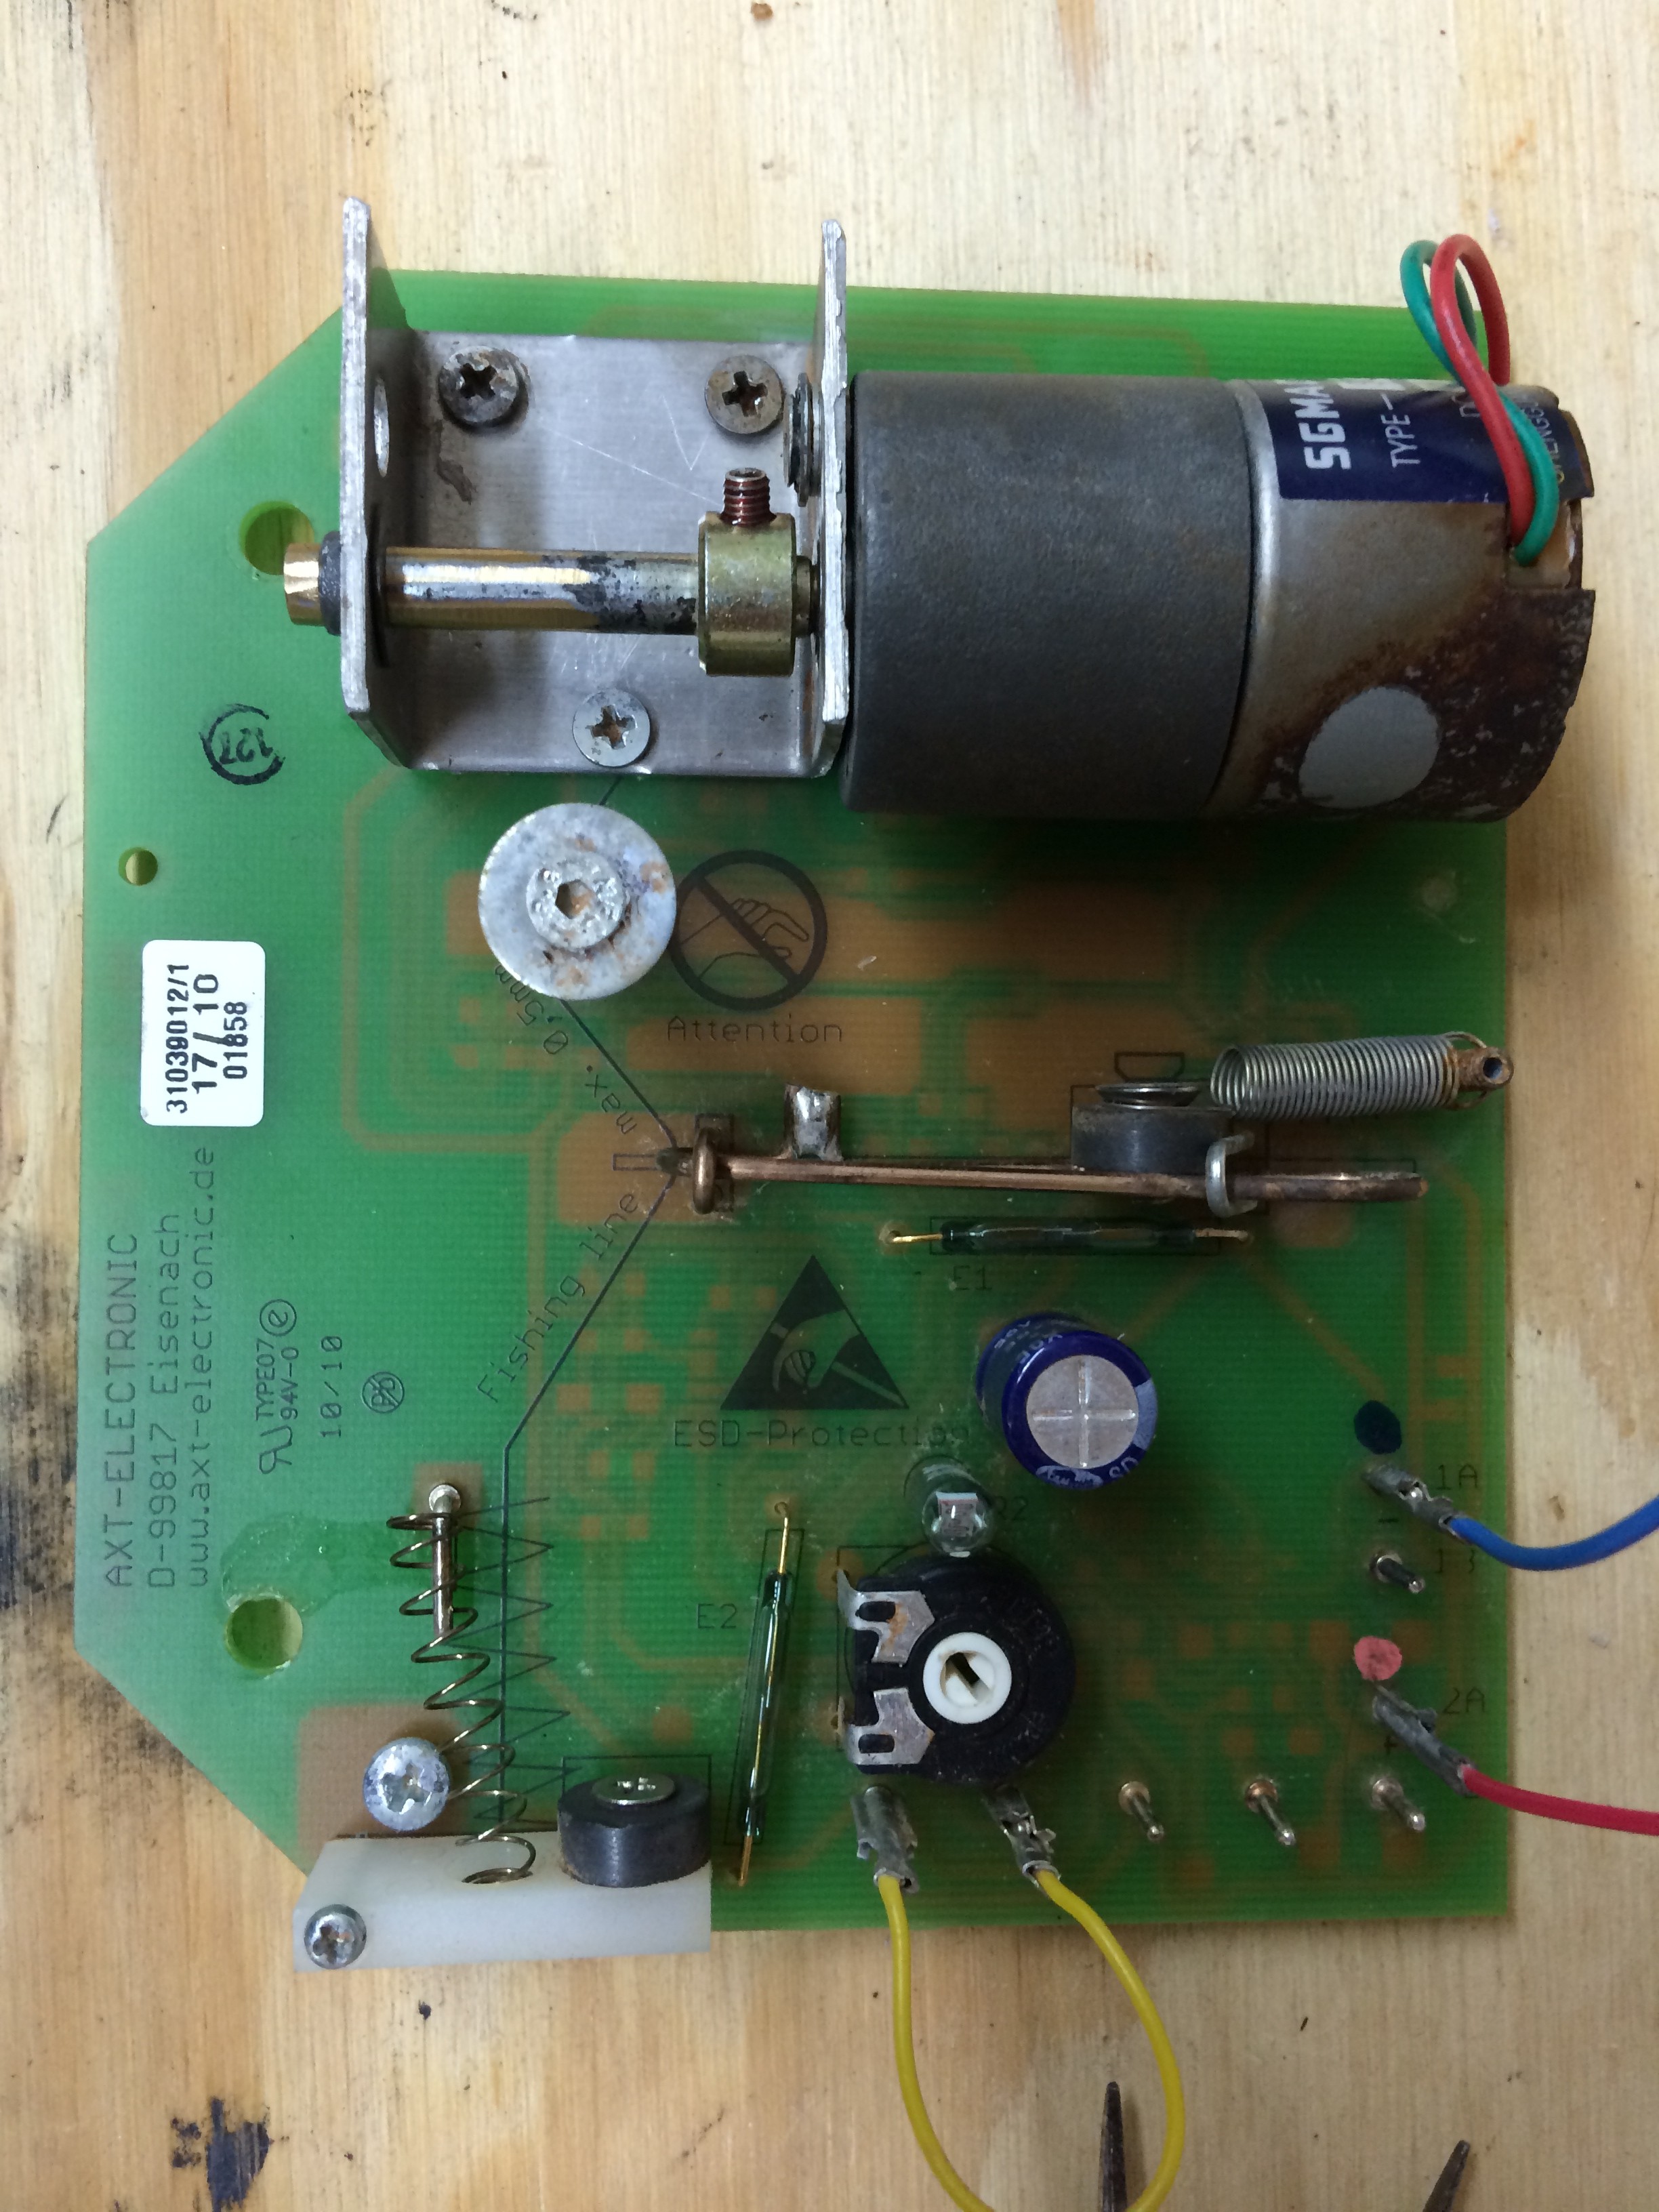
The design is very clever. Instead of using mechanical limit switches that would wear out and be susceptible to environmental challenges in the coop, the system uses non-contact reed switches that are operated by magnets. These are visible in the photo running vertically just to the right of the pivoting plastic arm on the lower left, and running horizontally between the sliding switch in the middle of the board and the large blue capacitor.
The connections on the lower right corner are as follows. Pins 1a and 1b are electrically common, and go to the negative side of the supply voltage at the AA batteries. Pins 2a and 2b are also electrically common with each other and go to the positive side of the AA batteries. The remaining pins across the bottom are referred to in the instructions as 3, 4, 5, and 6. In the photo, 5 and 6 are shorted with a yellow jumper. This jumper causes the circuitry to bypass the optical sensor (located just below and to the left of the blue capacitor, and just above the potentiometer. The potentiometer is where one would adjust the light sensor, and as I understand it, pins 5 and 6 could also connect to a remote light sensor. When the circuit is closed, then the door is closed.
Pins 3 and 4 are connected to the timer in our setup, though in the photo they aren’t connected to anything. When those pins are shorted, the door will close. When the system is in “door closed” mode, the motor will unwind the string until the sliding switch in the center of the board slides to the right. This is an indication to the logic that the door is now resting on the bottom of its track, since the string is slack. In door open mode, the motor winds up the string until a knot in the string hangs up in the small hole in the piece of white plastic on the lower left side of the board. When that knot hangs up in the small hole, the plastic arm lifts, and the magnet opens the reed switch.
Our opener worked well for the first few years. We would have to periodically adjust the timer to account for seasonal changes in the length of the day, but that was to be expected. The batteries lasted a long time- at least several months, and perhaps a year at times. It was slightly inconvenient that the two systems used different batteries, but not a big deal.
All of that worked well until our big flood in the summer of 2013. The system was submerged while powered for some time, and I didn’t have any expectations for it to work again. I removed the expensive parts from our wrecked chicken coop and tossed them in a cardboard box for over a year, when our new chicken house was ready for a door actuator.
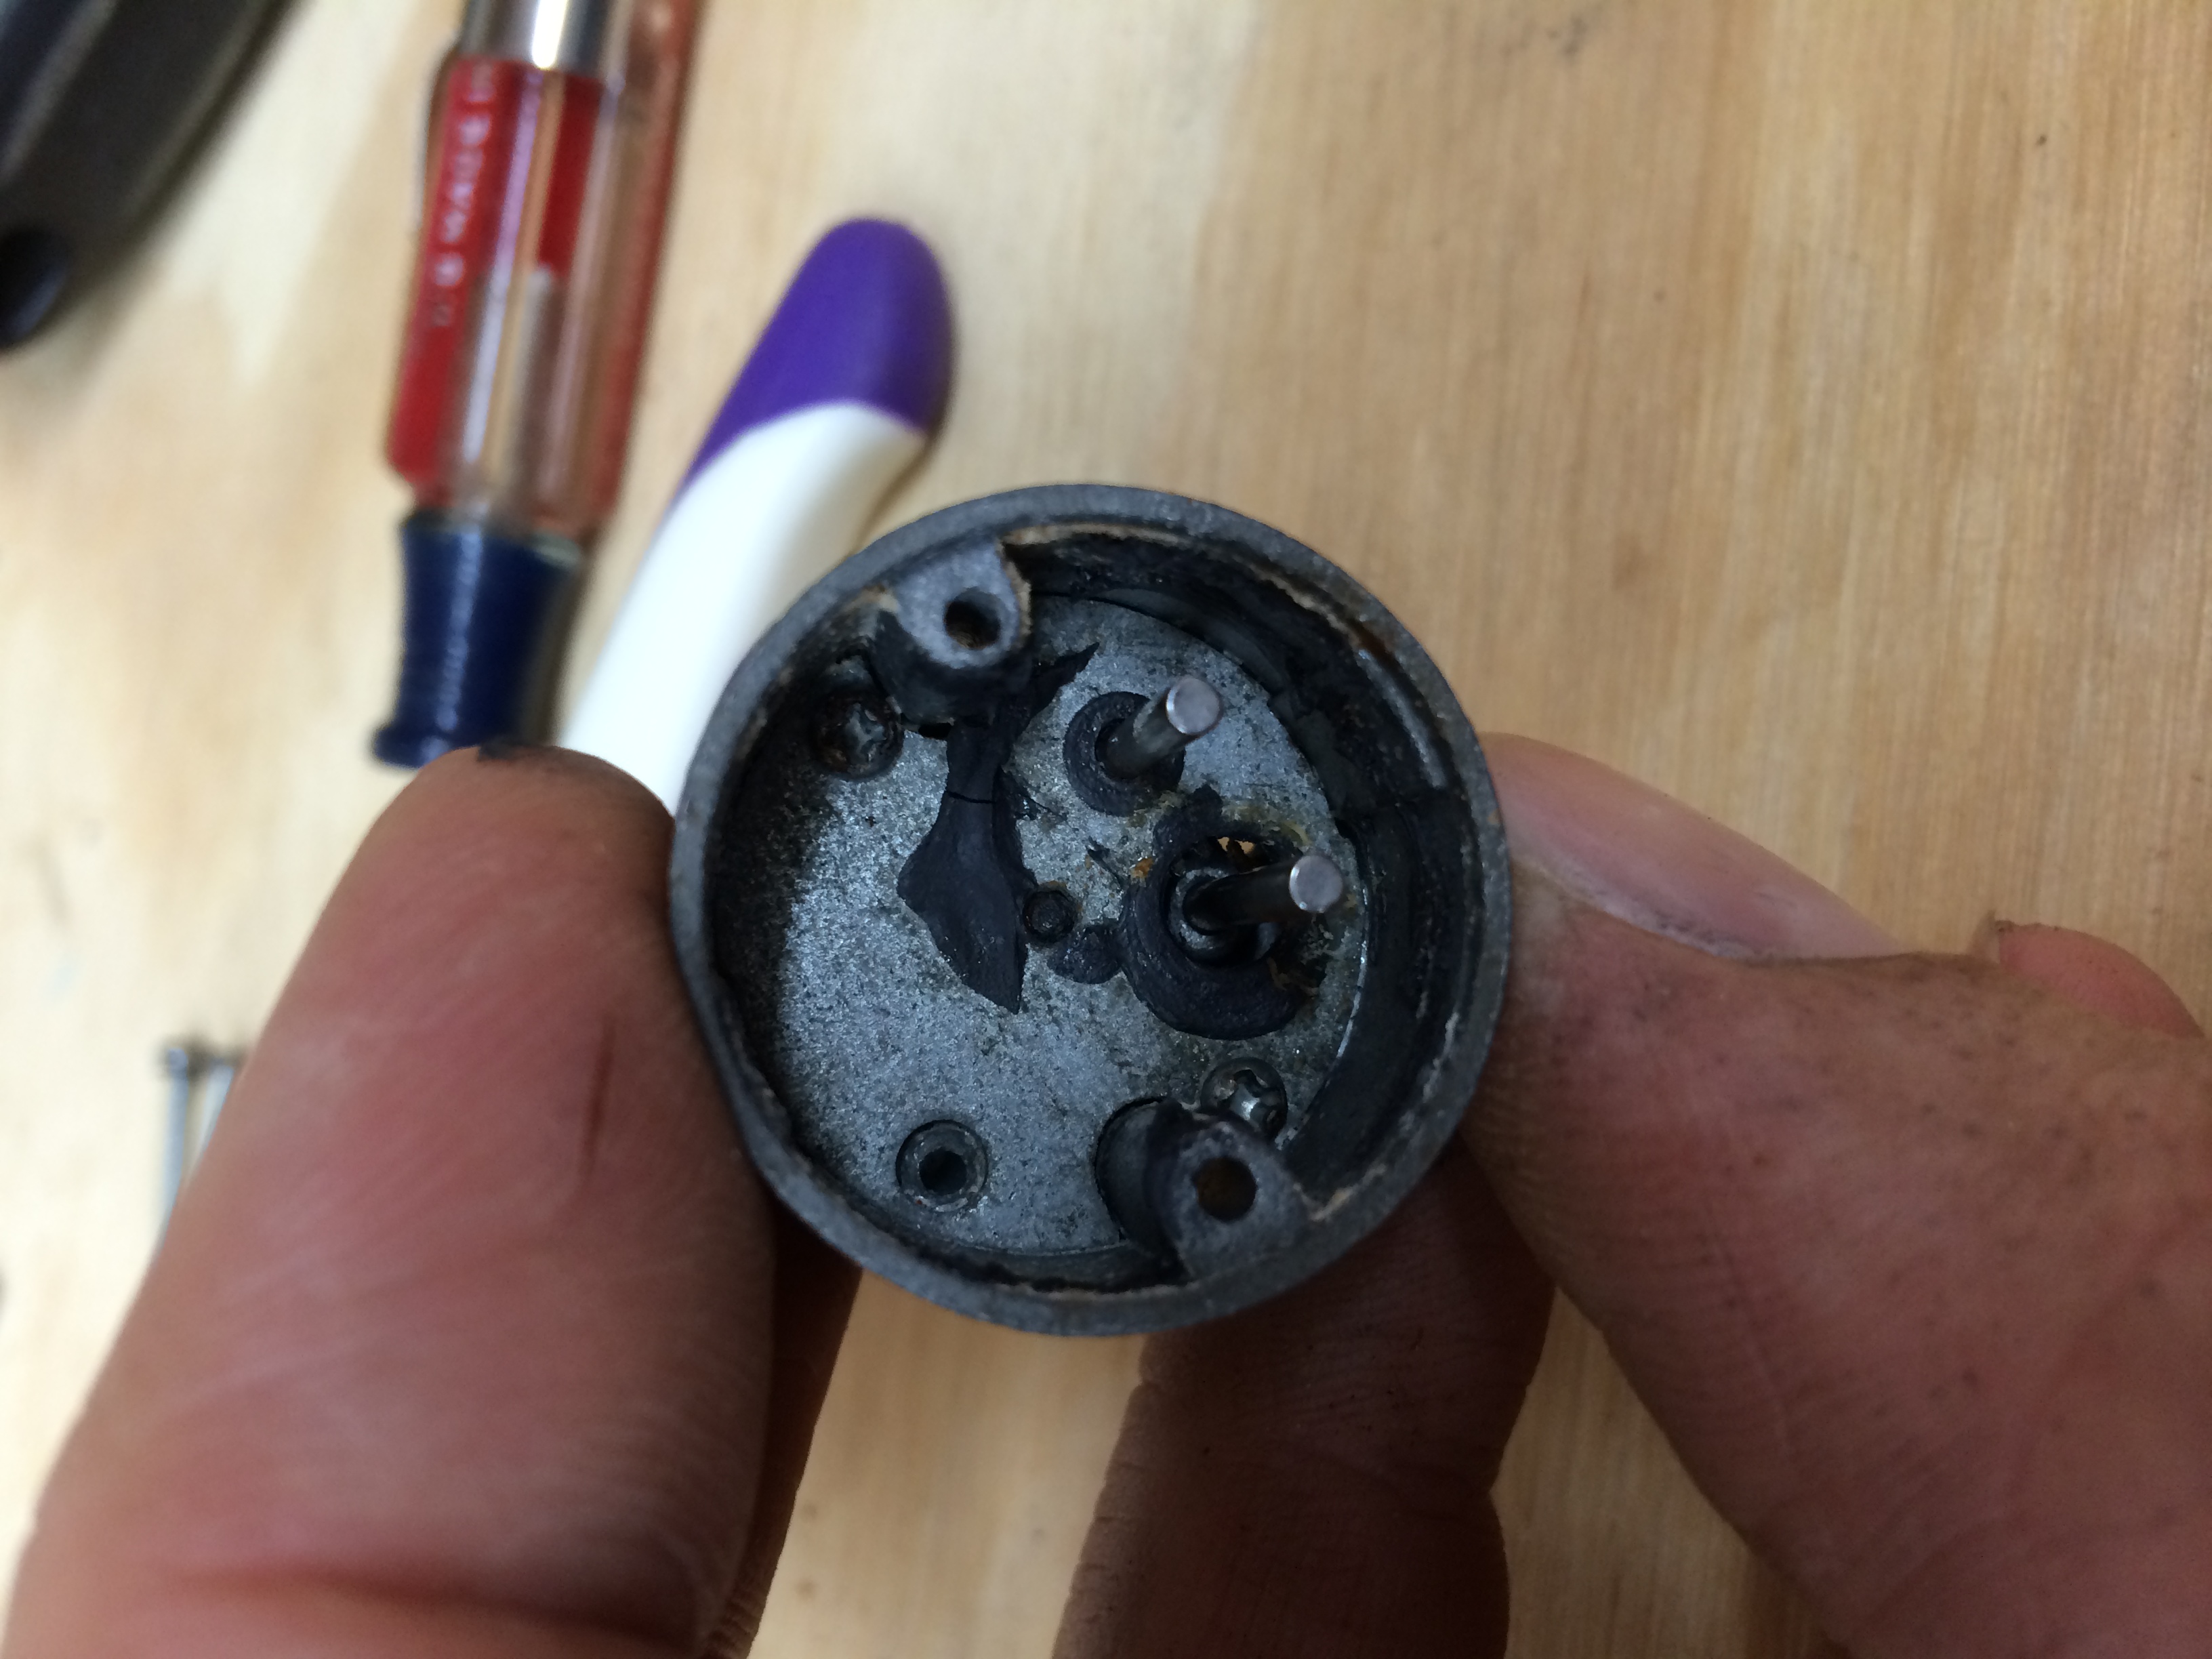
The circuit board is potted with some sort of clear varnish, so I had hopes that maybe the circuitry was OK. I removed the motor from the board and took apart the gearbox, cleaning each gear and packing with fresh grease. I cleaned and lubricated the motor, which seemed fine.

With 6 volts applied to the motor leads directly, it worked great. But when I reconnected the motor to the circuit board, I couldn’t get it to work. There was probably some water damage to the circuitry after all, which is certainly not a surprise considering the exposure. I wrote to the manufacturer in Germany to see if they could suggest any further troubleshooting or if they could supply any parts, and they offered to send a new circuit board and motor for $65 with shipping. This was an appealing option, since the new system all together would have cost closer to $200, and I really only needed the board itself. Since I was starting fresh with the new chicken house, I decided to make a few changes to the door opening arrangement, and I’ve made another entry to describe those changes here.
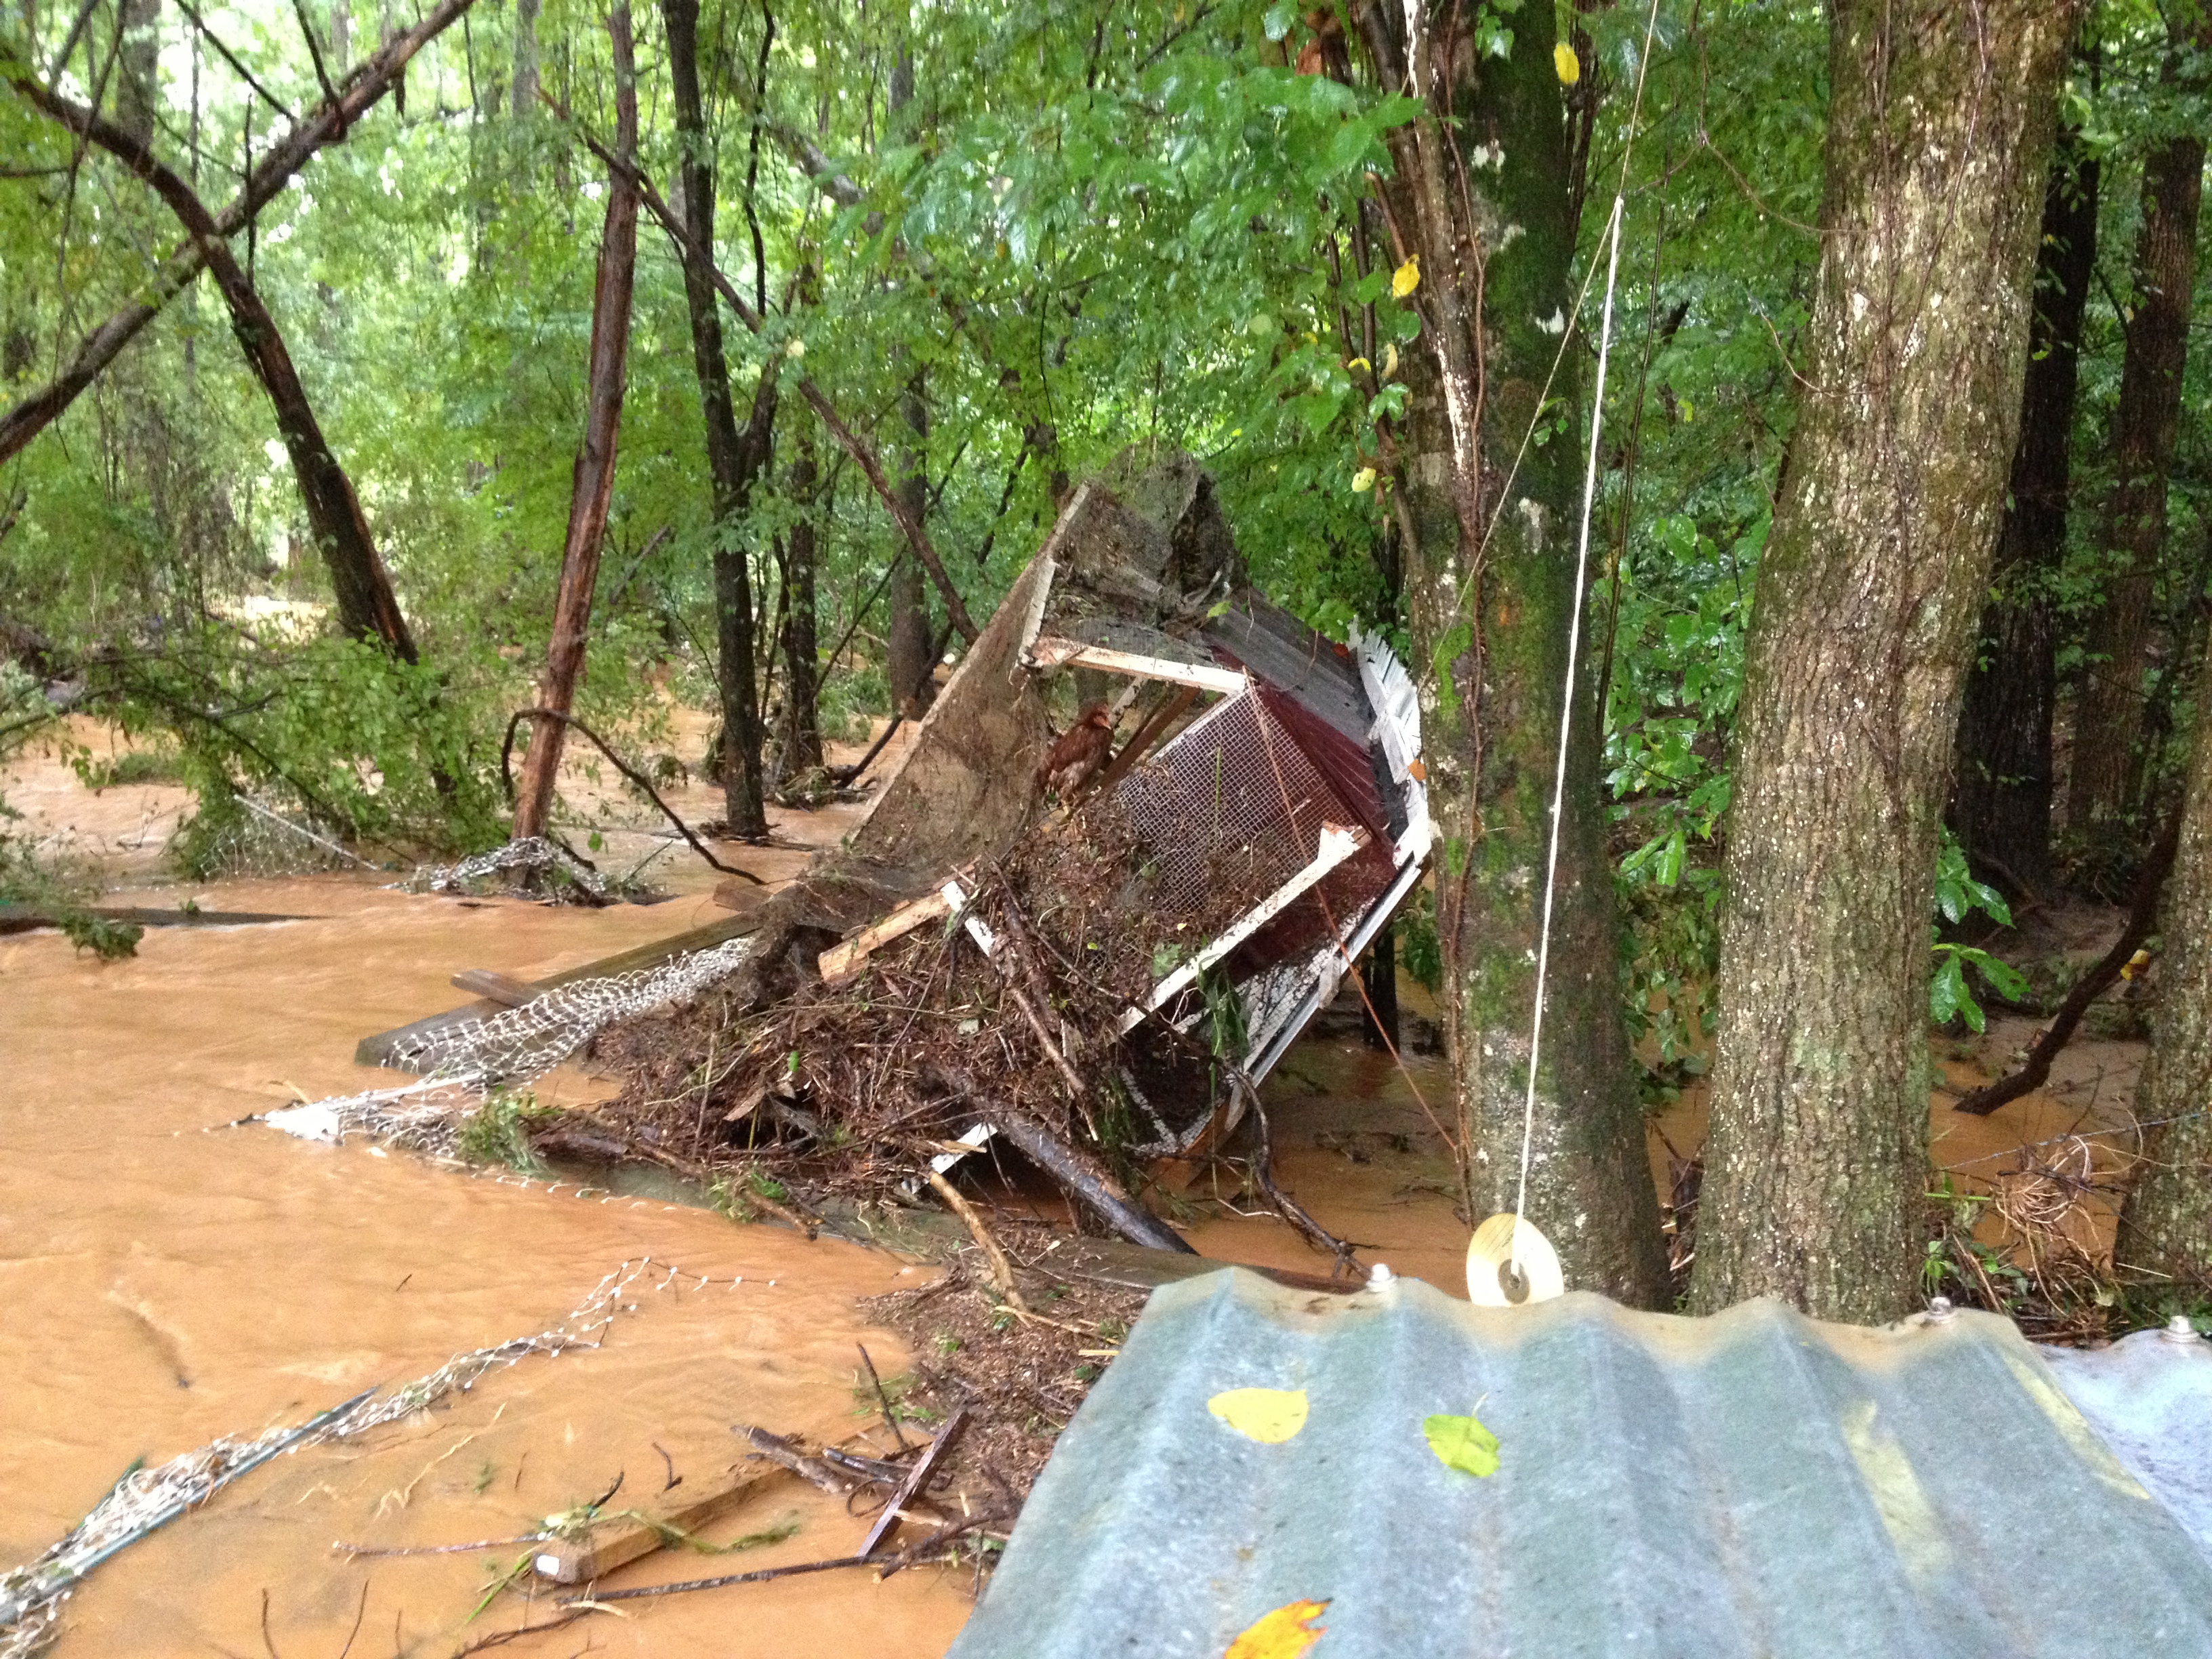
In the summer of 2013, things were going fairly well for our chicken operation. We had around 20 hens laying, one rooster, and even a couple of silkies just for fun. We had two 6×8 foot houses connected by a hardware-cloth tunnel, and an automatic door to their fenced yard. We used three lengths of Premier One netting, which made for a pretty large yard. The area where we kept the chickens was known to flood from time to time. Here’s a picture of a flood like the ones that we saw once or twice per year.
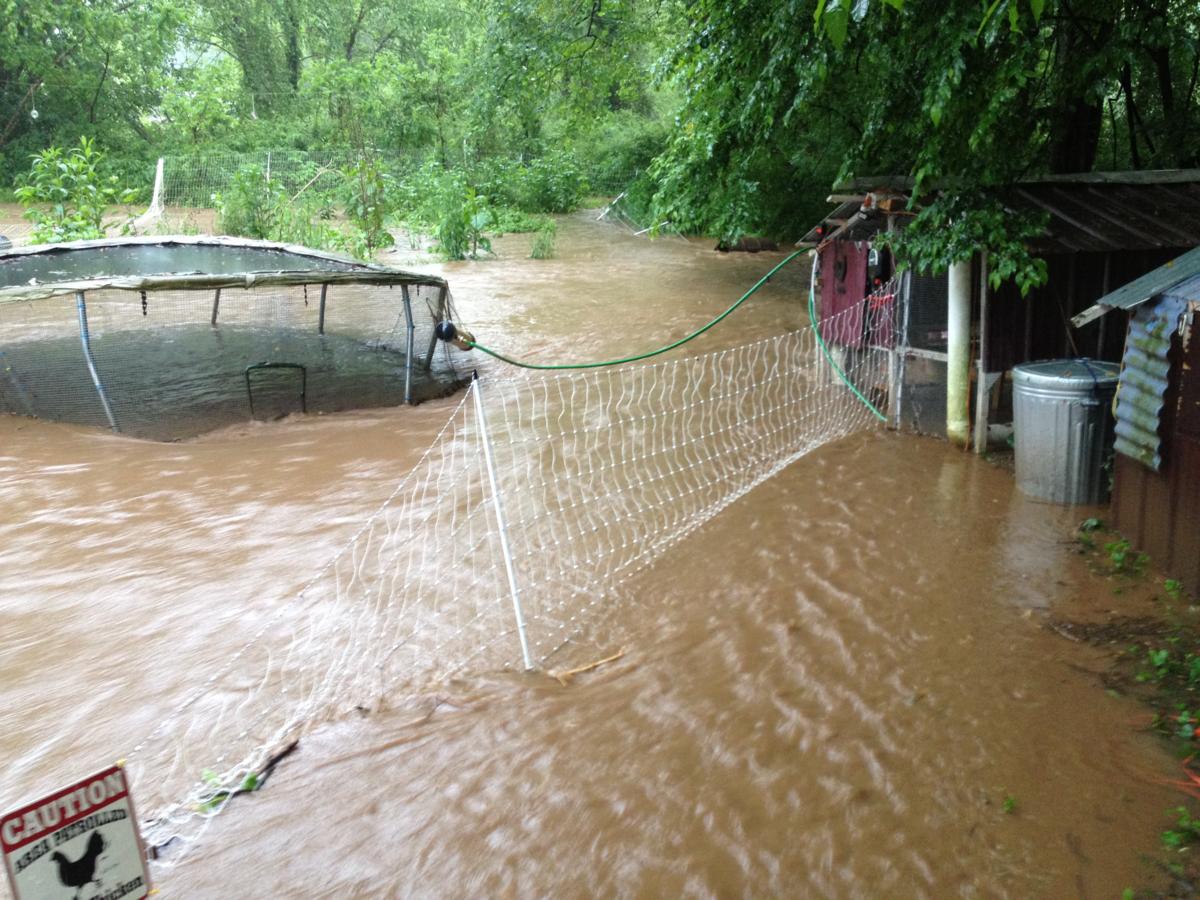
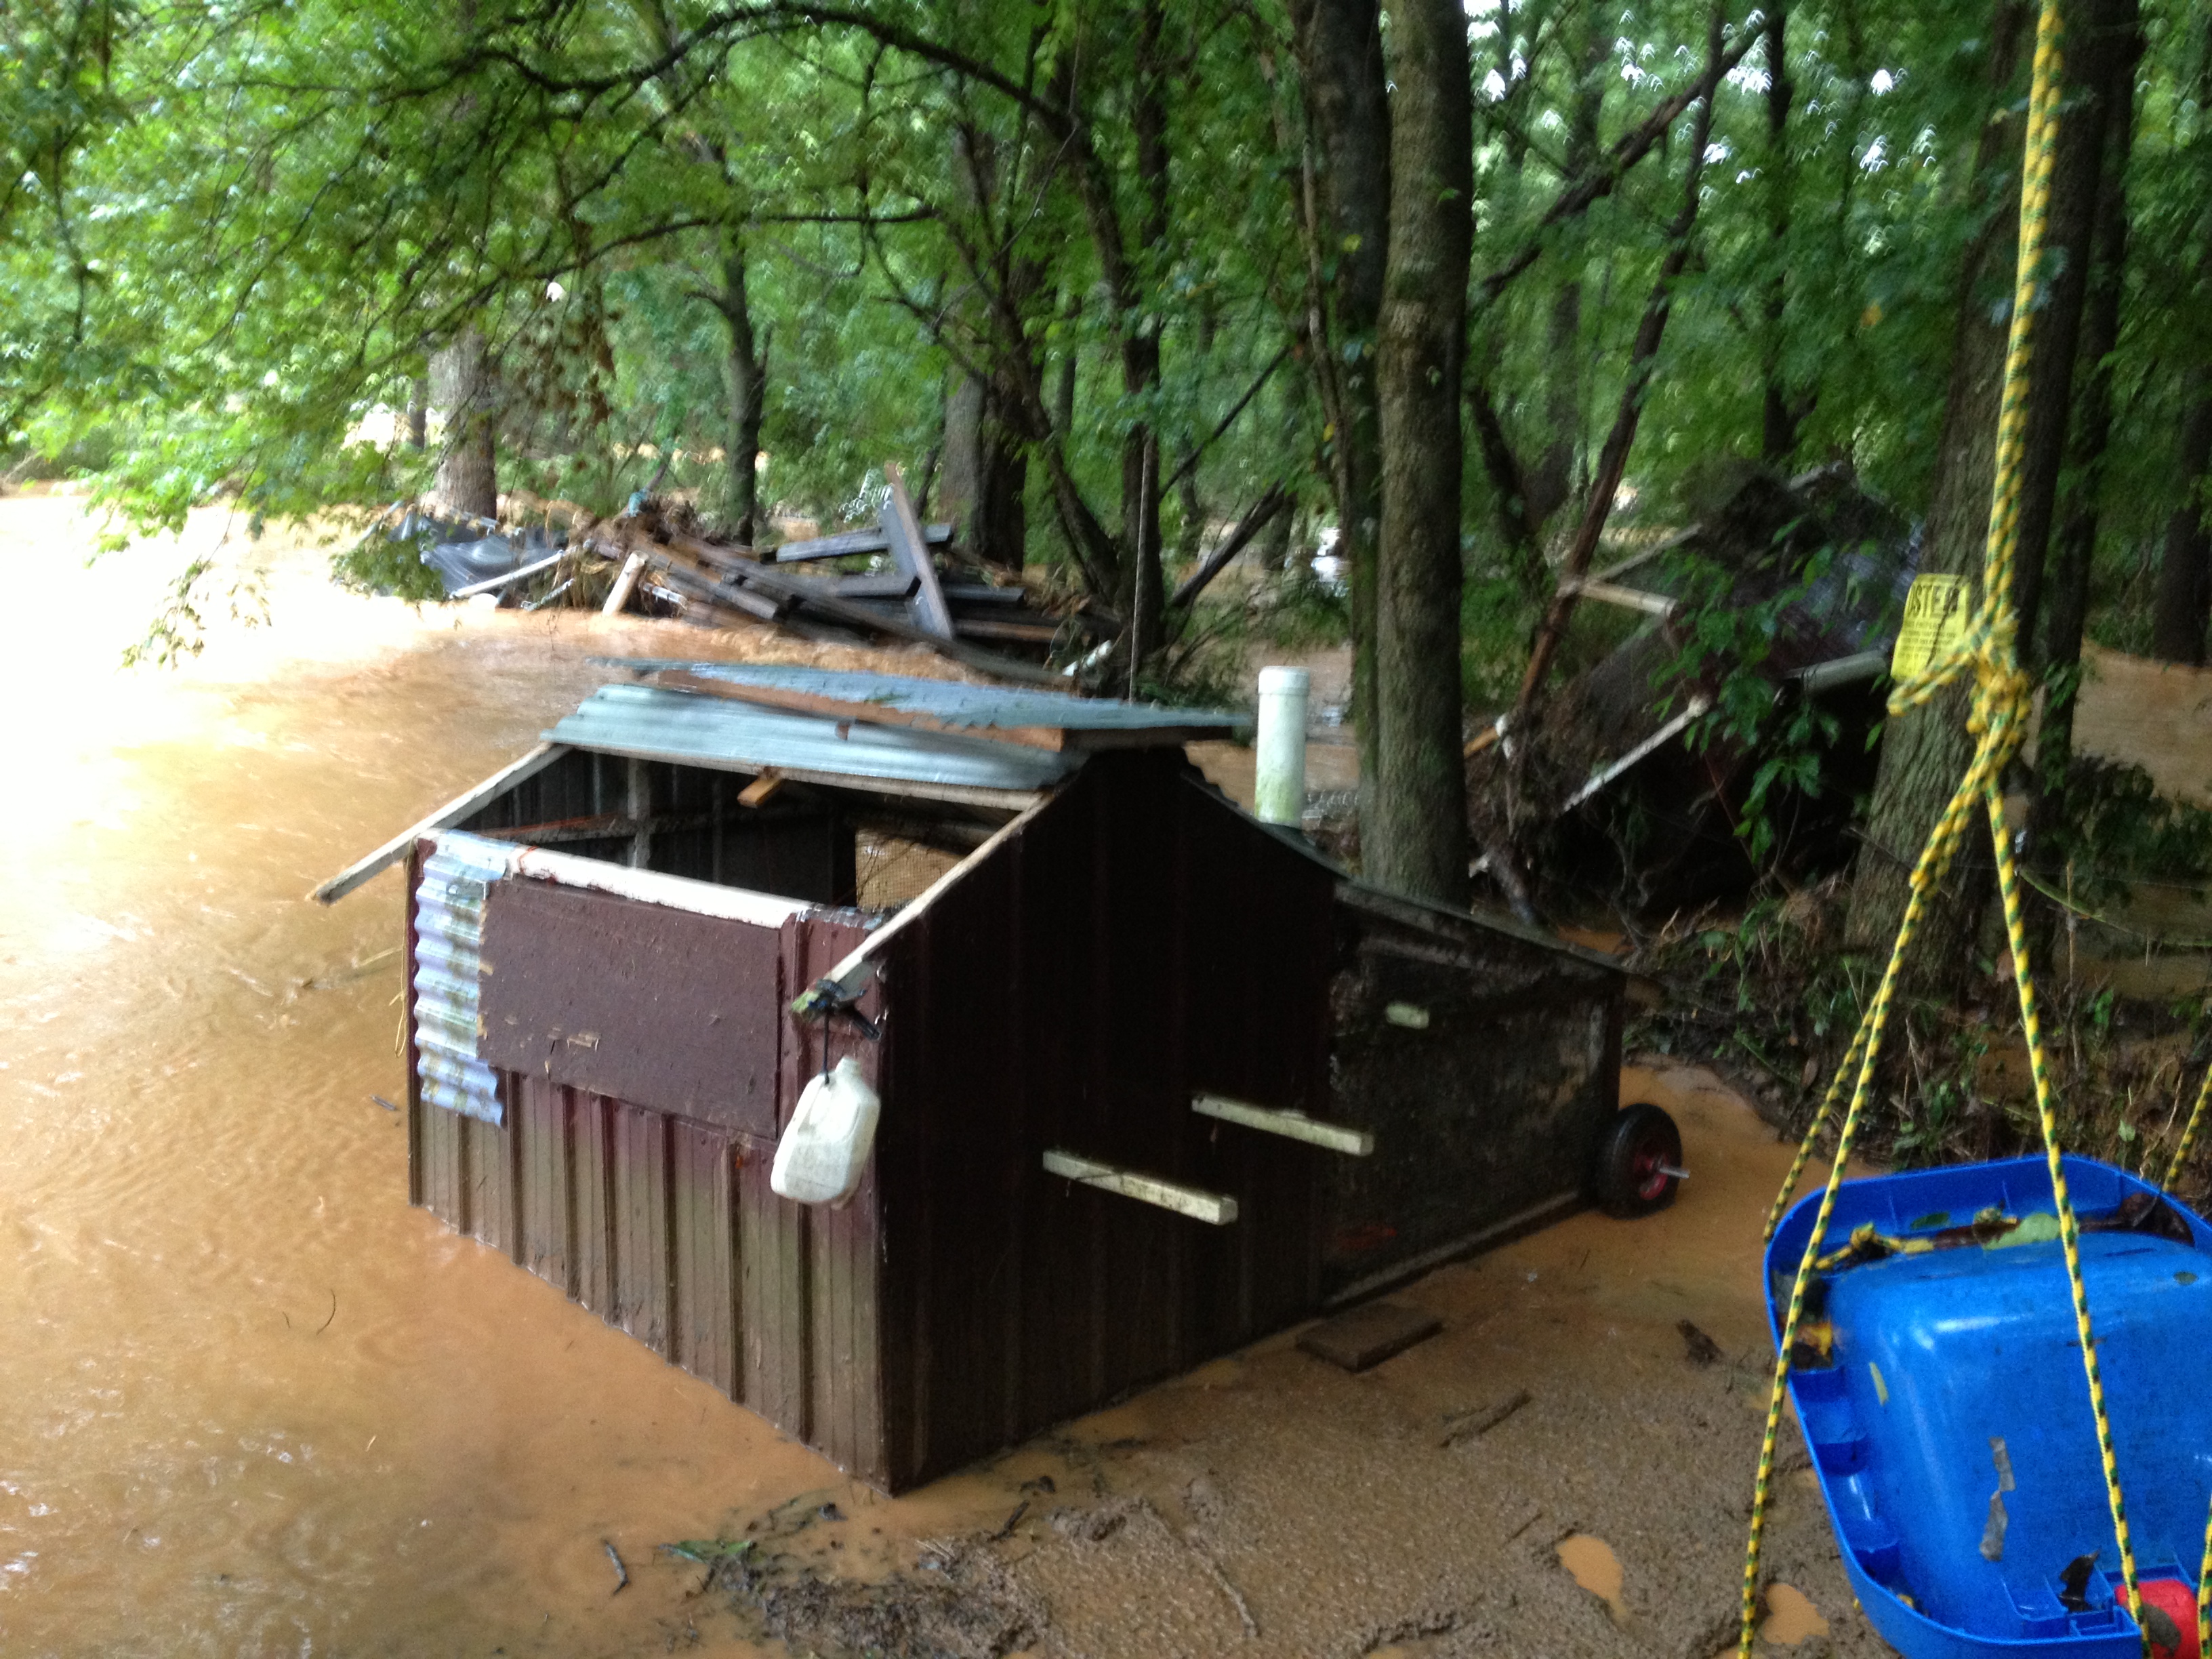
These floods were just an inconvenience, requiring us to change out the bedding and rearrange the trampolines. Skip ahead to late July 2013, when I woke up just after daybreak one rainy morning, with plans to hop in the already-packed car and leave town for a week. I looked out the window to see that the creek in our driveway was already about 12 feet over its usual height, with water up to the road level of our driveway bridge. This was much higher than we had ever seen before, but not as high as it had ever been, according to the old timers. It was clear that my travel plans were going to be delayed. I put on rain gear and went down to check on the chickens. All of their yard was under water, and one of their houses was mostly submerged too. The rain was still coming down very hard, and the water was rising. By around 9:00am the water level was higher than anyone had ever seen it before. Our driveway bridge washed away, with most of the wood decking floating in one piece through the yard like a big raft, collecting much of the chicken fence with it. Here is a picture of the yard from after the water level had dropped several feet.

The house that sat higher on the hill had water up to nearly the top.
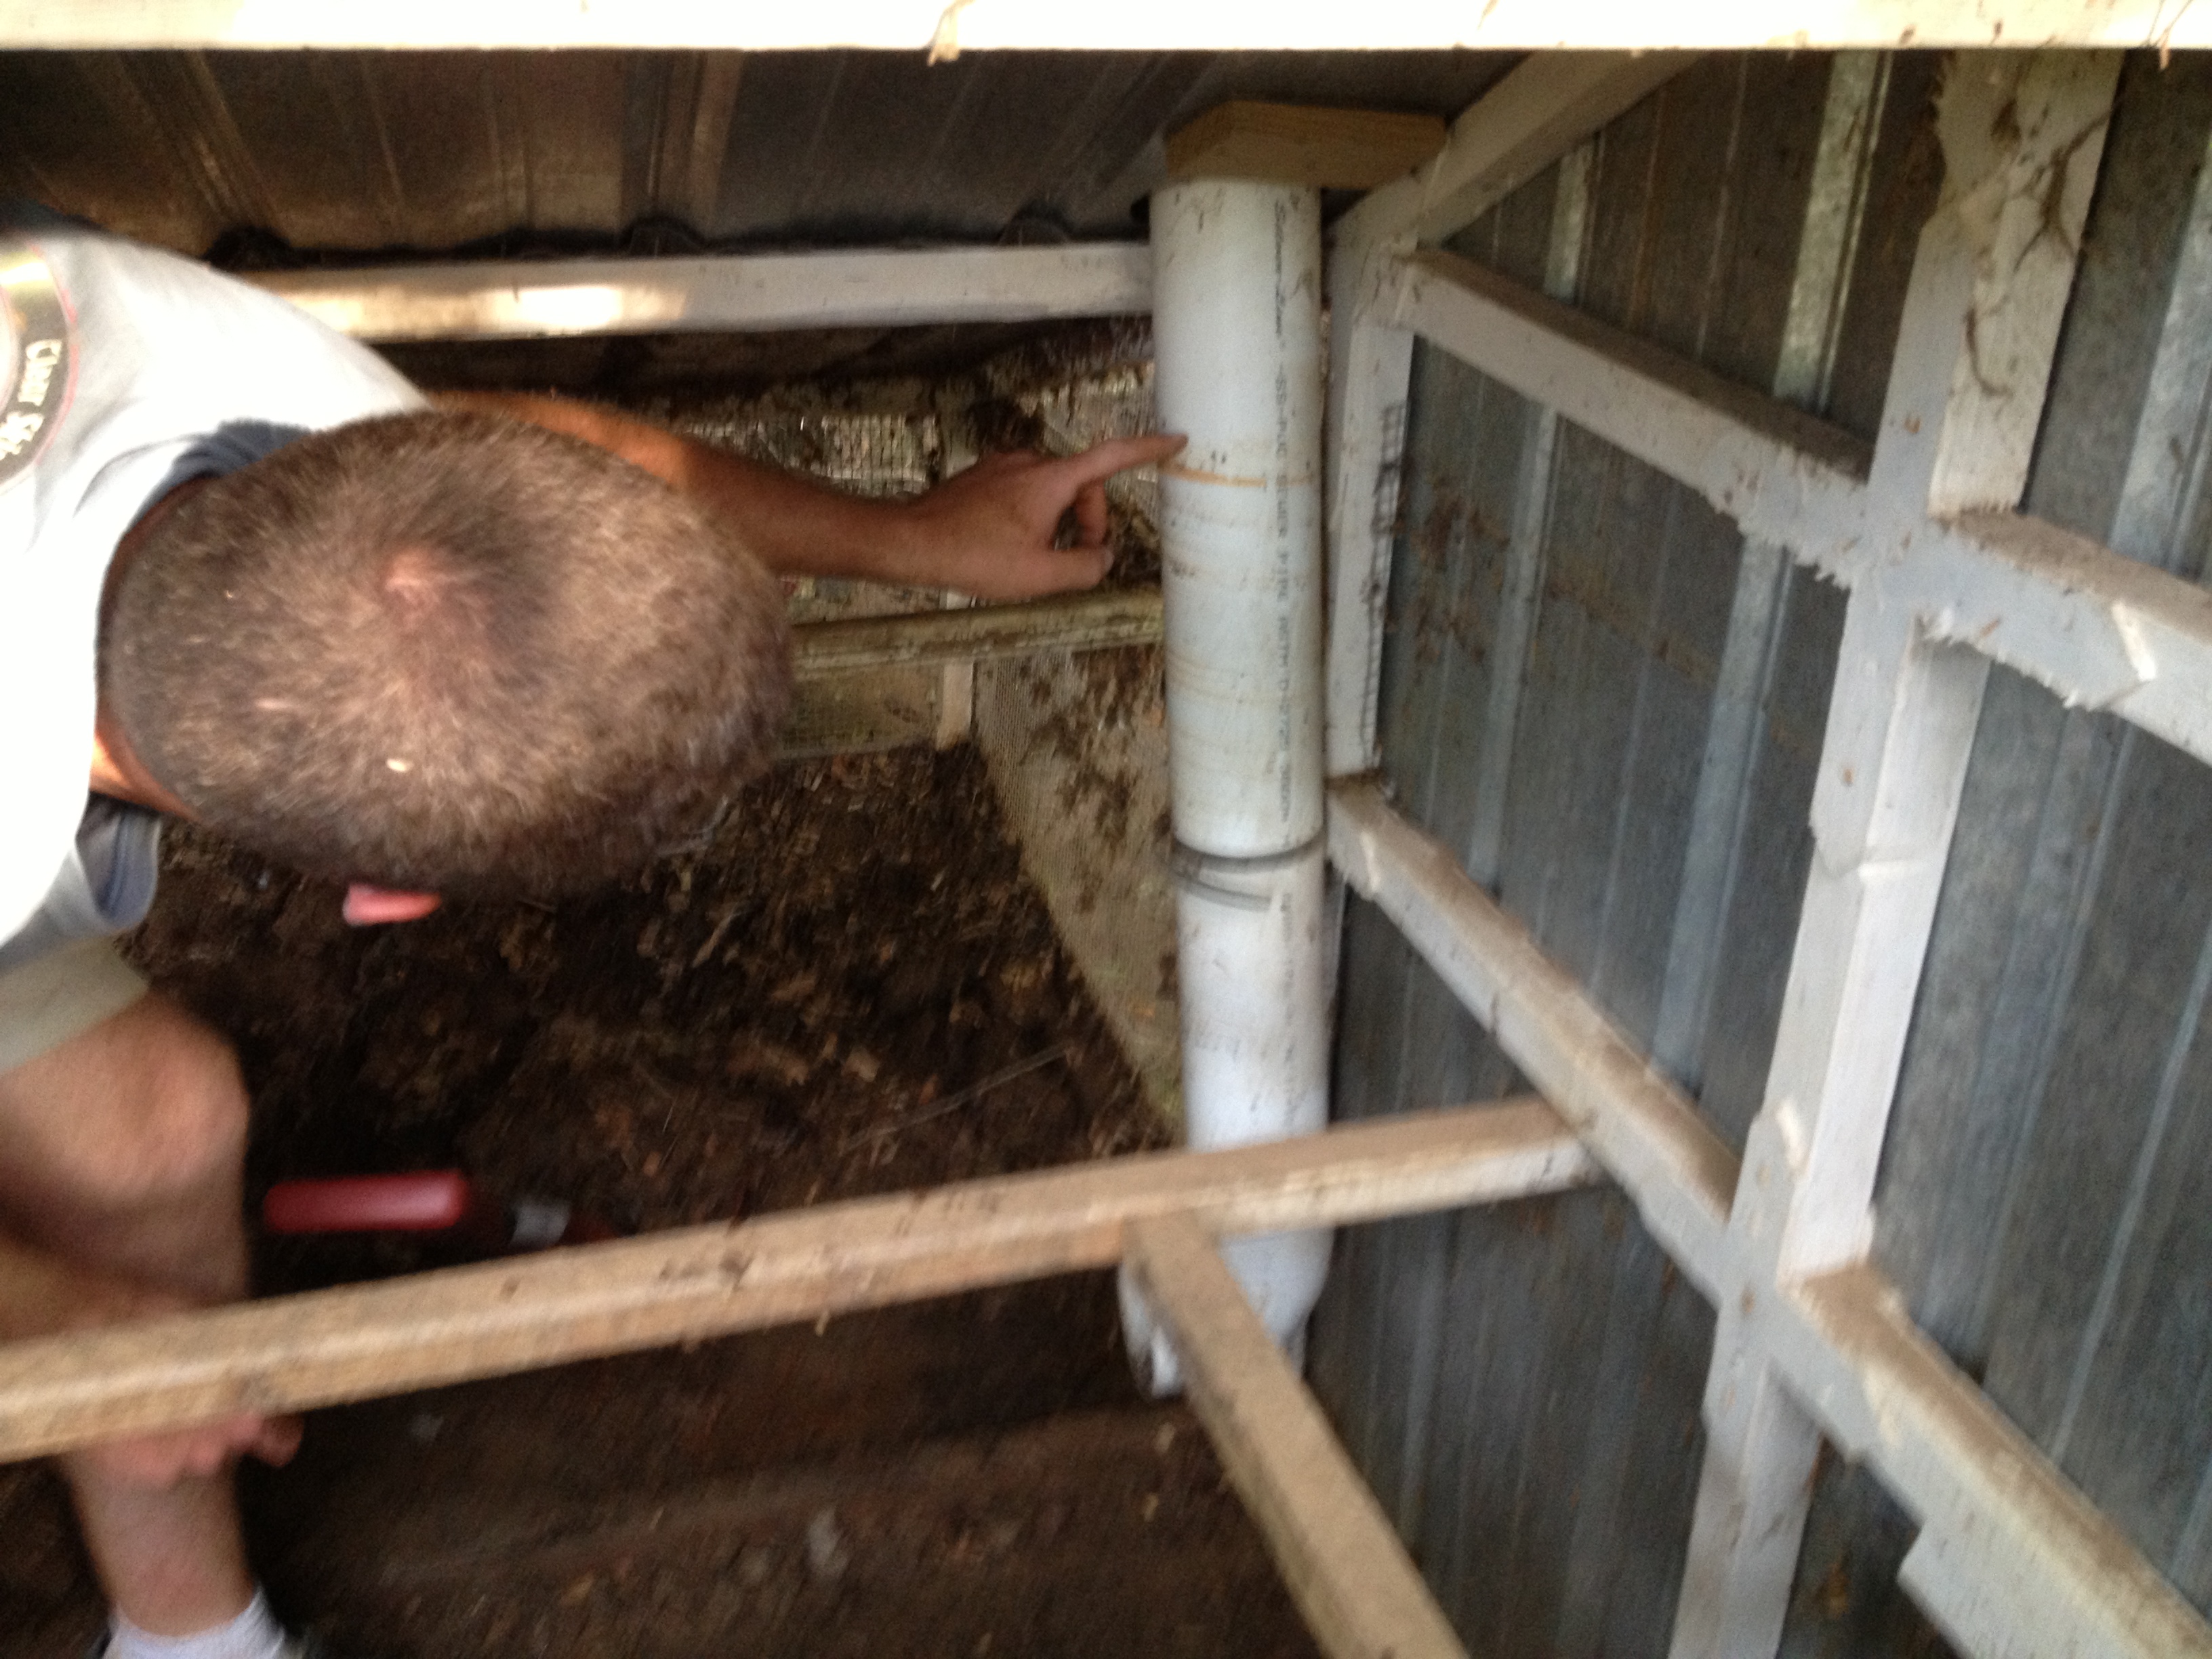
This was after the water had receded considerably.

This brave girl must have been floating in the top of the house.
This is how high the water had been.


Here is the view a week later when we came back to town.
 In the earliest days of our chicken hobby, we thought we would have the girls in a chicken tractor. This idea was quickly squashed when we realized that our tractor was perhaps large enough for three birds, and we had 26. Even with just three, we would have needed to move the tractor almost daily, and it was just too heavy for that, even though we had worked hard to try and make it light-weight. The next iteration in that plan was to make a larger enclosed pen with an open bottom, that we could move less frequently. One of us had the idea to try using a trampoline. It’s round, so it provides a maximum surface area for the amount of material used, and it’s a sturdy, ready-made frame with a cover that provides some shade, but also allows some sun in. We picked up a 100-foot roll of 1/2″ hardware cloth from the local hardware store, and found two trampolines on Craigslist. One was a nice 14-foot version that we paid a little for, and one was a cheap 12-foot version that we got for free, since it had been balled up in a windstorm. The trampoline pen worked well. It was easiest to move them with two people, but it was possible to move them with one person too. Two wheelbarrow tires on one side would have made it easier to move. As we became less interested in the chicken tractor idea, we would just scoot trampolines around to provide cover for the girls while they grazed in the pasture. We never did get around to enclosing the larger trampoline, though even without the hardware cloth it still provided some good protection from aerial predators. And best of all, if we felt like we had too much energy, we could go bounce on the trampolines too! Although we would make sure there weren’t any birds underneath of course.
For years we’ve had good results with these simple and inexpensive home-made chicken feeders. The pipe is 4″ PVC drain pipe, which is much thinner and cheaper than heavier schedule 40 PVC. We get two 10-foot lengths of the sewer pipe from the local home store and use it to make two feeders with a little left over. After removing the end bell we cut one pipe in half to create the vertical portions. These end up being just a little bit less than 5′, which is a good ergonomic height. If you’ll be making a feeder to be serviced by smaller people, then you can cut the pipes shorter and make even more feeders from the same amount of pipe- you’ll just have to fill them more often. The pipe is easy to cut with a hand saw, which is good to know if you need to go shopping for it without a truck. Just cut the long pipes in half in the parking lot!
Next we cut off about a foot of another pipe for the horizontal section. Don’t make this one much longer than a foot, since it will just complicate feed delivery. Add on two caps like this per feeder, plus two elbows like these.
Then, use something to cut a big access hole in the side of the 1′ piece:
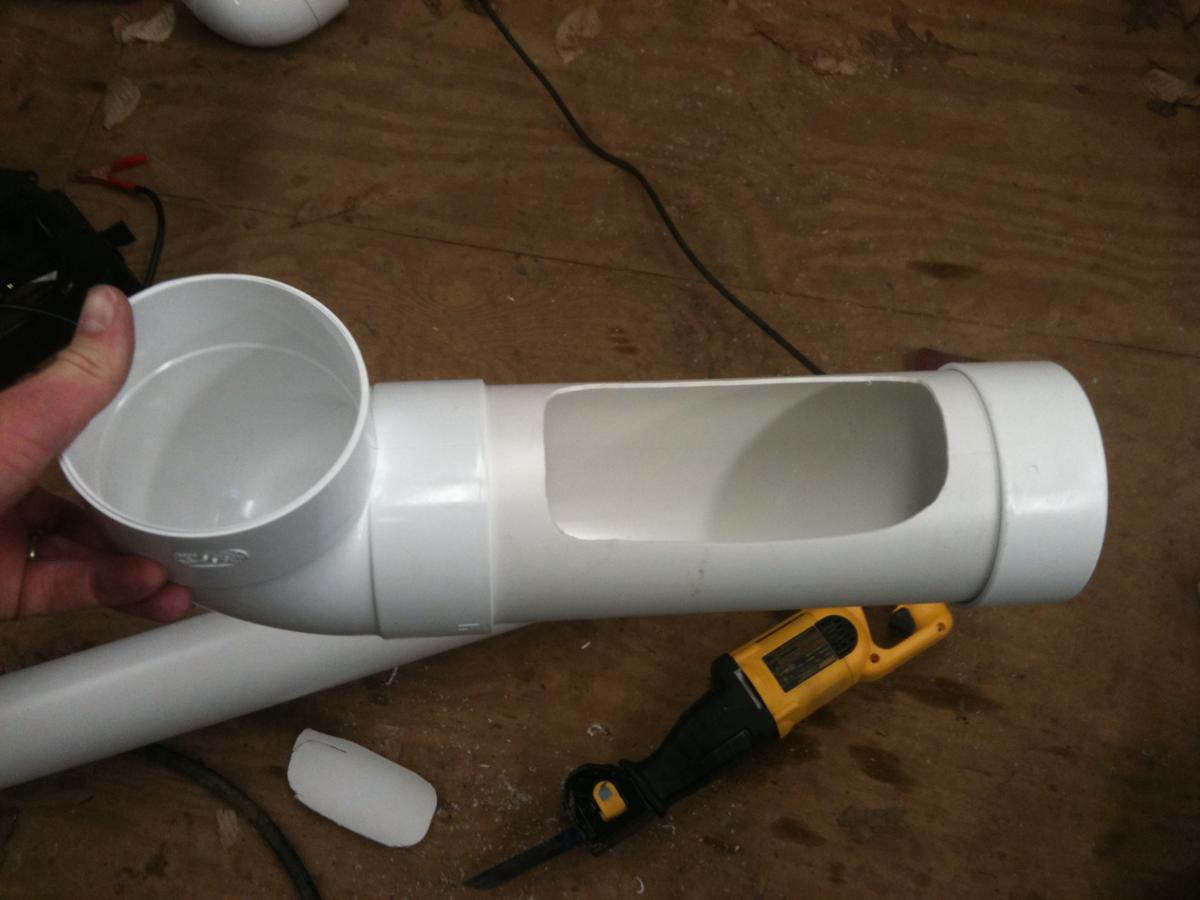
Here’s one way to do it
Here are a few things that we’ve learned from experience. First, don’t glue the fittings together. There will be plenty of friction to hold them, and you’ll probably want to get them apart to clean them periodically. Add a little bit of tape around the seam at the bottom of the long pipe to keep water out. The tape isn’t necessary at the junction where the short pipe goes into the elbow, just where the long pipe goes in. Don’t forget to put the top cap back on after you service the feeder! Especially if the pipe is outside of the house. If you forget and it rains, you’ll have a pipe full of nasty stuff in no time, and a good chance to try out the cleaning procedure. We find that it works best to have the top of the long pipe accessible outside of the chicken house, so that we can add feed more easily.
This type of L or J feeder works well with pellets and crumbles, and we’ve not had any trouble with the chickens cleaning it out completely when they get to the bottom. You can make several and put them to use today! Here is your shopping list for two feeders, and you’ll end up with enough scrap to have a good start on your next two:

Here’s a visual list for your shopping trip. Just add another long piece of pipe if you are going to make two feeders!